Beginner's Guide
Contents
- 1 I've never played Ragnarok Online before, help me with the basics!
- 2 I know the basics, so what's custom in Project Alfheim?
- 3 Beginner Walkthrough
I've never played Ragnarok Online before, help me with the basics!
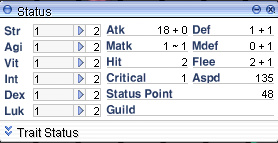
Let's talk in a surface level about each one of the six main stats:
Ragnarok Online has 6 stat mechanics (STR, AGI, VIT, INT, DEX & LUK) and a linear static class system that grants skill points (choosing a first class then branch out from there). Hence, the game divides both stats and skills by Base Level and Job Level. Raising a base level gives stat points to allocate. Raising a job level gives 1 skill point, some skills have prerequisite of other skills.
- STR: For melee (close range) physical classes' damage output (Conversely, long range classes uses Bows, Instruments, Whips and Guns) and +30 maximum weight limit per point.
- AGI: Each point gives +1 FLEE and increases ASPD (Attack Speed). FLEE can negate any physical (non-magical) attack, but capped at 95% chance. Auto-attack (AA) and most skills have animation delay reducible by ASPD yielding better Damage per Second (DPS) output. Note: skills have other types of delay, non-reducible by ASPD.
- VIT: Each point gives 1% Maximum HP; -1% chance of being inflicted by Bleeding, Poison, Silence, Stun status effects, and reduce the duration of the Curse; and +2% effectiveness of HP-healing consumables. Having VIT increases survivability, giving more time for healing instead of dying. High AGI classes may disregard VIT because they can evade attacks, while full support classes and tanks benefits from VIT to resist attacks.
- INT: Each point raises minimum and maximum MATK therefore better damage output for magical builds (any classes); ~1 soft MDEF; 1% of Maximum SP and SP item regeneration. Every 6 points gives +1 SP natural regeneration. Blind and Chaos (status effects) chances of being inflicted are reduced by 2% to 3% (Blind duration also gets reduced), Sleep chance is reduced by 1% per point. Lastly, INT increases success chance of Alchemist's brewing potions.
- DEX: For long range classes' damage output; +1 HIT per point (necessary to connect physical attacks to monsters); gives minimum boost damage to every weapon (melee & ranged); increases ASPD, but minor compared to AGI; and reduces skills' casting time (150 total DEX for instant cast).
- LUK: For critical builds, +0.3% of CRIT chance & 0.1% perfect dodge per point; gives 1% CRIT shield (less chance for enemies to crit attack your character) and 1 ATK every 5 points; decreases (slightly) chance of being inflicted by Blind, Curse, Frozen, Poison, Silence, Sleep, Stone Curse & Stun status effects.
Extra Notes:
- Round up your physical stat (STR for close range and DEX for long range) in multiples of 10 to receive further ATK boost (Example: 130 total STR Assassin / 150 Total DEX Hunter). For magical builds, minimum MATK is boosted every 7 points and maximum is every 5 points (35, 70, 105 or 140 total INT fulfills both minimum and maximum bonuses).
- 100 total VIT and INT gives immunity to status effects mentioned on the prior list. (100 VIT reduces Curse duration into 0 seconds instead of reducing Curse chance).
Wait a minute, there are sub-stats too!
The sub-stats are displayed on the right side of the stat UI, they are modified by your base + bonus stats, equipment, buffs and debuffs, let’s proceed:
- ATK: Indicator for physical (short or long range) classes. The number in the left side is based on STR/DEX, Weapon, Gears, Cards and Random Options. The number in the right side of the + (plus) is the weapon refinement bonus.
- MATK: These two numbers are your actual MATK value in this order: “Min-MATK ~ Max-MATK”, from INT and % MATK gears.
- HIT: determines your probability of successfully striking an attack on the opponent, empowered by DEX, Base Level, Equipment that grants HIT, and some skills like Bash. In the Person VS Monsters (acronym: PvM) and Most Valuable Player (MvP) environments, an equal or higher number needed to be achieved for 100% HIT is displayed by @mi (@mobinfo) in-game command or RateMyServer or Divine-Pride web database. In Player vs Player (PvP) case, chance of successful physical attack is (20 + Attacker's HIT - Enemy's FLEE)% * (100% + Attacker's Skill Modifier).
- DEF/MDEF works in similar way, divided into Hard and Soft. Hard (M)DEF is the number to the left of the “+” sign; sourced from Equipment, Cards or Monk's Steel Body skill; and it reduces damage taken by percentage value (Example: Def 31 + 5 means 31% physical damage reduction). Soft (M)DEF is located to the right side of the “+” sign; sourced from VIT for DEF and INT for MDEF; lessen damage taken by subtracting number presented in the Status Window. (Example: Def 31 + 5 means 5 less damage after the 31% reduction).
- CRIT (Acronym for Critical) is mainly used in auto-attack builds to maximize damage because it bypasses FLEE and DEF. Only handful of skills are able to crit (Sharp Shooting, Tracking & Shadow Slash) while most cannot. Chance is increased by 0.3%*LUK, Equipment, Cards and Skills. Enemy's LUK also contributes CRIT shield (less critical chance).
- FLEE and Perfect Dodge determines your capability of evading enemy physical attack.
- The left number of the “+” sign represents FLEE; is empowered by AGI, Base Level, Skills & Equipment; capped at 95% chance. Multiple enemies hitting simultaneously reduce flee chance by percentage each. Flee evades auto-attacks and physical skills.
- The right number of the “+” sign represents Perfect Dodge (PD); is empowered by 0.1 * LUK, Equipment. Perfect Dodge doesn’t suffer penalty from multiple enemies, and 100 PD is reachable. PD only evade auto-attacks, not skills.
- ASPD (Acronym for Attack Speed) represents the speed of your auto-attacks and skills (not all) delay. ASPD is based on equipped weapon types on certain classes, AGI, DEX and more modifiers (details on ASPD page). ASPD is capped at 190 (Night Watch's Gatling Berserk Skill increases the cap to 193).
- Status Points (not sub-stat but shown on status window) are gained by leveling up a base level, for allocating main stats. Granted amount rises depending on current base level (first levels are 3 and the last ones are 22) and also the cost for main stat (initial costs are 2 stat points and in the range of 92 is 11).
- HP: Health Points / life bar, character dies when it reaches 0, character may re-spawn on last save spot or be resurrected by another character or Token of Siegfried. Each class has its own Max HP modifier, mages HP are weaker than tank classes.
- SP: Spell Points, used for Skills. Each class has also its own Max SP modifier. Having 0 SP restricts using Skills (except no sp cost Skills) until SP is replenished but still allows auto-attack.
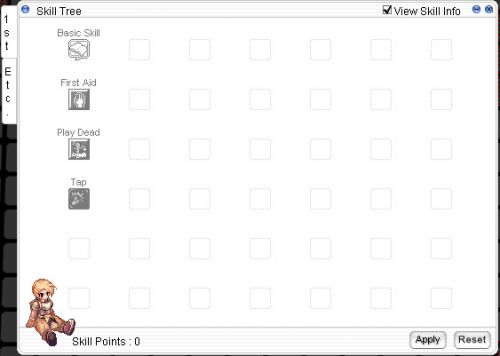
Let's talk in a surface level about skills and skill trees
Skills are a core part of the game that unique roles for classes; can be built in different ways and makes them somewhat flexible; are categorized into Passive, Active and Offensive. Starting as Novice / High Novice, the only available skill is "Basic Skill" unlocking basic features until Level 9 before changing class. There are 6 first classes and 4 expanded classes to choose, explained later.
Raising a Job Level gives 1 skill point to allocate. Some skills have prerequisites (Example: "Two hand Quicken" need Level 1 "Sword Mastery" and "2H Mastery"). As private server has custom updates, its wiki has more accurate prerequisites than other web database. Passive skills are always active, each point strengthens their effects. Active skills are casted by character; have its own duration and not necessarily doing damage. Offensive skills are Active Skills that do damage to enemies.
Active and Offensive skills are used by double-clicking the skill icon. The client cursor transform into a circle showing a number in the bottom right part representing Skill level in use (modifiable by the mouse wheel). Left-click again activates the skill on target, while right click cancel skill activation and no action taken. To emphasize, Alfheim has custom skill changes and classess also being reworked, mostly documented into our Wikipedia, hence refer information to wiki first before external sources.
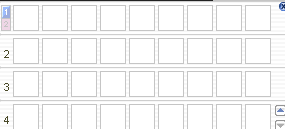
Skill Bars
Skill bars are shortcuts to use Consumables, Skills and/or change Equipment. The default setting for the skill bar is F1 to F9 keys for the first row (labeled as "1"). There are 4 levels fully customizable, can be assigned to any keys (even gaming mouse buttons!). To assign a skill/equipment/consumable in the bar, hold left click a skill/equipment/consumable and then drop it inside any desired squares, then press the assigned key and viola. Note that the skill keys are locally stored in your PC, the config file can be copied to save backup; and restored by overwriting the current file after installing new game client.
Levels: Base & Job
Ragnarök Online has two level metrics: Base and Job. Both are independent from each other. Monsters have different experience values on both, that character may choose different ways of leveling by killing different monsters.
- Base level up gives Status points, recovers 100% HP & SP; also gives buffs only for Taekwon Kid and Super Novice. The max level of base in our server is 99.
- Job level up gives Skill points and also grants bonus stat at milestones depending on class. The maximum level of each stage of class is:
- First / High First / Second Class: 50.
- Transcendent / Ninja / Gunslinger Class: 70. (Night Watch: 85)
- Super Novice: 99.
classes are split generally in normal and expanded but there are also the transcendent classes, upgraded forms of both, having more status points, Max HP and SP and skills to unlock more builds. To transcend, normal 2nd / Expanded class with max level in both Base and Job is required, and also short quest. The class system is mostly “Static” once choosing a first or expanded class (Taekwon, Gunslinger, Ninja and Super Novice). Doing a normal class (Swordman, Mage, Thief, Acolyte, Archer, Merchant), job level 40 enables quest to change into second classes.
Inventory and Equipment UI
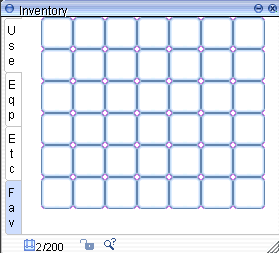
The inventory has 3 categories (Use, Equipment, Etc). Fourth one, “Favorites” are customizable, item taken from the first 3.
- Use: for item labeled as Consumables, for the simple reason that it can be usable on your character or another one (if the item does so).
- Eqp/Equipment: for Equipment category Item, you can double left click to equip or change gear.
- Etc: for item other than Equipment & Consumables that are not interactive directly.
- Fav/Favorite: Here you can transfer items from 3 categories to lock them up / differentiate it from the rest of the inventory. To transfer, hold left click an item, then hover it into the Fav tab and release. The item will disappear from their normal tab into Fav tab.
Note:
- The maximum capacity of a normal inventory is 100 unique items, can be expanded to 200 (The inventory will always show the max).
- The maximum capacity for stackables is 30,000 of each (also applicable on storages).
- Reaching weight limit prevent to loot more Item.
- Activating the lock button prevents dropping loot on the ground.
Right clicking any item in the inventory displays the description menu that gives you detailed information about the item. Right clicking an Equipment piece shows a comparison between what Equipped Item and Equipment in the inventory. Equipment have Class and Base Level restrictions shown in the description, hence precaution needed before obtaining the Equipment (Example: brand new Acolyte is unable to equip dagger after changing job).
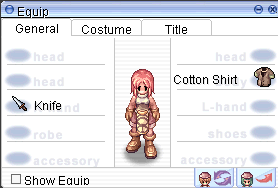
The equipment UI shows a set of armors and weapon used, you can change partially or all your equipment making you more versatile. To change partially, double left click the Equipment in your Inventory or just press a key assigned to an Equipment in Skill bar. Changing all Equipment, use “Swap Equipment” button, lower right corner of the UI, note that the second set of equipment needs to be assigned to swap successfully. A custom command for swapping can be added in “Shortcut Settings” from the option menu. There is a quirk about equipping and swapping in the Right and Left hand (Only for Assassin Class) and the Right and Left accessories. Changing them by Skill Bar only change the left hand weapon/accessory.
Status Effects
Short summary of Status Effects and how to negate them:
- Poison reduces your soft DEF, take a % of your health and negate you from recovering SP naturally. Item like green herb/potion, panacea, royal jelly, Detoxify from Thief, or Dispell from Sage negates the effect. Investing on VIT reduce the chance and duration.
- Blind reduces HIT and FLEE by 25% and visual range on screen, investing on INT reduces the chance and duration and VIT also reduces the duration. Consumables like green herb/potion, panacea, royal jelly or Cure from Acolyte negates the effect.
- Stun makes character impossible to control and monster/player will successfully hit character disregarding FLEE, adding VIT reduce the chance and duration. Status Recovery from Acolyte/Super Novice or Dispell from Sage negates the effect.
- Sleep is similar to Stun but first attack will undo the effect. Enemies have 2x Crit Chance while in effect. Investing on INT reduces the chance and duration. Status Recovery or Dispell negates the effect.
- Stone also negates character's control, reduces DEF by 50%, increases MDEF by 25% and transform you into Earth level 1 Element. Blessing, Status Recovery or Dispell negates the effect.
- Freeze is similar to Stone but changing your element to Water level 1. Getting hit will cancel the effect immediately, using Status Recovery, Provoke from Swordman and Mind Breaker from Professor class will also end the effect. You can also negate the status with high MDEF.
In-game Mechanics: Race, Element, Size
Monsters (and players) have a Race, Element and Size that can be taken advantage to improve damage output / reduce damage taken.
- Race: Players are considered "Demi-Human" and "Player" (used on latter RO update to differentiate from normal monsters). Demon and Insect Race monsters can see through hiding/cloaking. There are cards to deal more damage (Physical or Magical) against every Race and to reduce damage by percentage.
- Element: The element is divided into 10 types and 4 effectiveness level (Level 1 to 4). Having elemental advantage can double your damage output in the highest level or null damage in disadvantage. Players, normal (auto) attacks and skills that doesn't specify element are Neutral unless Skills, Equipment or Cards change it. There are offensive and defensive cards (changing element directly or reducing elemental damage by a percentage). The most basic circle of element is: Fire → Earth → Wind → Water → Fire (→ is strong against).
- Size: Size is divided into 3 (Small, Medium, Large), Players are considered Medium except Small for Baby classes. Weapons have different modifiers (50%, 75% or 100%) for Size affecting only Weapon ATK, less significant penalty when considering total damage (Status ATK is not affected). On cards, there are offensive (they have also a +5 ATK boost) and defensive reducing a percentage of the damage you take.
Example of map where monsters share Race and Size: Juperos Ruins F1 (Formless race & Medium size).
I know the basics, so what's custom in Project Alfheim?
Details are listed on Main Page, here are brief summary.
Project Alfheim is pre-renewal mechanic server, and its custom contents adapt renewal contents and others fit into pre-renewal scene.
Quality of Life Changes
Commands and Features were added to eliminate the needs of doing multiple client (still allowed) in mind.
- GRF edits on client are acceptable, but modifying player sprites is not allowed. GM would not provide support for GRF edits errors.
- Macros for active gameplay are allowed. Players must actively be at your computer and initiating the macro, not AFK. Old or Hardware Macro may be needed to bypass Gepard. More Rules can be found in Discord.
- Warper, next to Kafra teleports character into visited locations for 1 (Newbie) Blue Gemstone.
- Inn also gives Increase AGI and Blessing for 30 minutes.
- Inside the Inn, WOE Warper offers free service to both active Castles, and WOE Kafra Storage did not check Basic Skill Level, hence Novice Level 1 can access.
- Stat Food effects have 30 minutes duration and do not cancel upon death.
- Elemental Converters, Box of Storm, and Cursed Water buffs duration are 15 minutes. Aspersio Level 5 stay for 10 minutes.
- Kafra card, purchasable at Tool Dealer, enables access to storage anywhere upon use.
- Base EXP requirements from Level 94 to 99 Pre-Trans are significantly reduced (~3 mil exp increase per level). Also, Transcendent First Class' Job EXP Table is equal to Pre-Trans table.
- Old Monsters have Status, EXP and Loot adjustments for better leveling, for example: Paradise Bounty Quest System maps, Louyang Dungeon and Ancient Mummy (Heal Bombing).
- Most Dungeon Entrance Quests are skippable by paying zeny.
- Most MVP maps have MVP Instance System, creating a clone map exclusive for a party by paying materials. Its main objective is to kill and loot MVP. MVP Card is not obtainable from Instance System.
- Item Captor guarantees (insures) a rare item after 3500 kills, excluding MvPs and Mini Bosses.
- Blacksmith Blessings are added for failproof refining.
- Alchemist who reaches 50,000 ranked points and Blacksmith who reaches 1,000 ranked points are considered ranked and have bonus effect for their creations.
Classes Changes
- Lord Knight gets Spear of Lucifer for Spiral Pierce, Save The King for Bowling Bash, Claw Sword for Crit and Metal Stick for Brandish Spear.
- Stalker's Plagiarism works like Blue mage from Final Fantasy, passively learning skills casted by players or monsters on screen permanently. Skill activation allows to set 1 active learned skill at a time.
- Merchant classes have buffs to remove material or zeny cost of skills (Mammonite, Acid Terror, Demonstration & all Whitesmith zeny-required skills) for 10 minutes by paying it 1 time.
- Clown & Gypsy have Severe Rainstorm buffing party members along with song effect, and Reverberation doing AoE damage.
- Sniper gets Bloody Bow for LUK build, Sagittarius Bow for Beast Strafing, Royal Guard's Bow for Trap and Bolt Shooter for Double Strafe. Traps (4 elements) damage formula are customized.
- Acolyte's skills are condensed and previously Priest skills are moved into Acolyte Skill Tree, (also affect Mage, Crusader and Super Novice). Priest has adjusted Arch Bishop's skills. Magnus Exorcismus hits all targets, not exclusively Demon and Undead.
- Gunslinger can transcend into Night Watch with new Guns and skills adjustment.
- All classes will eventually get major overhaul.
- % Cast Time from Equipment and Poem of Bragi stacks, Isilla Card activation with Bragi may reach 100% Cast Time Reduction.
- CD in Mouth (cannot be combined with Elemental Sword) enables more autocast builds beside Ifrit's Rings, moreover, with Equipment increasing autocast rate & easier access for 190 ASPD (% ASPD from Headgear, Weapon's Random Options and Accessories).
Miscellaneous and Communities
- Weapons, Armors, Garments, Footgears from Monsters, Crafting and opening Boxes have Random Options (not Headgears, Shields, and Accessories).
Enchant-able Gears, Temporal Boots & Rock Ridge Enchant do not have Random Options by default, but can reach max options by spending materials. - Most Craftable & Rock Ridge Gears' Random Options can be re-rolled by spending materials, while the rest can not.
- Random Options for a piece of gear can be worth of 1~4 additional card effects. Changing from Level 3 to Level 4 Weapon with good options can be worth 1~2 more card effects.
- 100% Element and/or Status Effect Resist are obtainable without Evil Druid, Marc and Medusa Card.
- Shadow Gears (minimal effect, mostly from Card Captor Sakura), (Minor) Sub-Stat Food Buffs and Pets especially Evolved ones are available.
- Some classes are capable to do 40 k+ damage in a single burst of skill.
- Custom monsters commonly have 30 k+ HP for (intended) solo maps, and 500 k+ HP for party maps. Also, they have customized renewal monster skills.
- Party Maps have Individual Loot Roll. Each party member have their own loot rolled individually from a monster with restrictions.
- Players occasionally recruit for Old Card Album (OCA) run, killing MvPs with high chance of OCA on MVP Instance System and/or field; also, Big 3 (Valkyrie Randgris, Ifrit, and Wounded Morocc).
- Character reaching Level 99 Transcended (max Job Level is not needed) receives Mystical Card Album (like OCA with additional chance of Mini-Bosses card) once, resetting and going back to Level 99 do not give another. Hence, it is recommended to make a new character instead of reset back to Level 70.
Beginner Walkthrough
Any steps below may be skipped when you have more optimal setup.
Choosing Class
Summary for Classes:
- Knight is good at tanking several monsters and AoE them all at once (Bowling Bash or Brandish Spear). Transcended knight has great single target ranged skill, Spiral Pierce (with cooldown).
- Crusader is better tanker than knight (Auto Guard & Defender), branching out either Holy DPS (Holy Cross & Grand Cross), offensive shield (Shield Boomerang & Shield Chain), autocast (CD in Mouth) or tanking for party route (Devotion & Providence).
- Assassin (Cross) is one of the best DPS but requires costly consumables for Enchant Deadly Poison.
- Rogue is jack of all trade especially after Plagiarism custom update.
- Hunter is the default (decent) ranged DPS unit.
- Bard (male) & Dancer (female) focused on party support using songs or dances. Transcended have great single target (Arrow Vulcan) and AoE DPS (Reverberation) skills with moderate cooldown.
- Blacksmith focused on single target DPS, Cart Termination and great even at solo; the only class that have Weapon Refine skill.
- Alchemist is throwing bottles (Acid Terror & Acid Demonstration), doing good-to-great damage, or healing (Slim Potion Pitcher), accompanied with Homunculus.
- Priest is the original support class, that can branch out into good (to great) holy magic DPS (Holy Light, Magnus Exorcismus & Judex) or autocast battle type (Duple Light).
- Monk is combo (Chain Crush Combo) or one punch man (Asura Strike). And just like in real life, monk has Steel Body.
- Wizard is the true Magic DPS, can achieve instant cast with Isilla card activation and Bragi buff.
- Sage focused on support magic type, or single target Magic (one of the best with Double Casting) DPS.
- Ninja goes either throwing weapon (not great), alternate magic, or stealth route.
- Gunslinger (transcend into Night Watch) have mostly ranged unique skills based on guns.
- Star Gladiator tests your game knowledge, and doing absurd damage exploiting game mechanic (later obsolete with upcoming transcended update).
- Soul linker unlocks extra skill for other classes (later obsolete with upcoming transcended update), great defensive (Ka-) buffs, and decent single target magic DPS (Esma).
In general, all classes are playable with few notes:
- Ranged classes (magic or physical) have easier gameplay, because of easier stat distribution, and avoiding damage. However, some custom maps prevent ranged damage with defender or unique mechanic, to encourage party variety.
- Ninja is lacking of custom updates.
- Sniper especially Trap Build and Soul Breaker type Assassin Cross is stuck at mid tier due to skills damage formula & double strafe animation speed. They are good enough for farming but inferior compared to higher tier.
- Night Watch, transcended from Gunslinger is one of the best DPS class with comprehensive custom updates.
- Strong classes on vanilla ragnarok server remains strong(er) in ProjectAlfheim.
- the best defense is a good offense since tanking is less necessary when killing in one-shot or mere seconds.
- focusing on party play, beginners have better chance to play as support (Priest, Linker, Bard or Dancer) since DPS and tank/mobber classes requires more Gears and Consumables.
Useful Commands
- @dailyexp (available daily), @poriexp (GM compensation for server hiccup), @eventexp (by paying event currency) or Battle Manuals doubles exp rate for 1 hour. It is feasible to maintain exp buffs constantly, essentially increasing server exp rate to 6x.
- @utility, @settings configures Master Account and @commands upon login settings.
- @autoloot is available.
- @lasafigure & @bountyquest remotely interact Job Figure and Bounty Quests. Other Bounty Quests do not have @command shortcuts.
- @ws +<min_refine> <item_id> [<compounded_card_id>] (<option_id> <min_value>) or @ws <item_name partial or complete> result can be double-clicked to open vendor's shop remotely.
- any @ws format tags can be excluded
- the order of the tags must be exact, otherwise incorrect inputs onward are ignored.
- @ws has cooldown.
- @ii (item info), @mi (mob info), @whodrops (inaccurate drop rate for gears with random options), @whereis are useful for searching database in-game.
Novice Training Ground & First Class Quest
- set up master account.
- type any double exp rate @commands (see above), @autoloot & @bountyquest. Also, @utility or @settings for login settings.
- start Novice Training Ground quests.
- on field map,
- for non-first character, may use Bank, buy Kafra Card, get Equipment and Consumables.
- get 5~10 VIT and DEX, rest are optional. Free stat reset is available for first classes, or up to base level 69 at Main Office.
- finish Brade quest to kill 1 poring.
- try out Swordman or Thief from NPC Guide, getting manual for either Bash or Envenom skill.
- refill HP & SP by talking to Brade again.
- more supplies by taking quests from Swordman, Thief, Mage and Merchant Guide.
- stay until job level 10 (killing Spore), due to decent monsters density.
- more supplies by accepting personality test result. Shortcut to pick a class → which options to choose:
- Swordman → all 1st option.
- Thief → all 1st option but 3rd option on the last (Promise it for next time).
- Merchant → all 2nd option.
- Archer → all 2nd option except "The Past" and "Consider if you need it" (1st option).
- Acolyte → 3rd, 2nd, 1st option then all 2nd option for the rest.
- Mage → all last option.
- finish first class quest and job change.
- immediately talk to paradise recruiter, next to job changer npc, to continue Paradise Quest.
Paradise Quest & Early Gears
- follow all the steps, read thoroughly for first timer since custom stuffs are explained.
- after getting paradise weapon from Tali, talk again to Tali to continue to Rock Ridge.
- in case Paradise Quest is skipped, talk to Paradise Scout, next to Paradise Leader at Lasagna, for Paradise Gear (if Super Novice or Second Class). Then, talk again to Tali to continue.
- for physical classes, use Concentration Potion (later, Awakening & Berserk Potion) from Tool Dealer or monsters for ASPD buff.
- for physical classes, buy Elemental Converter to get elemental advantage (damage boost) on Paradise Bounty Quest System maps.
- use @lasafigure when farming in Dragon's Nest.
- after getting rock ridge coins, purchase an Adventurer's Weapon at Rock Ridge Weapon Shop , Paradise Gears from Buck, and enchant them on Dakota or Main Office.
- Buck & Dakota are inside Building of South Cactus on mini map.
- recommended early enchant/random options are ATK, MATK or damage.
- outside Paradise Gears, other useful early enchant/random options are INT, Max SP, SP recovered every 10 seconds and Neutral Element Resist.
Further Gears Progression
- utilize @ws to buy Gears. Ex: @ws (17 15) shows any gear that have enchant/random option ATK +15 or above.
- get Brasilis Field Weapons (second class only), Infiltrator or Orc Archer Bow as an upgrade from Adventurer's Weapon.
- Brasilis can be accessed from Alberta Docks, East part.
- monsters at Brasilis Field have either Safety Wall, Defender or high MDEF, that require a bit strategy or small beginner party.
- @ws is always an option.
- again, keep using Elemental Converter.
- craft Time Keeper Gear set from Nightmare Clock Tower as Paradise Gears upgrade.
- use @whodrops and @whereis to find materials needed for Time Keeper Gear.
- read notes on NCT wiki page for strategies.
- Time Keeper random options may be re-rolled by the same crafter npc for a cost.
- Despite great stats from Time Keeper, Carded Gear may be better than non-slotted Time Keeper on some circumstances, ex: monsters have strong shadow element skills, hence bathory carded armor is better.
- may get cheap Neutral Resist on Garment in-between progressions, example: Vali's Manteau or Pot Dofle Card compounded on slotted garment.
- may get overrefined Crimson Weapons as an upgrade from Brasilis Field weapon, before aiming end-game weapons.
- Holy Element option may be essential for lazy players, not dual clienting priest for Aspersio. LV3 Aspersio Scroll (still requires holy water) is obtainable but uncommon.
- specialize gears according class builds, example: rideword hat for physical classes which are lacking of sp management.
