Difference between revisions of "Quality of Life Changes"
| (43 intermediate revisions by 2 users not shown) | |||
| Line 1: | Line 1: | ||
{{TOC}} | {{TOC}} | ||
| − | + | : ''[[File:sc.png|16px]] Icon denotes a specific custom area and/or addition.'' | |
With Project Alfheim, we understand that many players simply do not have the time to grind out the game like they used to. Further, as players got better at the game, they began to break it to the point where it was less fun for many. | With Project Alfheim, we understand that many players simply do not have the time to grind out the game like they used to. Further, as players got better at the game, they began to break it to the point where it was less fun for many. | ||
| − | + | Multi-clienting is a very divisive topic in the community with many feeling like it is mandatory if it is not hard-restricted. However, hard restricting multi-client in our experience has not led to many more players playing together and is simply an artificial restriction. Further, it feels bad for the players who may simply enjoy going hard when they play solo. As such, we don't restrict multi-clienting. | |
| − | |||
| − | |||
| − | |||
| − | |||
While we can't give players everything without working for it, we have added many features with the explicit goal of making it feel less mandatory to multi-client. | While we can't give players everything without working for it, we have added many features with the explicit goal of making it feel less mandatory to multi-client. | ||
| − | |||
| − | |||
With that bit of insight into our server vision and the reason behind our changes let's get into the actual changes themselves. Each section will have a brief explanation of the change as well as an animated example of what it looks like in game. | With that bit of insight into our server vision and the reason behind our changes let's get into the actual changes themselves. Each section will have a brief explanation of the change as well as an animated example of what it looks like in game. | ||
| − | + | = Increased Sitting Regeneration = | |
<div style="float: right"> | <div style="float: right"> | ||
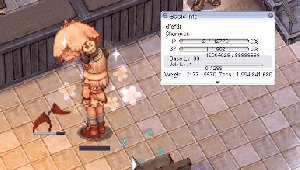
| − | + | [[File:sittingregen.gif|thumb|Increased Regeneration Example]] | |
</div> | </div> | ||
When a player is out of combat for 5 seconds, having not been hit by a mob they will enable massively Increased HP/SP Regeneration. | When a player is out of combat for 5 seconds, having not been hit by a mob they will enable massively Increased HP/SP Regeneration. | ||
| − | * Upon sitting a player will regenerate 3% of their Max HP/SP per second. | + | * '''Upon sitting, a player will regenerate 3% of their Max HP/SP per second.''' [[File:sc.png|16px]] |
| − | |||
| − | |||
| − | |||
| − | |||
| − | |||
| − | |||
| − | |||
| − | |||
| − | |||
| − | |||
| − | |||
| − | |||
| − | |||
| − | |||
| − | |||
| − | |||
| − | |||
| − | |||
| − | |||
| − | |||
| − | |||
| − | |||
| − | |||
| − | |||
| − | |||
| − | |||
| − | |||
| − | + | This is a fixed percentage and not a flat value so it will always take ''about'' 33 seconds to regenerate to full from 0. | |
| + | * This does ''<u>not</u>'' work while overweight, but ''<u>will</u>'' work to bypass some skill exclusive restrictions <!--<sup><ref>''E.g. Asura Strike's 5 minute SP cooldown.''</sup></ref>-->. | ||
| + | : ''E.g. Asura Strike's 5 minute SP cooldown.'' | ||
| − | + | = Custom Inns = | |
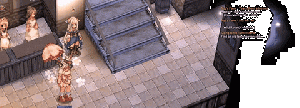
| + | [[File:innexample.gif|thumb|Inn Example]] | ||
| − | + | On Project Alfheim, Inns are an essential. | |
| − | + | '''Using an Inn works as normal by:''' | |
| + | * Fully replenishing HP & SP | ||
| − | |||
| − | + | '''Added Custom Effects:''' | |
| + | * 30 minute Level 10 Increase AGI [[File:sc.png|16px]] | ||
| + | * 30 minute Level 10 Blessing [[File:sc.png|16px]] | ||
| − | + | '''Added Custom Access NPC's:''' | |
| + | *Kafra Storage [[File:sc.png|16px]] | ||
| + | *Warper to WOE Castles [[File:sc.png|16px]] | ||
| + | *Repairman [[File:sc.png|16px]] | ||
| − | + | == Towns with Inns == | |
| + | : Most major towns have had an Inn added if they did not previously have one. | ||
| − | + | # Prontera (East and West sides) | |
| + | # Morocc (South and North) | ||
| + | # Geffen | ||
| + | # Alberta | ||
| + | # Izlude [[File:sc.png|16px]] | ||
| + | # Aldebaran | ||
| + | # Lutie [[File:sc.png|16px]] | ||
| + | # Comodo [[File:sc.png|16px]] | ||
| + | # Yuno [[File:sc.png|16px]] | ||
| + | # Amatsu [[File:sc.png|16px]] | ||
| + | # Gonryun [[File:sc.png|16px]] | ||
| + | # Louyang [[File:sc.png|16px]] | ||
| + | # Ayothaya [[File:sc.png|16px]] | ||
| + | # Einbroch | ||
| + | # Lighthalzen | ||
| + | # Daytime Nameless Island [[File:sc.png|16px]] ''(No monsters and no access to Cursed Abbey)'' | ||
| + | [[File:ic.png|30px]] '''NOTE:''' ''As content progresses forward, every major town will have these same changes. If you do not see a town listed it is because it was released after our launch.'' | ||
| + | : ''Due to lack of space Umbala does not and will not be receiving an Inn.'' | ||
| − | + | = Uniform Kafra Warps = | |
| − | + | Kafras normally make you warp individually from town to town with only a few immediately nearby locations available. | |
| − | + | E.g. Before, if you wanted to travel from Prontera to say Umbala you would have had to make multiple warps before the option would be available from a closer Kafra location. | |
| − | + | We changed this by simply calculating the cost all at once and allowing you to warp to any town a Kafra can warp you to normally. | |
| − | [[File: | + | ''Quite simply'', '''every Kafra can warp you to any other Kafra warp location for a fix Zeny fee.''' [[File:sc.png|16px]] |
| − | + | = Uniform Tool Dealers = | |
| − | + | '''All towns have at least one major Tool Dealer (usually the most accessible) who sells all the major items players may use.''' [[File:sc.png|16px]] | |
| − | The same applies for Berserk Potions, Yggdrasil Leaf, and Blue Gemstones | + | Arrows, Iron Arrows, Silver Arrows, Fire Arrows, and Traps are no longer location exclusive. The same applies for Berserk Potions, Yggdrasil Leaf, and Blue Gemstones! |
| + | = Items Drops Identified = | ||
| + | Items that drop will already be identified. | ||
| − | + | = Unlocking Warps = | |
| − | [[File: | + | [[File:WarpPoint.gif|left]] |
| − | + | ''On Alfheim, our Warper still requires you to have: '''visited the location you want to warp to at least once.''''' [[File:sc.png|16px]] | |
| − | + | [[File:Warperkafracat.png|thumb]] | |
| + | '''Warper Cost:''' | ||
| + | *1 Blue Gemstone | ||
| − | [[File: | + | : [[File:ic.png|30px]] ''There are no field map warps. <u>Only</u> Dungeons, Towns, and the two special location warps. |
| − | |||
| + | There are a few exceptions to this rule: | ||
| + | *Yggdrasil Tree | ||
| + | *Niflheim (Indoors) | ||
| + | *Glast Heim (Sewer and Cave) | ||
| + | *Byalan 4 | ||
| − | + | Every major town has at least one Warper Kafra Cat ready to help out! | |
| − | + | : <small>''If you would like a warp added you can make a suggestion in the '''<u>{{plainlink |url=https://discord.gg/projectalfheim Discord}}</u>'''. There will never be one on an MVP map, or within a dungeon beyond the above exceptions.</small> | |
| − | + | = Renewal Novice Grounds = | |
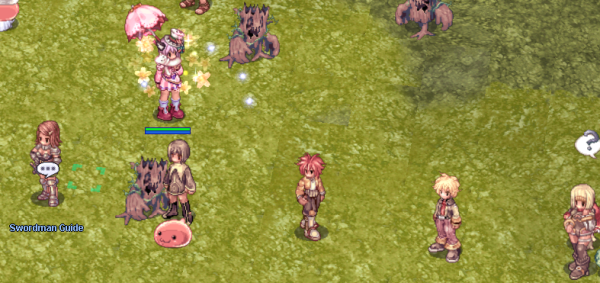
| − | + | [[File:Renewalnovicegrounds.png|600px]] | |
| + | Renewal Training Grounds are essentially the same as pre-renewal except they don't force you to use stat points at the start. Additionally, the Quests from these Job NPCs can help give new players some good initial supplies/EXP for those willing to take the short time to do them! | ||
| − | + | * '''Jinha''', who usually teaches you only '''[[First Aid]]''', now also teaches you the '''[[Tapping_System|Tapping Skill]]'''! [[File:sc.png|16px]] | |
| − | + | = Increased WOE Supply Drops = | |
| − | For all | + | ''For all WoE related supplies, '''drops have either had an extra drop added to specific monsters and/or had the drop rate increased.''''' [[File:sc.png|16px]] |
| − | + | This is to lessen the burden of having to grind materials to participate in WOE. With it being significantly easier and less costly this will hopefully encourage more WOE participation. Additionally, it should help stimulate the economy for newer players who can easily make money by selling them to existing guilds and players. | |
| − | + | ''To counter prospective inflation, '''all of these drops have had their sell cost reduced to 1/3 of its original value where necessary.''''' [[File:sc.png|16px]] | |
{|class="wikitable" | {|class="wikitable" | ||
! style="background-color:pink" | Monster | ! style="background-color:pink" | Monster | ||
| − | + | ! style="background-color:pink" | Item | |
| − | + | ! style="background-color:pink" | Change | |
| − | ! style="background-color:pink" | Item | ||
| − | ! style="background-color:pink" | | ||
|- | |- | ||
| − | |Argos | + | | style="text-align: center;" | '''Argos'''<br>[[File:Argos.gif|center]] |
| − | + | | style="text-align: center;" | [[File:Cobweb.gif]] Cobweb | |
| − | | | + | |Extra drop added at same rate [[File:sc.png|16px]] |
| − | |[[File:Cobweb.gif | ||
| − | |Extra drop added at same rate | ||
|- | |- | ||
| − | |Bathory | + | | style="text-align: center;" | '''Bathory'''<br>[[File:Bathory.gif|center]] |
| − | + | | style="text-align: center;" | [[File:Witchstarsand.gif]] Witch Starsand | |
| − | | | + | |Extra drop added at same rate [[File:sc.png|16px]] |
| − | |[[File:Witchstarsand.gif | ||
| − | |Extra drop added at same rate | ||
|- | |- | ||
| − | |Demon Pungus | + | | style="text-align: center;" | '''Demon Pungus'''<br>[[File:Demonpungus.gif|center]] |
| − | + | | style="text-align: center;" | [[File:Yellowgemstone.gif]] Yellow Gemstone | |
| − | | | + | |Extra drop added at same rate [[File:sc.png|16px]] |
| − | |[[File:Yellowgemstone.gif | ||
| − | |Extra drop added at same rate | ||
|- | |- | ||
| − | |Driller | + | | style="text-align: center;" | '''Driller'''<br>[[File:Driller.gif|center]] |
| − | + | | style="text-align: center;" | [[File:Redgemstone.gif]] Red Gemstone | |
| − | | | + | |Extra drop added at same rate [[File:sc.png|16px]] |
| − | |[[File:Redgemstone.gif | ||
| − | |Extra drop added at same rate | ||
|- | |- | ||
| − | |Evil Druid | + | | style="text-align: center;" | '''Evil Druid'''<br>[[File:Evil_Druid.gif|center]] |
| − | + | | style="text-align: center;" | [[File:Whiteherb.gif]] White Herb | |
| − | | | + | |Extra drop added at same rate [[File:sc.png|16px]] |
| − | |[[File:Whiteherb.gif | ||
| − | |Extra drop added at same rate | ||
|- | |- | ||
| − | |Goat | + | | style="text-align: center;" | '''Goat'''<br>[[File:Goat.gif|center]] |
| − | + | | style="text-align: center;" | [[File:Blueherb.gif]] Blue Herb | |
| − | | | + | |Extra drop at 25% [[File:sc.png|16px]] |
| − | |[[File:Blueherb.gif | ||
| − | |Extra drop at 25% | ||
|- | |- | ||
| − | |Incubus | + | | style="text-align: center;" | '''Incubus'''<br>[[File:Incubus.gif|center]] |
| − | + | | style="text-align: center;" | [[File:Whiteherb.gif]] White Herb | |
| − | | | + | |Extra drop added at same rate [[File:sc.png|16px]] |
| − | |[[File:Whiteherb.gif | ||
| − | |Extra drop added at same rate | ||
|- | |- | ||
| − | |Khalitzburg | + | | style="text-align: center;" | '''Khalitzburg'''<br>[[File:Khalitzburg.gif|center]] |
| − | + | | style="text-align: center;" | [[File:Whiteherb.gif]] White Herb | |
| − | | | + | |Extra drop added at same rate [[File:sc.png|16px]] |
| − | |[[File:Whiteherb.gif | ||
| − | |Extra drop added at same rate | ||
|- | |- | ||
| − | |Les | + | | style="text-align: center;" | '''Les'''<br>[[File:Les.gif|center]] |
| − | + | | style="text-align: center;" | [[File:Stem.gif]] Stem<br>[[File:Blueherb.gif]] Blue Herb | |
| − | | | + | |Extra drop of Stems at same rate and Blue Herb rate increased to 50% [[File:sc.png|16px]] |
| − | |[[File:Stem.gif | ||
| − | |Extra drop of Stems at same rate and Blue Herb rate increased to 50% | ||
|- | |- | ||
| − | |Majoruros | + | | style="text-align: center;" | '''Majoruros'''<br>[[File:Majoruros.gif|center]] |
| − | + | | style="text-align: center;" | [[File:Whiteherb.gif]] White Herb | |
| − | | | + | |Extra drop added at same rate [[File:sc.png|16px]] |
| − | |[[File:Whiteherb.gif | ||
| − | |Extra drop added at same rate | ||
|- | |- | ||
| − | |Mandragora | + | | style="text-align: center;" | '''Mandragora'''<br>[[File:Mandragora.gif|center]] |
| − | + | | style="text-align: center;" | [[File:Stem.gif]] Stem | |
| − | | | + | |Two extra drops added at same rate [[File:sc.png|16px]] |
| − | |[[File:Stem.gif | ||
| − | |Two extra drops added at same rate | ||
|- | |- | ||
| − | |Flora | + | | style="text-align: center;" | '''Flora'''<br>[[File:Flora.gif|center]] |
| − | + | | style="text-align: center;" | [[File:Stem.gif]] Stem | |
| − | | | + | |One extra drop added at the same rate [[File:sc.png|16px]] |
| − | |[[File:Stem.gif | ||
| − | |One extra drop added at the same rate | ||
|- | |- | ||
| − | |Nightmare | + | | style="text-align: center;" | '''Nightmare'''<br>[[File:Nightmare.gif|center]] |
| − | + | | style="text-align: center;" | [[File:Blueherb.gif]] Blue Herb | |
| − | | | + | |Primary drop increased to 50%, second drop added at 25% [[File:sc.png|16px]] |
| − | |[[File:Blueherb.gif | ||
| − | |Primary drop increased to 50%, second drop added at 25% | ||
|- | |- | ||
| − | |Obeaune | + | | style="text-align: center;" | '''Obeaune'''<br>[[File:Obeaune.gif|center]] |
| − | + | | style="text-align: center;" | [[File:Heart_of_mermaid.gif]] Heart of Mermaid | |
| − | | | + | |Extra drop added at same rate [[File:sc.png|16px]] |
| − | |[[File:Heart_of_mermaid.gif | ||
| − | |Extra drop added at same rate | ||
|- | |- | ||
| − | |Poison Spore | + | | style="text-align: center;" | '''Poison Spore'''<br>[[File:Poisonspore.gif|center]] |
| − | + | | style="text-align: center;" | [[File:Poisonsporeitem.gif]] Poison Spore | |
| − | | | + | |Extra drop added at same rate [[File:sc.png|16px]] |
| − | |[[File:Poisonsporeitem.gif | ||
| − | |Extra drop added at same rate | ||
|- | |- | ||
| − | |Remover | + | | style="text-align: center;" | '''Remover'''<br>[[File:Remover.gif|center]] |
| − | + | | style="text-align: center;" | [[File:Karvodailnirol.gif]] Karvodailnirol | |
| − | | | + | |Drop rate doubled [[File:sc.png|16px]] |
| − | |[[File:Karvodailnirol.gif | ||
| − | |Drop rate doubled | ||
|- | |- | ||
| − | |Roda Frog | + | | style="text-align: center;" | '''Roda Frog'''<br>[[File:Rodafrog.gif|center]] |
| − | + | | style="text-align: center;" | [[File:Emptybottle.gif]] Empty Bottle | |
| − | | | + | |Extra drop added at same rate [[File:sc.png|16px]] |
| − | |[[File:Emptybottle.gif | ||
| − | |Extra drop added at same rate | ||
|- | |- | ||
| − | |Verit | + | | style="text-align: center;" | '''Verit'''<br>[[File:Verit.gif|center]] |
| − | + | | style="text-align: center;" | [[File:Immortal_heart.gif]] Immortal Heart | |
| − | | | + | |Extra drop added at same rate [[File:sc.png|16px]] |
| − | |[[File:Immortal_heart.gif | ||
| − | |Extra drop added at same rate | ||
|- | |- | ||
| − | |Wraith | + | | style="text-align: center;" | '''Wraith'''<br>[[File:Wraith.gif|center]] |
| − | + | | style="text-align: center;" | [[File:Fabric.gif]] Fabric | |
| − | | | + | |Extra drop added at same rate [[File:sc.png|16px]] |
| − | |[[File:Fabric.gif | ||
| − | |Extra drop added at same rate | ||
|- | |- | ||
| − | |Zenorc | + | | style="text-align: center;" | '''Zenorc'''<br>[[File:Zenorc.gif|center]] |
| − | + | | style="text-align: center;" | [[File:Zenorcfang.gif]] Zenorc Fang | |
| − | | | + | |Extra drop added at same rate [[File:sc.png|16px]] |
| − | |[[File:Zenorcfang.gif | ||
| − | |Extra drop added at same rate | ||
|} | |} | ||
| + | = Item Captor = | ||
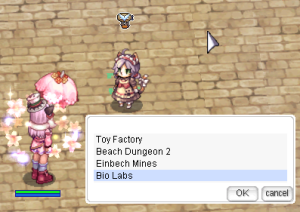
| − | + | [[File:Itemcaptor.png|thumb|Item Captor Menu]] | |
| − | |||
| − | [[File:Itemcaptor.png]] | ||
| − | This | + | '''This feature will guarantee you the item you are hunting after exactly 3500 kills.''' [[File:sc.png|16px]] |
| − | + | ''The catch is, '''you only get the item from the NPC if you do NOT drop the item before 3500 kills that you were hunting.''' [[File:sc.png|16px]] | |
| + | : [[File:ic.png|30px]] ''3500 kills is about the bottom 19% of the "Bad Luck Bell Curve".'' | ||
| + | '''How It Works:''' | ||
| + | # First you register your starting date. This will set a flag in the NPC that lasts 7 days. During this time every time the ''Item Captor'' gives you an item your cost to use the NPC will go up. | ||
| + | # Then you can choose to hunt an item. | ||
| + | # Select the mob you are going to hunt from. You should look up the mob ID FIRST with @mi. ''(NOTE: MVP and Mini Boss are excluded from this NPC)'' | ||
| + | # Then you select the item you want to hunt from the list. ''(Old Card Albums are excluded from choices)'' | ||
| + | # Then the NPC will tell you your current price. This starts at '''100,000 Zeny and 1 Green Silvervine'''. This fee is NOT refunded. If you accept the kill count quest will begin. | ||
| + | # If you get the card or item before 3500 kills the quest automatically ends and you can start again. | ||
| + | # If you reach 3500 kills before you drop the item, then the item is automatically given to you and the quest ended. ''(You do NOT have to go back to the npc.)'' | ||
| + | # When you talk to the NPC you can choose to start up another or give up on your current quest if you've changed your mind and want to hunt something else. | ||
| + | :: [[File:ic.png|30px]] ''This NPC has no cooldown, but it's cost increases for every time you reach the 3500 kills and it gives you the item.'' | ||
| − | 1 | + | '''Cost:''' |
| + | : 100,000 Zeny + 1 Green Silvervine | ||
| + | : 200,000 Zeny + 2 Green Silvervine | ||
| + | : 300,000 Zeny + 3 Green Silvervine | ||
| − | + | = Safe Card Removal = | |
| + | Safely remove cards from items without destroying the item or the card! Safe Card Removal NPC is available at the [[Main Office]]. | ||
| − | + | = Overweight Changed to 70% and Gym Passes = | |
| − | + | Overweight in the game originally began at 50% overweight to disable natural regen. '''This is changed to 70% on Project Alfheim to be like Renewal.''' [[File:sc.png|16px]] | |
| − | + | In addition to this, '''''Gym Passes'' for increased weight limit are available in the [[Main Office]] in exchange for ''[[Silvervine_Exchange_System|Silvervine Fruit(s)]]'''''. [[File:sc.png|16px]] | |
| + | : [[File:ic.png|30px]] ''You obtain Silvervine Fruits by killing monsters. | ||
| − | + | Gym Passes can be used via the Ripped Cabus NPC at {{Navi|payon|173|141}}. | |
| − | + | [[File:NPC Ripped Cabus.png]] | |
| − | + | = Quest Skips = | |
| + | You can pay to skip the quests to gain access to some dungeons. To begin, start the first step and you'll be given a prompt to skip it for an amount of zeny. However if you decline the prompt you won't get it again. | ||
| − | 100,000z | + | ==List of quest skips== |
| + | *Kiel Quest: 300k (still doesn't give OCA) | ||
| + | *Moscovia: 100,000z | ||
| + | *Lost Child:100,000z | ||
| + | *Rachel Sanc: 300,000z | ||
| + | *Veins Siblings: 300,000z | ||
| + | *Curse of Gaebolg: 200,000z | ||
| + | *Nameless Island: 100,000z | ||
| + | *Bio Labs: 100,000z | ||
| + | *Ayothaya Dungeon: 50,000z | ||
| + | *Amatsu Dungeon: 50,000z (Shinobis also removed on first floor) | ||
| + | *Abyss Lake 3: Warp no longer requires dragon parts to enter. | ||
| + | *Satan Morocc Quest version of monster made SIGNIFICANTLY easier (hell power, EQ removed, way less HP, way easier to flee/ hit) | ||
| − | + | = List of @commands = | |
| − | |||
| − | |||
| − | |||
| − | |||
| − | |||
| − | |||
| − | |||
| − | |||
| − | |||
| − | |||
| − | |||
: ''See Also: [[Commands]]'' | : ''See Also: [[Commands]]'' | ||
A slew of @commands are enabled for quality of life to help save the player time. Below you will find a complete list with a description of each and how they work. | A slew of @commands are enabled for quality of life to help save the player time. Below you will find a complete list with a description of each and how they work. | ||
| − | + | == @wb and @ws == | |
| − | |||
| − | |||
| − | |||
Search the marketplace from anywhere! We recommend using the marketplace on our website, but you can use this command to search for items as well. | Search the marketplace from anywhere! We recommend using the marketplace on our website, but you can use this command to search for items as well. | ||
| Line 300: | Line 274: | ||
Note that you can double click the items on the left to open the shop the item is in to buy the item from anywhere! | Note that you can double click the items on the left to open the shop the item is in to buy the item from anywhere! | ||
| − | + | == @whosells and @whobuys == | |
| − | |||
In addition to search store, you can use these to search without visuals, but you won't be able to see random options on gears this way. These are still useful if you want to look for none optioned gears, but otherwise we recommend using the Market function on the website or use @ws and @wb | In addition to search store, you can use these to search without visuals, but you won't be able to see random options on gears this way. These are still useful if you want to look for none optioned gears, but otherwise we recommend using the Market function on the website or use @ws and @wb | ||
| − | + | == @shopjump == | |
| − | |||
| − | |||
| − | |||
In addition to @searchstore, you can use @shopjump to instantly teleport to an existing shop. You MUST be on the same map as the shop and you can only use this command in towns to prevent abuse. To do this type the command and the name of the shop. when searching for an item it will tell you the name of an item in quotes. the @searchstore function also will show the shop name when you double click on the shop or hover over it. | In addition to @searchstore, you can use @shopjump to instantly teleport to an existing shop. You MUST be on the same map as the shop and you can only use this command in towns to prevent abuse. To do this type the command and the name of the shop. when searching for an item it will tell you the name of an item in quotes. the @searchstore function also will show the shop name when you double click on the shop or hover over it. | ||
| − | + | == @autoloot and @alootid == | |
| − | |||
This functions the same as other private servers. Simply type @autoloot and then the value of the drop rate you want to autoloot. If you want to only autoloot specific items you can use @alootid + and @alootid - to add or remove items from your custom list. These will ensure you autoloot these items no matter what. | This functions the same as other private servers. Simply type @autoloot and then the value of the drop rate you want to autoloot. If you want to only autoloot specific items you can use @alootid + and @alootid - to add or remove items from your custom list. These will ensure you autoloot these items no matter what. | ||
| − | + | == @refresh == | |
| − | |||
This game is a buggy game, so we feel @refresh is essential for clarity purposes. Type @refresh to reload your visuals. If a monster bugs out and remains on screen, you feel you might be position bugged, etc you can use this command to clarify what is actually on your screen. | This game is a buggy game, so we feel @refresh is essential for clarity purposes. Type @refresh to reload your visuals. If a monster bugs out and remains on screen, you feel you might be position bugged, etc you can use this command to clarify what is actually on your screen. | ||
| − | + | == @iteminfo and @mobinfo == | |
| − | |||
Same as other private servers, these simply help you search for items and monsters in the database. Important to note that our marketplace on the website requires item ID currently, so using @iteminfo to find out the desired items ID is useful for searching. | Same as other private servers, these simply help you search for items and monsters in the database. Important to note that our marketplace on the website requires item ID currently, so using @iteminfo to find out the desired items ID is useful for searching. | ||
| − | + | == @whereis == | |
| − | |||
This one just helps the player find out what maps a monster resides on. Type @whereis and either the monster name or the monster id. If your search isn't working try looking up the desired mobs exact ID with @mobinfo first! | This one just helps the player find out what maps a monster resides on. Type @whereis and either the monster name or the monster id. If your search isn't working try looking up the desired mobs exact ID with @mobinfo first! | ||
| − | + | == @settings == | |
(Account-wide) | (Account-wide) | ||
This command will open the settings menu which allows to save specific settings upon login. This will save settings such as @autoloot, @showexp, and chat channels. | This command will open the settings menu which allows to save specific settings upon login. This will save settings such as @autoloot, @showexp, and chat channels. | ||
| − | + | == @hidepet == | |
This command will hide all pets on screen | This command will hide all pets on screen | ||
| − | + | == @hidepettalk == | |
Mutes all pet random chatter | Mutes all pet random chatter | ||
| − | + | == @killcount == | |
Track how many kills you've done vs a specific mob with @killcount. You type @killcount and the mob ID number to see how many in the last 7 days (server days not 168 hours). See how unlucky you are, or maybe that you haven't killed as many as you thought you did! | Track how many kills you've done vs a specific mob with @killcount. You type @killcount and the mob ID number to see how many in the last 7 days (server days not 168 hours). See how unlucky you are, or maybe that you haven't killed as many as you thought you did! | ||
| − | + | == @fastregen == | |
Enables or disables the sitting regen feature. It will be on by default but you can turn it off in settings or using the command anytime. (Mainly used for Star Gladiators to reset their maps/feelings using the official doridori method.) | Enables or disables the sitting regen feature. It will be on by default but you can turn it off in settings or using the command anytime. (Mainly used for Star Gladiators to reset their maps/feelings using the official doridori method.) | ||
| − | + | == @eventexp == | |
(Only during the Sweets Festival event) | (Only during the Sweets Festival event) | ||
Spawns Sweet Annie NPC from anywhere to receive your EXP buffs using Sweets Festival Coins without having to go all the way to the main office in Prontera. | Spawns Sweet Annie NPC from anywhere to receive your EXP buffs using Sweets Festival Coins without having to go all the way to the main office in Prontera. | ||
| − | + | == @droploot == | |
Type @droploot +(itemid) to always drop an item on the ground when farming. You can remove with the same command but a -. (Please note: @alootid will take priority over this command) | Type @droploot +(itemid) to always drop an item on the ground when farming. You can remove with the same command but a -. (Please note: @alootid will take priority over this command) | ||
| − | + | == @itemcaptor == | |
This command displays your current item captor count. | This command displays your current item captor count. | ||
| − | + | == @dailyexp == | |
This command allows you to obtain your daily exp buff without having to go all the way to the main office in Prontera (can be used from anywhere). | This command allows you to obtain your daily exp buff without having to go all the way to the main office in Prontera (can be used from anywhere). | ||
| + | |||
| + | [[Category:General Information]] | ||
Latest revision as of 05:03, 7 March 2024
With Project Alfheim, we understand that many players simply do not have the time to grind out the game like they used to. Further, as players got better at the game, they began to break it to the point where it was less fun for many.
Multi-clienting is a very divisive topic in the community with many feeling like it is mandatory if it is not hard-restricted. However, hard restricting multi-client in our experience has not led to many more players playing together and is simply an artificial restriction. Further, it feels bad for the players who may simply enjoy going hard when they play solo. As such, we don't restrict multi-clienting.
While we can't give players everything without working for it, we have added many features with the explicit goal of making it feel less mandatory to multi-client.
With that bit of insight into our server vision and the reason behind our changes let's get into the actual changes themselves. Each section will have a brief explanation of the change as well as an animated example of what it looks like in game.
Contents
- 1 Increased Sitting Regeneration
- 2 Custom Inns
- 3 Uniform Kafra Warps
- 4 Uniform Tool Dealers
- 5 Items Drops Identified
- 6 Unlocking Warps
- 7 Renewal Novice Grounds
- 8 Increased WOE Supply Drops
- 9 Item Captor
- 10 Safe Card Removal
- 11 Overweight Changed to 70% and Gym Passes
- 12 Quest Skips
- 13 List of @commands
Increased Sitting Regeneration
When a player is out of combat for 5 seconds, having not been hit by a mob they will enable massively Increased HP/SP Regeneration.
This is a fixed percentage and not a flat value so it will always take about 33 seconds to regenerate to full from 0.
- This does not work while overweight, but will work to bypass some skill exclusive restrictions .
- E.g. Asura Strike's 5 minute SP cooldown.
Custom Inns
On Project Alfheim, Inns are an essential.
Using an Inn works as normal by:
- Fully replenishing HP & SP
Added Custom Effects:
Added Custom Access NPC's:
Towns with Inns
- Most major towns have had an Inn added if they did not previously have one.
- Prontera (East and West sides)
- Morocc (South and North)
- Geffen
- Alberta
- Izlude

- Aldebaran
- Lutie

- Comodo

- Yuno

- Amatsu

- Gonryun

- Louyang

- Ayothaya

- Einbroch
- Lighthalzen
- Daytime Nameless Island
 (No monsters and no access to Cursed Abbey)
![]() NOTE: As content progresses forward, every major town will have these same changes. If you do not see a town listed it is because it was released after our launch.
NOTE: As content progresses forward, every major town will have these same changes. If you do not see a town listed it is because it was released after our launch.
- Due to lack of space Umbala does not and will not be receiving an Inn.
Uniform Kafra Warps
Kafras normally make you warp individually from town to town with only a few immediately nearby locations available.
E.g. Before, if you wanted to travel from Prontera to say Umbala you would have had to make multiple warps before the option would be available from a closer Kafra location.
We changed this by simply calculating the cost all at once and allowing you to warp to any town a Kafra can warp you to normally.
Quite simply, every Kafra can warp you to any other Kafra warp location for a fix Zeny fee. ![]()
Uniform Tool Dealers
All towns have at least one major Tool Dealer (usually the most accessible) who sells all the major items players may use. ![]()
Arrows, Iron Arrows, Silver Arrows, Fire Arrows, and Traps are no longer location exclusive. The same applies for Berserk Potions, Yggdrasil Leaf, and Blue Gemstones!
Items Drops Identified
Items that drop will already be identified.
Unlocking Warps
On Alfheim, our Warper still requires you to have: visited the location you want to warp to at least once. ![]()
Warper Cost:
- 1 Blue Gemstone
There are a few exceptions to this rule:
- Yggdrasil Tree
- Niflheim (Indoors)
- Glast Heim (Sewer and Cave)
- Byalan 4
Every major town has at least one Warper Kafra Cat ready to help out!
- If you would like a warp added you can make a suggestion in the Discord. There will never be one on an MVP map, or within a dungeon beyond the above exceptions.
Renewal Novice Grounds
Renewal Training Grounds are essentially the same as pre-renewal except they don't force you to use stat points at the start. Additionally, the Quests from these Job NPCs can help give new players some good initial supplies/EXP for those willing to take the short time to do them!
- Jinha, who usually teaches you only First Aid, now also teaches you the Tapping Skill!

Increased WOE Supply Drops
For all WoE related supplies, drops have either had an extra drop added to specific monsters and/or had the drop rate increased. ![]()
This is to lessen the burden of having to grind materials to participate in WOE. With it being significantly easier and less costly this will hopefully encourage more WOE participation. Additionally, it should help stimulate the economy for newer players who can easily make money by selling them to existing guilds and players.
To counter prospective inflation, all of these drops have had their sell cost reduced to 1/3 of its original value where necessary. ![]()
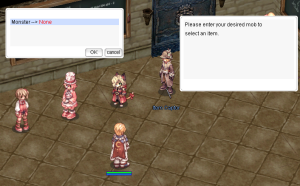
Item Captor
This feature will guarantee you the item you are hunting after exactly 3500 kills. ![]()
The catch is, you only get the item from the NPC if you do NOT drop the item before 3500 kills that you were hunting. ![]()
How It Works:
- First you register your starting date. This will set a flag in the NPC that lasts 7 days. During this time every time the Item Captor gives you an item your cost to use the NPC will go up.
- Then you can choose to hunt an item.
- Select the mob you are going to hunt from. You should look up the mob ID FIRST with @mi. (NOTE: MVP and Mini Boss are excluded from this NPC)
- Then you select the item you want to hunt from the list. (Old Card Albums are excluded from choices)
- Then the NPC will tell you your current price. This starts at 100,000 Zeny and 1 Green Silvervine. This fee is NOT refunded. If you accept the kill count quest will begin.
- If you get the card or item before 3500 kills the quest automatically ends and you can start again.
- If you reach 3500 kills before you drop the item, then the item is automatically given to you and the quest ended. (You do NOT have to go back to the npc.)
- When you talk to the NPC you can choose to start up another or give up on your current quest if you've changed your mind and want to hunt something else.
Cost:
- 100,000 Zeny + 1 Green Silvervine
- 200,000 Zeny + 2 Green Silvervine
- 300,000 Zeny + 3 Green Silvervine
Safe Card Removal
Safely remove cards from items without destroying the item or the card! Safe Card Removal NPC is available at the Main Office.
Overweight Changed to 70% and Gym Passes
Overweight in the game originally began at 50% overweight to disable natural regen. This is changed to 70% on Project Alfheim to be like Renewal. ![]()
In addition to this, Gym Passes for increased weight limit are available in the Main Office in exchange for Silvervine Fruit(s). ![]()
Gym Passes can be used via the Ripped Cabus NPC at .
Quest Skips
You can pay to skip the quests to gain access to some dungeons. To begin, start the first step and you'll be given a prompt to skip it for an amount of zeny. However if you decline the prompt you won't get it again.
List of quest skips
- Kiel Quest: 300k (still doesn't give OCA)
- Moscovia: 100,000z
- Lost Child:100,000z
- Rachel Sanc: 300,000z
- Veins Siblings: 300,000z
- Curse of Gaebolg: 200,000z
- Nameless Island: 100,000z
- Bio Labs: 100,000z
- Ayothaya Dungeon: 50,000z
- Amatsu Dungeon: 50,000z (Shinobis also removed on first floor)
- Abyss Lake 3: Warp no longer requires dragon parts to enter.
- Satan Morocc Quest version of monster made SIGNIFICANTLY easier (hell power, EQ removed, way less HP, way easier to flee/ hit)
List of @commands
- See Also: Commands
A slew of @commands are enabled for quality of life to help save the player time. Below you will find a complete list with a description of each and how they work.
@wb and @ws
Search the marketplace from anywhere! We recommend using the marketplace on our website, but you can use this command to search for items as well.
type @wb will search for buy shops containing the item you looked for and @ws will look for people selling the item you are looking for. Use @ii to get the item ID if you are having trouble finding it by its name in text.
Note that you can double click the items on the left to open the shop the item is in to buy the item from anywhere!
@whosells and @whobuys
In addition to search store, you can use these to search without visuals, but you won't be able to see random options on gears this way. These are still useful if you want to look for none optioned gears, but otherwise we recommend using the Market function on the website or use @ws and @wb
@shopjump
In addition to @searchstore, you can use @shopjump to instantly teleport to an existing shop. You MUST be on the same map as the shop and you can only use this command in towns to prevent abuse. To do this type the command and the name of the shop. when searching for an item it will tell you the name of an item in quotes. the @searchstore function also will show the shop name when you double click on the shop or hover over it.
@autoloot and @alootid
This functions the same as other private servers. Simply type @autoloot and then the value of the drop rate you want to autoloot. If you want to only autoloot specific items you can use @alootid + and @alootid - to add or remove items from your custom list. These will ensure you autoloot these items no matter what.
@refresh
This game is a buggy game, so we feel @refresh is essential for clarity purposes. Type @refresh to reload your visuals. If a monster bugs out and remains on screen, you feel you might be position bugged, etc you can use this command to clarify what is actually on your screen.
@iteminfo and @mobinfo
Same as other private servers, these simply help you search for items and monsters in the database. Important to note that our marketplace on the website requires item ID currently, so using @iteminfo to find out the desired items ID is useful for searching.
@whereis
This one just helps the player find out what maps a monster resides on. Type @whereis and either the monster name or the monster id. If your search isn't working try looking up the desired mobs exact ID with @mobinfo first!
@settings
(Account-wide) This command will open the settings menu which allows to save specific settings upon login. This will save settings such as @autoloot, @showexp, and chat channels.
@hidepet
This command will hide all pets on screen
@hidepettalk
Mutes all pet random chatter
@killcount
Track how many kills you've done vs a specific mob with @killcount. You type @killcount and the mob ID number to see how many in the last 7 days (server days not 168 hours). See how unlucky you are, or maybe that you haven't killed as many as you thought you did!
@fastregen
Enables or disables the sitting regen feature. It will be on by default but you can turn it off in settings or using the command anytime. (Mainly used for Star Gladiators to reset their maps/feelings using the official doridori method.)
@eventexp
(Only during the Sweets Festival event) Spawns Sweet Annie NPC from anywhere to receive your EXP buffs using Sweets Festival Coins without having to go all the way to the main office in Prontera.
@droploot
Type @droploot +(itemid) to always drop an item on the ground when farming. You can remove with the same command but a -. (Please note: @alootid will take priority over this command)
@itemcaptor
This command displays your current item captor count.
@dailyexp
This command allows you to obtain your daily exp buff without having to go all the way to the main office in Prontera (can be used from anywhere).
