Difference between revisions of "Sign Quest"
| Line 1: | Line 1: | ||
| + | * This guide may be missing some important information. If you feel something is missing in this guide, [https://forums.warpportal.com/index.php?/topic/249265-request-from-players-sign-quest-updated-guide/ click here]. | ||
{{Quest Info | {{Quest Info | ||
| levelreq = 50 | | levelreq = 50 | ||
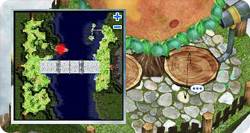
| joblevelreq = | | joblevelreq = | ||
| classreq = | | classreq = | ||
| − | | itemreq = | + | | itemreq = {{Item List |id=914 |item=Fluff |simple=yes |num=100 }}<br> |
| + | {{Item List |id=7033 |item=Poison Spore |simple=yes |num=50 }}<br /> | ||
| + | {{Item List |id=904 |item=Scorpion Tail |simple=yes |num=30 }}<br /> | ||
| + | {{Item List |id=930 |item=Rotten Bandage |simple=yes |num=20 }}<br /> | ||
| + | {{Item List |id=1038 |item=Little Evil Horn |simple=yes |num=15 }}<br /> | ||
| + | {{Item List |id=1092 |item=Empty Test Tube |simple=yes |num=10 }}<br /> | ||
| + | {{Item List |id=610 |item=Yggdrasil Leaf |simple=yes |num=2 }}<br /> | ||
| + | {{Item List |id=511 |item=Green Herb |simple=yes |num=10 }}<br /> | ||
| + | Various Art Items<br /> | ||
| + | {{Item List |id=526 |item=Royal Jelly |simple=yes |num=10 }}<br /> | ||
| + | {{Item List |id=518 |item=Honey |simple=yes |num=20 }}<br /> | ||
| + | {{Item List |id=948 |item=Bear's Footskin |simple=yes |num=30 }}<br /> | ||
| + | {{Item List |id=520 |item=Hinalle Leaflet |simple=yes |num=1 }}<br /> | ||
| + | {{Item List |id=708 |item=Ment |simple=yes |num=1 }}<br /> | ||
| + | {{Item List |id=713 |item=Empty Bottle |simple=yes |num=1 }}<br /> | ||
| + | {{Item List |id=612 |item=Mini Furnace |simple=yes |num=5 }}<br /> | ||
| + | {{Item List |id=615 |item=Oridecon Hammer |simple=yes |num=2 }}<br /> | ||
| + | {{Item List |id=988 |item=Golden |simple=yes |num=1 }} or {{Item List |id=989 |item=Emperium Anvil |simple=yes |num=1 }}<br /> | ||
| + | {{Item List |id=2278 |item=Mr. Smile |simple=yes |num=1 }}<br /> | ||
| + | {{Item List |id=1097 |item=Worn Out Page |simple=yes |num=10 }}<br /> | ||
| + | {{Item List |id=2203 |item=Glasses |simple=yes |num=1 }}<br /> | ||
| + | {{Item List |id=907 |item=Resin |simple=yes |num=4 }}<br /> | ||
| + | {{Item List |id=953 |item=Stone Heart |simple=yes |num=12 }}<br /> | ||
| + | {{Item List |id=7013 |item=Coral Reef |simple=yes |num=375 }} | ||
| nitemreq = 1 Level 4 Weapon | | nitemreq = 1 Level 4 Weapon | ||
| zenyreq = 100,000 | | zenyreq = 100,000 | ||
| questreq = | | questreq = | ||
| − | | questscoreq =[[Language Quest|Umbala Language Quest]] | + | | questscoreq =[[Language Quest|Umbala Language Quest]]<br>[[Piano Keys Quest]]<br>Mr. Smile Assistance |
| − | | baseexpreward = | + | | baseexpreward = At least 3,000,000. More depending on options selected. |
| jobexpreward = | | jobexpreward = | ||
| − | | itemreward = {{ | + | | itemreward = {{Item List |id=7025 |item=Lucifer's Lament|num=1 |simple=yes}} and<br>{{Item List |id=2644 |item=The Sign|num=1 |simple=yes}} |
| − | | qreward = Cursed Water Fountain | + | | qreward = Cursed Water Fountain (turns {{Item|id=713 Empty Bottle}} into {{Item|id=12020 Cursed Water}}) |
| + | | window = yes | ||
}} | }} | ||
==Part 1: Crumbs of Sobbing Starlight== | ==Part 1: Crumbs of Sobbing Starlight== | ||
| + | *Tip: Since there are plenty of locations to visit, take advantage of the new Navigation Feature. Click on the location links to copy the coordinates and command. Press Ctrl+V with your chat box open, then press enter. The arrows will lead you to the destination. | ||
1. Read the Announcement on a notice board in one of the cities. All the announcements are the same, so it is only necessary to read one. | 1. Read the Announcement on a notice board in one of the cities. All the announcements are the same, so it is only necessary to read one. | ||
| Line 24: | Line 50: | ||
* [[Al De Baran]]: (54 223) | * [[Al De Baran]]: (54 223) | ||
| − | 2. Enter a Prontera building | + | 2. Enter a Prontera building {{Navi|prontera |263|275}} and talk to the Archeologist Metz {{Navi|prt_in |227|45}} about the announcement. Speak to him again and agree to help him. He mentions Arian, who first tests you for your competency. |
| − | + | :[[File:Thesign-Metz.png]] | |
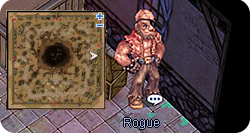
| − | + | 3. Go inside a [[Morroc]] building {{Navi|morocc |283|173}} and talk to the rogue Arian {{Navi|morocc_in |115|154}} for the first test. He desires the following sets of items ('''bring only the set he asks for each time and NO other sets''', i.e. not 100 {{item |id=914 Fluff}} and 50 {{item |id=7033 Poison Spore}} at the same time. Otherwise, he will take all the quest items and you'll need to recollect): | |
| − | |||
| − | |||
| − | |||
| − | |||
| − | |||
| − | 4. After Arian has all the items he wanted, speak to the Young Man, Gaanan | + | :[[File:Thesign-Arian.png]] |
| + | |||
| + | * {{Item List|id=914 |item=Fluff |num=100 |simple=yes}} | ||
| + | * {{Item List|id=7033 |item=Poison Spore |num=50 |simple=yes}} | ||
| + | * {{Item List|id=904 |item=Scorpion Tail |num=30 |simple=yes}} | ||
| + | * {{Item List|id=930 |item=Rotten Bandage |num=20 |simple=yes}} | ||
| + | * {{Item List|id=1038 |item=Little Evil Horn |num=15 |simple=yes}} | ||
| + | * {{Item List|id=7013 |item=Coral Reef |num=10 |simple=yes}} | ||
| + | |||
| + | *'''Tip''': Have a friend mail the items to you one set at a time. | ||
| + | |||
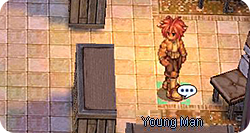
| + | 4. After Arian has all the items he wanted, speak to the Young Man, Gaanan {{Navi|morocc_in |114|162}} above him. Gaanan will asks 5 questions, to which the answers are: | ||
| + | |||
| + | :[[File:Thesign-Gaanan.png]] | ||
* 1. Stranded on an island: Fourth option | * 1. Stranded on an island: Fourth option | ||
| Line 43: | Line 77: | ||
* 5. The world is going to end: Fourth option (save the world) | * 5. The world is going to end: Fourth option (save the world) | ||
| − | After answering correctly, talk to Arian to be rewarded with a {{ | + | After answering correctly, talk to Arian to be rewarded with a {{Item List |id=7177 |item=Crumb of Sobbing Starlight |num=1 |simple=yes}} and 18,000 Base EXP. Now journey to [[Payon]] to find Daewoon for the second test. |
| + | |||
| + | * 111 GX received 40,500 Base EXP (VIP) | ||
| + | |||
| + | 5. Go inside a Payon building {{Navi|payon |130|204}} and talk to Daewoon, three rooms SOUTH WEST of the entrance {{Navi|payon_in03 |11|31}}. Select any option to "Do you have any idea what that jewel you're holding actually is?" and begin his test. You will receive different EXP based on your response here. Whether you suceed will depend on how much your answers appeal to him. The best choices see below. | ||
| − | + | :[[File:Thesign-Daewoon.png]] | |
* 1. Option #1, '''Yes''' | * 1. Option #1, '''Yes''' | ||
| Line 53: | Line 91: | ||
* 5. Option #1, '''Yes ''' | * 5. Option #1, '''Yes ''' | ||
| − | You can take the test again if you failed. If you succeeded, Daewoon then | + | You can take the test again if you failed. If you succeeded, Daewoon then gives you a {{Item List |id=7177 |item=Crumb of Sobbing Starlight |num=1 |simple=yes}} and 18,000 Base EXP, bringing the total to two. |
| + | |||
| + | * 111 GX received 40,500 Base EXP (VIP) | ||
| + | |||
| + | *'''Note:''' ''For question 3, the option "Close my eyes and attack/smash it" is also accepted.'' | ||
| + | |||
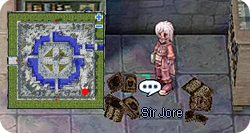
| + | 6. Enter the lower right Aldebaran building {{Navi|aldebaran |223|56}} and find Sir Jore {{Navi|aldeba_in |155|101}}. He asks for the following items after he fails his experiment. | ||
| + | |||
| + | *'''Note:''' ''While Sir Jore can only be spoken to start his portion at any time you need to return to him prior to 10pm (Pacific Time) that day. If this time is missed, continue again tomorrow.'' | ||
| − | + | :[[File:Thesign-Sir-Jore.png]] | |
| − | * | + | * {{Item List|id=1092|item=Empty Test Tube|num=10 |simple=yes}} (purchasable at tool dealer in Geffen Mage academy) |
| + | * {{Item List|id=610|item=Yggdrasil Leaf|num=2 |simple=yes}} | ||
| + | * {{Item List|id=511|item=Green Herb|num=10 |simple=yes}} | ||
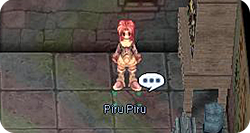
| − | + | 7. After collecting the items, Sir Jore requires information about the Stone of Sage from two famous alchemists. Talk to Piru Piru {{Navi|aldeba_in |156|118}}, just north west from Sir Jore) and she'll reveal the location of the two alchemists: the south forest. | |
| − | + | :[[File:Thesign-Piru Piru.png]] | |
| − | |||
| − | |||
| − | + | *'''Note:''' ''This step is OPTIONAL, and only exists to give the player some more guidance. You can go straight to step 8.'' | |
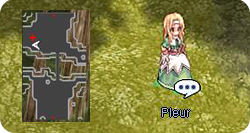
| − | 8. First, find the daughter Pleur on the second floor of the Hidden Temple | + | 8. First, find the daughter Pleur on the second floor of the Hidden Temple {{Navi|prt_maze02 |57|151}}. |
| + | |||
| + | :[[File:Thesign-Pleur.png]] | ||
* If entered the maze from prt_fild01: go up, down, left, right, down, up, left, up, up, left to reach the second floor. | * If entered the maze from prt_fild01: go up, down, left, right, down, up, left, up, up, left to reach the second floor. | ||
| Line 80: | Line 128: | ||
: it is faster to just return to a save point and come back to the maze again from either (prt_fild01) or (mjolnir_12). | : it is faster to just return to a save point and come back to the maze again from either (prt_fild01) or (mjolnir_12). | ||
| − | * Note: It is possible to use Teleport level 1 or Fly Wings to get to the spot where the father and daughter alchemists are. It may take a while, but can potentially be less stressful than getting "lost". | + | *'''Note:''' ''It is possible to use Teleport level 1 or Fly Wings to get to the spot where the father and daughter alchemists are. It may take a while, but can potentially be less stressful than getting "lost".'' |
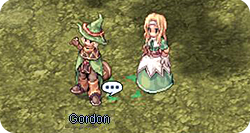
| − | 9. Once caught up with them | + | 9. Once caught up with them {{Navi|prt_maze02 |14|183}} & {{Navi|prt_maze02 |16|183}}, talk to Gordon and select the second option about the Stone. After that expect to be teleported to one south of [[Aldebaran]] (mjolnir_12). |
| − | + | :[[File:Thesign-Gordon.png]] | |
| − | + | 10. Tell Sir Jore what was discovered about the Stone of Sage from Gordon. When he asks what the Stone of Sage is, enter the response [Red Gemstone]. He'll hand over the third {{Item List |id=7177 |item=Crumb of Sobbing Starlight |num=1 |simple=yes}} and mentions Jesqurienne in [[Geffen]]. | |
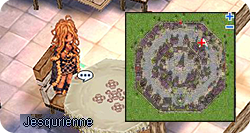
| − | + | 11. Inside the top right Geffen building {{Navi|geffen |168|170}} is a female drinker, Jesqurienne {{Navi|geffen_in |59|74}}. Tell her you've heard of her, and then call her a '''stuck-up chick''' to accept her challenge. | |
| − | |||
| − | |||
| − | |||
| − | |||
| − | |||
| − | |||
| − | |||
| − | |||
| − | |||
| − | |||
| − | |||
| − | |||
| − | |||
| − | |||
| − | |||
| − | |||
| − | |||
| − | |||
| − | |||
| − | + | :[[File:Thesign-Jesqurienne.png]] | |
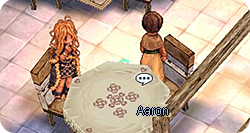
| − | 12. | + | 12. Talk to her boyfriend Aaron at the same table to begin the challenge. In order to win, more or equal questions must be answered correctly than Jesqurienne. The ten multiple choice questions presented will also be chosen at random. |
| − | + | :[[File:Thesign-Aaron.png]] | |
| − | + | Examples of some questions are: | |
| + | <blockquote style="background: white; border: 1px solid rgb(153, 153, 153); padding: 1em; width: 60%;"> | ||
| + | <ul> | ||
| + | <li>Which NPC is not relevant to the Blacksmith Job Quest?: '''Barcardi'''</li> | ||
| + | <li>Which item is not relevant to the creation of a Counteragent?: '''Karvodailnirol'''</li> | ||
| + | <li>Choose the monster that is a different size than the others.: '''Marine'''</li> | ||
| + | <br> | ||
| + | <li>Choose the skill related to the Priest's B.S. Sacramenti from the ones displayed in the list.: '''Gloria'''</li> | ||
| + | <li>Choose the material that is not related to the creation of a Condensed White Potion.: '''Empty Bottle'''</li> | ||
| + | <li>Choose the item that is"necessary for a Blacksmith"to create a Gladius.: '''Sapphire'''</li> | ||
| + | <br> | ||
| + | <li>Choose the property that is unrelated to the Mage's Bolt type skills.: '''Earth'''</li> | ||
| + | <li>What is the Bunny Band's DEF and its added ability?: '''LUK +2:2'''</li> | ||
| + | <li>Choose the prefix or suffix that is incorrectly matched with its Monster Card name.: '''Golem - Immortal'''</li> | ||
| + | <br> | ||
| + | <li>Choose the correct name of the ruler of the Rune-Midgarts Kingdom.: '''Tristram III'''</li> | ||
| + | <li>Choose the monster that is a different type than the others.: '''Penomena'''</li> | ||
| + | <br> | ||
| + | <li>Choose the monster which does not drop the 'Yggdrasil Leaf' item.: '''Marduk'''</li> | ||
| + | <li>Choose the job class that cannot equip Silk Robe.: '''Hunter'''</li> | ||
| + | <li>Choose the level requirement for entering the PvP Room.: '''31'''</li> | ||
| + | <br> | ||
| + | <li>What is the correct weight for 1 Empty Bottle?: '''2'''</li> | ||
| + | <li>Choose the correct DEF for the Indian Filet item.: '''3'''</li> | ||
| + | <li>What is the city closest to Turtle Island?: '''Alberta'''</li> | ||
| + | <br> | ||
| + | <li>Fifty-one multiplied by fifteen, divided by three, plus five is equal to...?: '''260'''</li> | ||
| + | <li>Four thousand five hundred sixty divided by four, divided by two, plus three is equal to...?: '''573'''</li> | ||
| + | <li>Three thousand one hundred two added to five hundred, plus four, divided by six equals...: '''601'''</li> | ||
| + | <br> | ||
| + | <li>Choose the building that is the closest to the Item Upgrade Place in Juno.: '''Weapon Shop'''</li> | ||
| + | <li>Choose the Hunter's Trap skill which does not inflict Property Damage.: '''Shockwave Trap'''</li> | ||
| + | <br> | ||
| + | <li>Which monster would receive the most damage from a Fire Property Dagger?: '''Hammer Goblin'''</li> | ||
| + | <li>Choose the monster on which the Mage skill, 'Stone Curse,' is ineffective: '''Evil Druid'''</li> | ||
| + | <br> | ||
| + | <li>Choose the NPC that looks different than all the others.: '''Izlude Meat Merchant'''</li> | ||
| + | <li>Choose the item that cannot be equipped by Novice class characters.: '''Wooden Mail'''</li> | ||
| + | </ul> | ||
| + | </blockquote> | ||
| − | + | *'''Note:''' ''If taking too long to answer, the quiz will be restarted.'' | |
| + | |||
| + | After beating her, input your character's name and to receive a fourth {{Item List |id=7177 |item=Crumb of Sobbing Starlight |num=1 |simple=yes}}. | ||
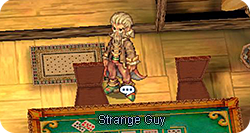
| − | + | 13. Go inside the [[Comodo]] casino {{Navi|comodo |153|97}}, and proceed to the second floor. Talk to a Strange Guy, Dearles {{Navi|cmd_in02 |88|51}}. First, he needs: 30,000 zeny. | |
| − | |||
| − | |||
| − | |||
| − | |||
| − | |||
| − | |||
| − | |||
| − | |||
| − | |||
| − | |||
| − | |||
| − | |||
| − | |||
| − | [[ | + | :[[File:Thesign-Dearles.png]] |
| − | |||
| − | * | + | *'''Note:''' ''This step you must wait 23 hours before you can continue. You can check the time in your quest tracker.'' |
| − | |||
| − | |||
| − | |||
| − | |||
| − | |||
| − | |||
| − | |||
| − | |||
| − | |||
| − | |||
| − | |||
| − | + | 14. Now he'll ask for artsy items. You must collect 11 or more points worth of '''different''' artsy items in order to continue. | |
| − | |||
| − | |||
| − | |||
| − | + | Here are all of the known examples: (w/ point values and npc location listed next to them) | |
| − | + | {| class="wikitable" | |
| + | |- | ||
| + | ! Points !! Artsy items | ||
| + | |- | ||
| + | | 1pt | ||
| + | || | ||
| + | * {{Item List|id=734 |item=Red Frame |num=1 |simple=yes}} - Gift Merchant (Prontera) | ||
| + | * {{Item List|id=735 |item=Chung Jah |num=1 |simple=yes}} - Gift Merchant (Prontera) | ||
| + | * {{Item List|id=736 |item=China |num=1 |simple=yes}} - Gift Merchant (Prontera) | ||
| + | * {{Item List|id=7149 |item=Yellow Plate |num=1 |simple=yes}} | ||
| + | * {{Item List|id=740 |item=Puppet |num=1 |simple=yes}} - Doll Merchant (Prontera) | ||
| + | * {{Item List|id=741 |item=Poring Doll |num=1 |simple=yes}} - Doll Merchant (Prontera) | ||
| + | |- | ||
| + | | 2pt || | ||
| + | * {{Item List|id=747 |item=Crystal Mirror |num=1 |simple=yes}} - Trader (Morroc Ruins 113,126) | ||
| + | * {{Item List|id=742 |item=Chonchon Doll |num=1 |simple=yes}} - Doll Merchant (Prontera) | ||
| + | |- | ||
| + | | 3pt || | ||
| + | * {{Item List|id=743 |item=Spore Doll |num=1 |simple=yes}} | ||
| + | * {{Item List|id=752 |item=Rocker Doll |num=1 |simple=yes}} | ||
| + | |- | ||
| + | | 4pt || | ||
| + | * {{Item List|id=749 |item=Frozen Rose |num=1 |simple=yes}} | ||
| + | * {{Item List|id=753 |item=Yoyo Doll |num=1 |simple=yes}} | ||
| + | * {{Item List|id=754 |item=Raccoon Doll |num=1 |simple=yes}} | ||
| + | |- | ||
| + | | 7pt || | ||
| + | * {{Item List|id=751 |item=Osiris Doll |num=1 |simple=yes}} | ||
| + | * {{Item List|id=750 |item=Baphomet Doll |num=1 |simple=yes}} | ||
| + | |} | ||
| − | + | After you hand them to him, you will receive 13,000 EXP. | |
| + | * 112 GX received 29,250 Base EXP (VIP) | ||
| − | + | [[Image:Ddr.jpg|right]] | |
| + | 15. Finally, Dearles proposes a dancing test. | ||
| + | :[[File:Thesign-Examener.png]] | ||
| + | <blockquote> | ||
| + | Steps: | ||
| + | * up left | ||
| + | * down right | ||
| + | * down left & up right | ||
| + | * down right | ||
| + | * down left & up right & up left & stay center | ||
| + | * down left & down right & down left | ||
| + | * down right & center & down right | ||
| + | * down left & up left & up right & down right & center | ||
| + | * down left & up right & up left & down right | ||
| + | * up right & down right & up right & down right | ||
| + | * up left & up right & center & up right & down left & down right | ||
| + | </blockquote> | ||
| + | *'''Note:''' ''Any movement speed enhancing items/buffs are recommended, but not necessary.'' | ||
| + | *'''Note:''' ''You don't have to reach the end of the spot, just touch one of the first lines of the step to make it count. This strategy helps out to successfully finish the test.'' | ||
| + | *'''Note:''' ''When a "Hide" spot is seen at the dancing test room, move to it to "Unhide" the spot, indicating a dance move was performed correctly.'' | ||
| + | *'''Note:''' ''The last part is tricky: sometimes it's the center sometimes it's down, even if it says center. Be sure to check the "Hide" spot for the last part.'' | ||
| − | + | 16. After the dance examiner states the test was passed, talk to Dearles for the fifth {{Item List |id=7177 |item=Crumb of Sobbing Starlight |num=1 |simple=yes}} and 16,830 EXP. | |
| + | * 112 GX received 38,250 Base EXP (VIP) | ||
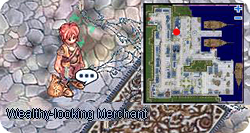
| − | * {{ | + | 17. Leave to [[Alberta]] to find Bakerlan, the Wealthy looking Merchant. He is located inside a top left Alberta building {{Navi|alberta |93|203}} in the first room upstairs {{Navi|alberta_in |125|101}}. |
| − | * {{ | + | :[[File:Thesign-Bakerlan.png]] |
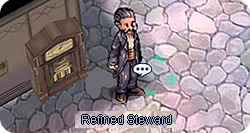
| − | * {{ | + | 18. He's busy and send you to his butler, Refined Steward, Mahatra {{Navi|alberta_in |114|178}}. Find Mahatra on the first floor. He requires a Stone to be sent to a Crusader in Juno. |
| − | * {{ | + | :[[File:Thesign-Mahatra.png]] |
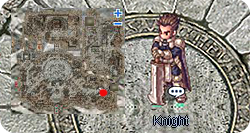
| − | * {{ | + | 19. Go to [[Juno]] and find a crusader, Leibech {{Navi|yuno |330|100}}. He gives you a Receipt in turn for the Stone. Then went back for Mahatra. |
| − | * {{ | + | :[[File:Thesign-Leibech.png]] |
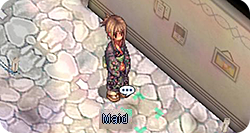
| + | 20. Mahatra needs you to speak to his boss, Bakerlan. Bakerlan will say you still need experience and asks you go back to Mahatra and ask for another test! Mahatra gives you a quest to help the Maid, Seylin {{Navi|alberta_in |154|171}} in the second floor corridor. Seylin will ask your help to get {{item |id=7044 Vigorgra}} as a gift for her brother. | ||
| + | :[[File:Thesign-Seylin.png]] | ||
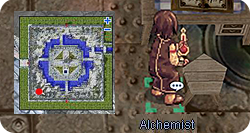
| + | 21. Proceed to the Alchemist Guild in [[Aldebaran]] {{Navi|aldebaran |68|56}} and find an Alchemist, Melkaba {{Navi|alde_alche |169|162}}, downstairs and to the right. | ||
| + | :[[File:Thesign-Melkaba.png]] | ||
| + | He'll create {{item |id=7044 Vigorgra}} with the following ingredients: | ||
| + | * {{Item List|id=526 |item=Royal Jelly|num=10 |simple=yes}} | ||
| + | * {{Item List|id=518 |item=Honey|num=20 |simple=yes}} | ||
| + | * {{Item List|id=948 |item=Bear's Footskin|num=30 |simple=yes}} | ||
| + | * {{Item List|id=520 |item=Hinalle Leaflet|num=1 |simple=yes}} | ||
| + | * {{Item List|id=708 |item=Ment|num=1 |simple=yes}} | ||
| + | * {{Item List|id=713 |item=Empty Bottle|num=1 |simple=yes}} | ||
* 10,000 Zeny | * 10,000 Zeny | ||
| − | Note: He does have a chance to fail so you might have to look for these items again. | + | *'''Note:''' ''He does have a small chance to fail so you might have to look for these items again.'' |
| + | *'''Note:''' ''In Poring server (RO:T), he is located outside of the building in {{Navi|aldebaran |71|52}}.'' | ||
| + | |||
| + | 22. After receiving the {{item |id=7044 Vigorgra}}, go back to Seylin. She'll need the Vigorgra and a letter send to her brother at [[Prontera]] Castle. | ||
| + | |||
| + | 23. Go to Prontera Castle and find her brother, Maruin {{Navi|prt_castle |107|58}}, at the entrance of the banquet hall. | ||
| − | + | :[[File:Maruin_new.jpg]] | |
| − | + | 24. After he gets the items, return to Seylin. She rewards you with 3 {{item |id=525 Panacea}}. | |
| − | + | 25. Then go downstairs and talk to Mahatra. Mahatra will send you up to Bakerlan. Finally Bakerlan say you've passed the test and gives you the sixth {{Item List |id=7177 |item=Crumb of Sobbing Starlight |num=1 |simple=yes}}. | |
| − | * Receive | + | * Receive 45,000 Base EXP (VIP, 112 GX). |
| − | + | 25. Return to Metz in [[Prontera]]. He will give you the 7th and last {{Item List |id=7177 |item=Crumb of Sobbing Starlight |num=1 |simple=yes}}. He'll tell you more information about the Crumb of Sobbing Starlights. | |
==Part 2: The Complete Sobbing Starlight== | ==Part 2: The Complete Sobbing Starlight== | ||
| − | 1. Continue talking to Metz. He tells you that if you can merge all the {{item |id=7177 | + | 1. Continue talking to Metz. He tells you that if you can merge all the {{item |id=7177 Crumb of Sobbing Starlight}}s into the {{Item List|id=7178|item=Sobbing Starlight|simple=yes}}, he'll reveal more secrets. But there's only one Blacksmith who has the skill to forge it and no one knows his whereabouts. Metz tells you his family lives in Geffen. |
| + | |||
| + | *'''Note:''' ''You'll need to talk to him few times to activate the second quest.'' | ||
| + | |||
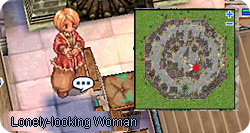
| + | 2. Go to a Geffen building {{Navi|geffen |138|101}} and find a Lonely Looking Woman, Brenda {{Navi|geffen_in |159|48}}. You'll need to key in her husband's name '''Engel Howard'''. She'll tell you they moved to Geffen because it's near her husband's work place. | ||
| + | |||
| + | :[[File:Thesign-Brenda-Howard.png]] | ||
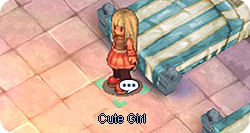
| − | + | 3. She asks you go talk to Cute Girl, Liana {{Navi|geffen_in |171|42}}. The cute little girl will ask you to send a Picture Letter to her father. | |
| − | + | :[[File:Thesign-Liana.png]] | |
| − | * To get the drawing you must select the "..." answer after telling | + | *'''Note:''' ''To get the drawing you must select the "..." answer after telling Liana her dad misses her.'' |
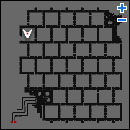
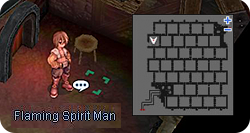
| − | + | 4. Head to the Coal Mines to find her father. Go to second floor of the dungeon and find Engel {{Navi|mjo_dun02 |88|295}} by using the hidden path from {{Navi|mjo_dun02 |64|295}}. | |
[[Image:Engelmap.jpg]] | [[Image:Engelmap.jpg]] | ||
| Line 201: | Line 316: | ||
Give the Picture Letter to him and tell him your intentions. He'll ask you to find the required ingredients to forge the Sobbing Starlight. | Give the Picture Letter to him and tell him your intentions. He'll ask you to find the required ingredients to forge the Sobbing Starlight. | ||
| − | * {{ | + | * {{Item List |id=612 |item=Mini Furnace|num=5 |simple=yes}} |
| − | * {{ | + | * {{Item List |id=615 |item=Oridecon Hammer|num=2 |simple=yes}} |
| − | * {{ | + | * {{Item List |id=988 |item=Golden|num=1 |simple=yes}} or {{Item List |id=989 |item=Emperium Anvil|num=1 |simple=yes}} |
| − | * Note: The higher quality the anvil, the higher chance it'll succeed. {{item |id=989 Emperium Anvil}} is the best, but your anvil will not be returned once you give it to him. You get one chance with any anvil of your choice, but if that attempt fails, you will need to return with a {{item |id=988 Golden}} or | + | *'''Note:''' ''The higher quality the anvil, the higher chance it'll succeed. {{item |id=989 Emperium Anvil}} is the best, but your anvil will not be returned once you give it to him. You get one chance with any anvil of your choice, but if that attempt fails, you will need to return with a {{item |id=988 Golden}} or {{item |id=989 Emperium Anvil}} instead.'' |
After you pass over the items he needs, he'll ask you send the a letter to his Wife while waiting for him to complete the forging. | After you pass over the items he needs, he'll ask you send the a letter to his Wife while waiting for him to complete the forging. | ||
| − | + | 5. Go back to Geffen and pass the letter to his Wife, Brenda. Before you leave make sure to talk to the Cute Girl, Liana for a reward. | |
* Receive 10 {{item|id=529 Candy}}. | * Receive 10 {{item|id=529 Candy}}. | ||
| − | + | 6. Go back to the Coal Mines and talk to Engel. If he failed to forge it, recollect the ingredients and a higher quality anvil instead ({{item |id=988 Golden}} or {{item |id=989 Emperium Anvil}} only). If it succeeded, you'll get the {{Item List |id=7178 |item=Sobbing Starlight|simple=yes}}. Go back [[Prontera]] and talk to Metz. | |
| + | |||
| + | :[[File:Thesign-Engel.png]] | ||
| − | + | 7. When you tell Metz the good news, he's very happy you repaired the {{item |id=7178 Sobbing Starlight}}. Unfortunately, he can't read the ancient words inside of it, so he sends you to the Magician, Dhota in [[Geffen]]. | |
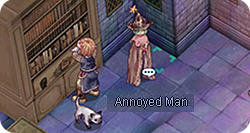
| − | + | 8. Go to the [[Geffen]] Tower {{navi|geffen|120|110}} and find Annoyed Man, Dhota {{Navi|gef_tower |118|36}} and the highest floor. Key in the [{{item |id=7178 Sobbing Starlight}}] and he'll ask you to go to Umbala to get the solution instead. | |
| + | |||
| + | :[[File:Thesign-Dhota.png]] | ||
* The [[Language Quest|Umbala Language Quest]] must be completed in order to continue. | * The [[Language Quest|Umbala Language Quest]] must be completed in order to continue. | ||
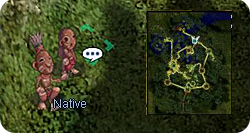
| − | + | 9. Go to Umbala and talk to a Native named Laotan {{Navi|umbala |163|256}} for clue. But he will only exchange the clue for a {{item |id=2278 Mr. Smile}}. | |
| + | |||
| + | :[[File:Thesign-Laotan.png]] | ||
* Talk to Miss Smile to make {{item |id=2278 Mr. Smile}} at Geffen/Prontera/Morroc/Alberta/Etc. Bring it to him. | * Talk to Miss Smile to make {{item |id=2278 Mr. Smile}} at Geffen/Prontera/Morroc/Alberta/Etc. Bring it to him. | ||
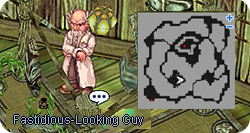
| − | + | 10. According to the Native, you must go to the building in Umbala {{Navi|umbala |108|118}} on the ground level, south of the spawn point. When you enter, you find a Fastidious-Looking Guy, Cyon {{Navi|um_in |27|23}}. After you tell him your intentions he'll ask you to collect 10 {{item |id=1097 Worn Out Page}}s. | |
| + | |||
| + | :[[File:Thesign-Cyon.png]] | ||
| − | + | '''Note: On servers that still have [[Umbala]] Dungeon (iRO Classic) Cyon is located inside a house at {{Navi|um_dun01 |129|90}}. | |
| − | After bringing him the required items, he hands over an Ancient | + | * {{Item List |id=1097 |item=Worn Out Page|num=10 |simple=yes}} |
| + | |||
| + | After bringing him the required items, he hands over an {{Item List|id=7275 |item=Record of Ancient Language|num=1 |simple=yes}}. Return to [[Prontera]] for Metz. | ||
==Part 3: The Ancient Document== | ==Part 3: The Ancient Document== | ||
| Line 235: | Line 360: | ||
1. Metz states Frank needs to translate the Ancient Document. | 1. Metz states Frank needs to translate the Ancient Document. | ||
| − | 2. Go to Alberta and to find a Fastidious Old Man, Frank | + | 2. Go to [[Alberta]] and to find a Fastidious Old Man, Frank {{Navi|alberta |165|83}}. But he seems to talking to himself and mumbles about his eyesight. |
| − | + | :[[File:Thesign-Frank.png]] | |
| − | + | * Go to Alberta's Armor Dealer and buy him a pair of {{Item List|id=2203 |item=Glasses|simple=yes}}. | |
| − | + | 3. Once he receives the {{item |id=2203 Glasses}}, he'll help translate the Ancient Document. Once he finishes, keep talking to him until he gives you {{Item List|id=7274 |item=Translated Ancient Language|num=1 |simple=yes}} (2% chance). | |
| − | + | 4. Now go collect these items and bring them to the Giant Telescope in the West Geffen Field {{Navi|gef_fild07 |178|244}}. | |
| − | |||
| − | |||
| − | + | :[[File:Thesign-Telescope.png]] | |
| − | + | * {{Item List|id=907 |item=Resin|num=4 |simple=yes}} | |
| + | * {{Item List|id=953 |item=Stone Heart|num=12 |simple=yes}} | ||
| + | * {{Item List|id=7013 |item=Coral Reef|num=365 |simple=yes}} | ||
| − | 6. Talk to the Metz again and he'll refer you to | + | Move onto one of the chairs {{Navi|gef_fild07 |182|241}} there to find an entrance to the Valkyrie Temple.<br /> |
| + | |||
| + | 5. Keep going up to find Valkyrie, Sandra {{Navi|himinn |48|85}}. After speaking to her, she kicks you out to [[Geffen]]. | ||
| + | * Received 787,500 Base EXP (112 GX; VIP) | ||
| + | |||
| + | 6. Talk to the Metz again and he'll refer you to [[Niflheim]]. | ||
* Note: The Witch's [[Piano Keys Quest]] must be completed to continue. | * Note: The Witch's [[Piano Keys Quest]] must be completed to continue. | ||
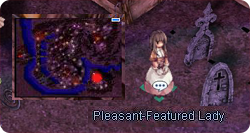
| − | 7. When arriving at Nifflheim find a Pleasant-Featured Lady, Serin | + | 7. When arriving at [[Nifflheim]] find a Pleasant-Featured Lady, Serin {{Navi|niflheim |313|70}}. She requires help: answer "Sure, go ahead" followed by "Sure, let's do it". The next answer determines how '''you''' wish to continue the quest. |
| − | A. Sure, why not? (Longer quest but receive {{ | + | :[[File:Thesign-Serin.png]] |
| + | |||
| + | A. Sure, why not? (Longer quest but receive {{Item List|id=2642 |item=Serin's Gold Ring|simple=yes}} as a reward along with some experience) | ||
B. Why should I help them. (Shorter quest) | B. Why should I help them. (Shorter quest) | ||
| − | + | Most NPCs here are DEAD NPCs. So in order to talk to them, walk near them to let them initiate a conversation. To talk back, click on the NPC's head. | |
== Part 4a: "Sure, why not?" == | == Part 4a: "Sure, why not?" == | ||
''' | ''' | ||
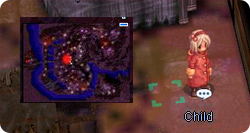
| − | 1. Once "I understand." is selected, track down a | + | 1. Once "I understand." is selected, track down a kid, Alakina Anne {{Navi|niflheim |169|162}}. She'll cry about wanting to go back home. After talking to her again "About the curse", she'll spew hints. |
| + | |||
| + | :[[File:Thesign-Anne.png]] | ||
* Walk near her and let her speak to you first then start clicking her head. | * Walk near her and let her speak to you first then start clicking her head. | ||
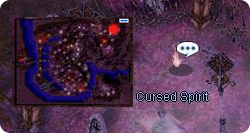
| − | 2. Go next to (don't click on it) the Cursed Spirit, Ashe Bruce | + | 2. Go next to (don't click on it) the Cursed Spirit, Ashe Bruce {{Navi|niflheim |350|258}}. He senses your strength, select the pull and read the 3rd book. You would be prompt to enter a spell, select the following options: Klaatu, Verata and Nictu (hidden 4th option). It takes a few tries of inputting this spell until his curse is finally broken. |
| + | |||
| + | :[[File:Thesign-Cursed-Spirit.png]] | ||
* 4th option is tricky, as it's in white. | * 4th option is tricky, as it's in white. | ||
| − | 3. When the curse is successfully broken, the Witch's Spell | + | 3. When the curse is successfully broken, the {{Item List|id=7304|item=Witch's Spell Scroll|simple=yes}} will be received. |
| − | 4. Go near Anne and she'll ask for help to go back. Choose " | + | 4. Go near Anne and she'll ask for help to go back. Choose "What can I do?" and then go find the Witch at the Witch Tower. |
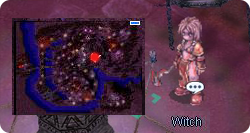
| − | 5. The Witch is in the highest building | + | 5. The Witch is in the highest building {{Navi|niflheim |254|191}} in Nifflheim. Follow the carpet in the Piano room and to enter the Witch's Room. DO NOT CLICK ON, but go stand next to the Witch, Kirkena {{Navi|nif_in |188|168}} (if you click on her you will be teleported back to Umbala) so she begins talking. (If she is clicked on, you can wait until the dialogue time-outs, about 60 seconds. The Next button will change to Close and you may try again.) Give her the Witch's Spell Book and choose "There's a lost child here I want to help." |
| − | She'll hand over a Wing | + | :[[File:Thesign-Kirkenna.png]] |
| + | |||
| + | She'll hand over a {{Item List|id=7309 |item=Crow Wing|simple=yes}}. The only way to escape from her room is to use a Butterfly Wing, Warp Portal, or click her head and be sent to the Umbala Jump Point. | ||
6. Go near Anne and she'll thank you. Then go near the Anne again and she'll say you lied to her, and she still can't go back. | 6. Go near Anne and she'll thank you. Then go near the Anne again and she'll say you lied to her, and she still can't go back. | ||
| Line 286: | Line 424: | ||
7. Go back to Kirkena for an explanation. She'll say the Wing Of Crow only can be used by living people, which means Anne is dead. | 7. Go back to Kirkena for an explanation. She'll say the Wing Of Crow only can be used by living people, which means Anne is dead. | ||
| − | 8. You did your best, so you head back and talk to Serin. Even though you can't help Alakina, she still thanks you. And as she promised, she'll give you her important item, {{ | + | 8. You did your best, so you head back and talk to Serin. Even though you can't help Alakina, she still thanks you. And as she promised, she'll give you her important item, {{Item List|id=2642 |item=Serin's Gold Ring|simple=yes}} as reward. Talk to Serin again and she'll ask you to find Greyryu the Poet. |
| − | * Don't equip {{ | + | * Don't equip {{Item List|id=2642 |item=Serin's Gold Ring|simple=yes}} during the quest, or it'll be confiscated by certain NPCs! |
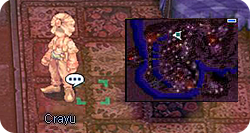
| − | 9. Go inside a Nifflheim building | + | 9. Go inside a [[Nifflheim]] building {{Navi|niflheim |187|241}} and you'll find Crayu {{Navi|nif_in |105|81}}. Go near Crayu. After answering a few questions he asks you to find Gen. |
| − | 10. You find a Depressing Man, Gen | + | : [[File:Crayu.png]] |
| + | |||
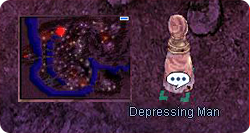
| + | 10. You find a Depressing Man, Gen {{Navi|niflheim |146|241}} just West of the building you enter. Talk to him and you find out he was the chosen one once, but failed, and he cautions you. He advises you to find the Witch for help. | ||
| + | |||
| + | : [[File:Thesign-Depressing-Man.png]] | ||
== Part 4b: "Why Should I Help Them?" == | == Part 4b: "Why Should I Help Them?" == | ||
| − | 1. Once you choose "Why should I help them?," find a Depressing Man, Gen | + | 1. Once you choose "Why should I help them?," find a Depressing Man, Gen {{Navi|niflheim |146|241}} just West of the building you entered. Talk to him and you find out he was the chosen one once, but failed, and he cautions you. He advises you to find the Witch for help.<br /> |
| − | 2. The Witch is at the highest building | + | 2. The Witch is at the highest building {{Navi|niflheim |254|191}} in Nifflheim. Follow the carpet in the Piano room and you'll enter the Witch's Room. Go near the Witch, Kirkena {{Navi|nif_in |188|168}} and she'll auto talk to you first. She'll ask you to find her Witch's Spell Book.<br /> |
| − | 3. Go near the Cursed Spirit, Ash Bruce | + | 3. Go near the Cursed Spirit, Ash Bruce {{Navi|niflheim |350|258}}. He senses your strength, select the pull and read the 3rd book. You would be prompt to enter a spell, select the following options: Klaatu, Verata and Nictu (hidden 4th option). |
* 4 is tricky, as it's in white. | * 4 is tricky, as it's in white. | ||
| − | 4. Go back to the witches castle. Enter the witches room by clicking on the speech bubble next to the portait in the 2nd floor | + | 4. Go back to the witches castle. Enter the witches room by clicking on the speech bubble next to the portait in the 2nd floor {{Navi|nif_in |139|176}}, return the Witch's Spell Book to Kirkena. |
== Part 5: Proving Yourself == | == Part 5: Proving Yourself == | ||
| − | 1. Go near the Witch, Kirkena and she'll tell you about the dangers of the quest. She also tell you to prove yourself is by bringing her the {{ | + | 1. Go near the Witch, Kirkena and she'll tell you about the dangers of the quest. She also tell you to prove yourself is by bringing her the {{Item List|id=7305 |item=Symbol of the Nine Realms|simple=yes}} and asks you to keep it as a secret. Go near her again and she'll ask you to come from the headstone near the stairs on the second floor the next time you visit. |
2. Go to Serin. You need to click on her 3 times. She'll tell you thing that the Witch didn't tell you. She also wants you to inform her first-hand once you get the Authority Of Nine World from the Ruler of the Dead and listen to the reasons why she needs these powers. | 2. Go to Serin. You need to click on her 3 times. She'll tell you thing that the Witch didn't tell you. She also wants you to inform her first-hand once you get the Authority Of Nine World from the Ruler of the Dead and listen to the reasons why she needs these powers. | ||
| − | 3. Now go back to the Giant Telescope in West Geffen Field | + | 3. Now go back to the Giant Telescope in West Geffen Field {{Navi|gef_fild07 |182|241}} to teleport to Valkyrie Temple (No need to bring any ingredients). Talk to Valkyrie, Sandra and she'll say she can't help you, but she'll give you support mentally.<br /> |
| − | 4. You're on your own now. So you go back Nifflheim to find more clues. You find a Mad Man, Laichin | + | 4. You're on your own now. So you go back [[Nifflheim]] to find more clues. You find a Mad Man, Laichin {{Navi|niflheim |102|54}} and he seems to have information you need for the quest! But he needs you to pay him twice, 40,000 Zeny and 20,000 Zeny. |
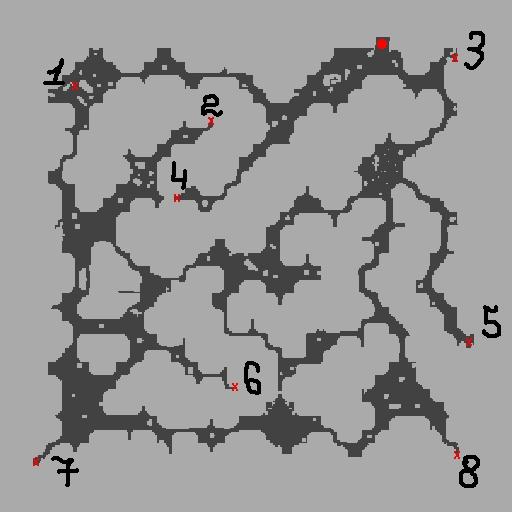
5. Listen carefully to the locations he mentions. The locations are random for each person and there are 4 locations you need to go out of a total of 8. Follow the sequence he mentions. | 5. Listen carefully to the locations he mentions. The locations are random for each person and there are 4 locations you need to go out of a total of 8. Follow the sequence he mentions. | ||
| − | [[Image:Gl_02spots.jpg | + | [[Image:Gl_02spots.jpg]] |
{| class="wikitable" | {| class="wikitable" | ||
! Number || Description || Cordinates | ! Number || Description || Cordinates | ||
|- | |- | ||
| − | | 1 || big 10 o'clock || {{ | + | | 1 || big 10 o'clock || {{navi|gl_dun02|43|251}} |
|- | |- | ||
| − | | 2 || small 11 o'clock || {{ | + | | 2 || small 11 o'clock || {{navi|gl_dun02|123|230}} |
|- | |- | ||
| − | | 3 || big 1 o'clock || {{ | + | | 3 || big 1 o'clock || {{navi|gl_dun02|263|267}} |
|- | |- | ||
| − | | 4 || very small 11 o'clock || {{ | + | | 4 || very small 11 o'clock || {{navi|gl_dun02|118|183}} |
|- | |- | ||
| − | | 5 || big 4 o'clock || {{ | + | | 5 || big 4 o'clock || {{navi|gl_dun02|273|97}} |
|- | |- | ||
| − | | 6 || small 6 o'clock || {{ | + | | 6 || small 6 o'clock || {{navi|gl_dun02|138|72}} |
|- | |- | ||
| − | | 7 || big 7 o'clock || {{ | + | | 7 || big 7 o'clock || {{navi|gl_dun02|19|27}} |
|- | |- | ||
| − | | 8 || big 5 o'clock || {{ | + | | 8 || big 5 o'clock || {{navi|gl_dun02|268|33}} |
|} | |} | ||
| − | The locations he mentions are in The Lowest Cave of Glast Heim ({{map|id=gl_dun02 gl_dun02}}). Bring a level 4 weapon. Keep the weapon in your inventory (not equipped). | + | The locations he mentions are in The Lowest Cave of Glast Heim ({{map|id=gl_dun02 gl_dun02}}). Bring a level 4 weapon from before the 10.1 update. [[Sign_Quest/weapons|Click here for a list of pre 10.1 level 4 weapons]]. Keep the weapon in your inventory (not equipped). |
6. Once there, click on the Mysterious Environment and it'll pop up with 3 types of message. | 6. Once there, click on the Mysterious Environment and it'll pop up with 3 types of message. | ||
| Line 349: | Line 491: | ||
** Wrong weapon. | ** Wrong weapon. | ||
* It shakes but there isn't any further response. Maybe it needs a greater impact to be activated. | * It shakes but there isn't any further response. Maybe it needs a greater impact to be activated. | ||
| − | ** Keep clicking the Mysterious Environment. | + | ** Keep clicking the Mysterious Environment. |
| + | * Perhaps you need something more powerful. (while having a pre-10.1 update level 4 weapon in your inventory NOT equipped) | ||
| + | ** Keep clicking the Mysterious Environment. | ||
| − | 7. You'll get | + | 7. You'll get a {{Item List|id=7306|item=Piece of Spirit|simple=yes}} once you break the seal. And when you break the fourth seal, you'll get the {{Item List|id=7307 |item=Spiritual Whispers|simple=yes}}. Go back to Nifflheim and talk to Depressing Man, Gen. |
8. Gen will identify himself as a servant to his master, Lady Hell. His master is looking for the Spiritual Whispers and he'll send you to an Unknown Area where his master resides. | 8. Gen will identify himself as a servant to his master, Lady Hell. His master is looking for the Spiritual Whispers and he'll send you to an Unknown Area where his master resides. | ||
| Line 359: | Line 503: | ||
10. Talk to her and she'll give you {{item |id=7305 Symbol of the Nine Realms}} in exchange for the Whisper of Soul. | 10. Talk to her and she'll give you {{item |id=7305 Symbol of the Nine Realms}} in exchange for the Whisper of Soul. | ||
| − | * You can click the fountain now. If you bring Empty | + | * You can click the fountain now. If you bring 1 Empty Bottle (and 3 Brigan if playing RO:T Poring Server), you'll exchange for a {{Item List|id=12020|item=Cursed Water|simple=yes}} each time you click the fountain. |
11. Now you have two choices. Either give the {{item |id=7305 Symbol of the Nine Realms}} to: | 11. Now you have two choices. Either give the {{item |id=7305 Symbol of the Nine Realms}} to: | ||
| Line 371: | Line 515: | ||
1. If you chose the Witch, Kirkena, go find her in her room through the headstone near the stairs on the second floor. | 1. If you chose the Witch, Kirkena, go find her in her room through the headstone near the stairs on the second floor. | ||
| − | She'll ask for the {{item |id=7305 Symbol of the Nine Realms}} and explain the reasons she needs it. If you got {{item |id=2642 Serin's Gold Ring}} earlier, she'll take it but will return it later and you can store the ring in kafra now (before that you couldn't store it). After that she'll give you 1 {{ | + | She'll ask for the {{item |id=7305 Symbol of the Nine Realms}} and explain the reasons she needs it. If you got {{item |id=2642 Serin's Gold Ring}} earlier, she'll take it but will return it later and you can store the ring in kafra now (before that you couldn't store it). After that she'll give you 1 {{Item List|id=7308 |item=Witch's Tonic|simple=yes}} and 5 {{Item List|id=7313 |item=Witch's Medal|simple=yes}}. |
* With 5 {{item |id=7313 Witch's Medal}}, you can bring 4 more partners in your party to assist you in defeating the quest monsters later on. You need to talk to the Witch to enter Serin's room before others can follow. In order for the others to help you fight, they will need to talk to the same gravestone that you do in order to get into the witch's room. They will need to have the seal on them. Do not let the extra partners lose any of the {{item |id=7313 Witch's Medal}}, they will need to be returned. | * With 5 {{item |id=7313 Witch's Medal}}, you can bring 4 more partners in your party to assist you in defeating the quest monsters later on. You need to talk to the Witch to enter Serin's room before others can follow. In order for the others to help you fight, they will need to talk to the same gravestone that you do in order to get into the witch's room. They will need to have the seal on them. Do not let the extra partners lose any of the {{item |id=7313 Witch's Medal}}, they will need to be returned. | ||
Kirkena found the location of Serin. Once you're ready, Kirkena will send you to a copy of nif_fild02 with many monsters on it: Ghouls, Succubus, Wraiths, Injustices, Evil Druids, and Ancient Mummies, which do not give EXP or drop anything. You must fight your way past them to get to the portal on the other side. Enter it, and you'll be in Serin's room. If you have people helping you, they'll be sent to Serin and must talk to her to get to where you are. | Kirkena found the location of Serin. Once you're ready, Kirkena will send you to a copy of nif_fild02 with many monsters on it: Ghouls, Succubus, Wraiths, Injustices, Evil Druids, and Ancient Mummies, which do not give EXP or drop anything. You must fight your way past them to get to the portal on the other side. Enter it, and you'll be in Serin's room. If you have people helping you, they'll be sent to Serin and must talk to her to get to where you are. | ||
| + | * In RO:T Poring server, you will just be sent straight to Serin. | ||
| + | * If you are helping someone with the quest, two options will appear. Pick the one that goes directly to Serin. | ||
2. You'll find Serin at the Unknown Area. Talk to her and chose "Stop her." | 2. You'll find Serin at the Unknown Area. Talk to her and chose "Stop her." | ||
| + | * If you select the option to change your mind and not stop her, you will fail this quest. | ||
3. Serin will summon monsters to attack you. Try not to stand near her when you talk to her. | 3. Serin will summon monsters to attack you. Try not to stand near her when you talk to her. | ||
| Line 387: | Line 534: | ||
* 2 {{monster|id=1192 Wraith}} | * 2 {{monster|id=1192 Wraith}} | ||
* 5 {{monster|id=1036 Ghoul}} | * 5 {{monster|id=1036 Ghoul}} | ||
| + | |||
| + | * Be aware that the Dark Illusion's damage display appears late, which registers hits early. Be cautious! | ||
| + | * You can spread out if you wish and defeat the monsters individually, not all at once. | ||
4. Once you beat the monsters, Serin will reappear. She'll tell you she's happy that she met you and she'll give up her dream and live peacefully in Nifflheim. Later on she'll send you back to the Witch's room. There is a 10 minute time limit on this battle. Every time you are kicked from the room due to a loss or a time out, there is a chance that you will fail the quest. | 4. Once you beat the monsters, Serin will reappear. She'll tell you she's happy that she met you and she'll give up her dream and live peacefully in Nifflheim. Later on she'll send you back to the Witch's room. There is a 10 minute time limit on this battle. Every time you are kicked from the room due to a loss or a time out, there is a chance that you will fail the quest. | ||
| − | 5. If you fail, the Nifflheim NPCs will no longer talk to you | + | 5. If you fail, the Nifflheim NPCs will no longer talk to you. |
== Part 6b: Serin the Pleasant-Featured Lady == | == Part 6b: Serin the Pleasant-Featured Lady == | ||
| − | 1. If you chose Pleasant-Featured Lady, Serin, go find Serin and pass her the {{item |id=7305 Symbol of the Nine Realms}}. She'll send you directly to her room | + | 1. If you chose Pleasant-Featured Lady, Serin, go find Serin and she explains that the witch is going to summon Dark Lord which will devastate the world, instead, to pass her the {{item |id=7305 Symbol of the Nine Realms}} to stop the witch. She'll send you directly to her room. |
| − | |||
| − | |||
| + | 2. In the room listen to her reasons for using the {{item |id=7305 Symbol of the Nine Realms}}. Serin has tricked you and she was the one who wanted to summon Dark Lord and so you must "Stop her". After talking to her, Dark Lord will appear. Talk to him and 1 Dark Illusion is summoned to attack you. There is a 10 minute time limit on this battle. Every time you are kicked from the room due to a loss or a time out, there is a chance that you will fail the quest. | ||
| + | * If you select the option to change your mind and not stop her, you will fail this quest. | ||
| + | * Be aware that the Dark Illusion's damage display appears late, which registers hits early. Be cautious! | ||
| + | * You can spread out and defeat the monsters individually, not all at once. | ||
3. Once you beat the Dark Illusion, Serin will reappear. She'll tell you she's happy that she met you and she'll give up her dream and live peacefully in Nifflheim. Later on she'll send you back to the Witch's room. | 3. Once you beat the Dark Illusion, Serin will reappear. She'll tell you she's happy that she met you and she'll give up her dream and live peacefully in Nifflheim. Later on she'll send you back to the Witch's room. | ||
== Part 7: The Sign == | == Part 7: The Sign == | ||
| − | 1. Talk to Kirkena and she's happy you stopped Serin. | + | 1. Talk to Kirkena and she's happy you stopped Serin. You'll get 500,000 (113 GX received 1,125,000 Base EXP; VIP) experience points as a reward. And she asks you to talk to Lady Hell once more. (if you took the witch path above, you need to have all 5 {{item |id=7313 Witch's Medal}} in your inventory) |
| + | |||
| + | '''2. (If you did 4a and 6a, optional, but needs to be done immediately if you choose to do so.) Go back to Serin (in Niflheim) and she will give you 500,000 base exp (1,125,000 VIP; 113 GX) if you return her ring to her (if you took the path that gave it). This must be done before talking to Lady Hell, otherwise Serin will tell you "....." and /sob or /... "..." ''' | ||
| + | *You will still be unable to return her ring if you help someone during the quest using Witch's Medal. | ||
| + | |||
| + | * Note: You can re-enter Kirkena room by using the picture near the stairs portal. | ||
| − | + | 3. Talk to Depressing Man, Gen to enter to Lady Hell room. When you meet Lady Hell, she won't have much to say to you. | |
| − | + | 4. Next, go the Valkyrie Temple and talk to Sandra. She's happy that you can complete the quest, and proved your courage to God. She'll give you {{item |id=7314 The Sign}} as proof that you are God's Chosen One. You'll be able to enter Valhalla with {{Item List|id=7314 |item=The Sign|simple=yes}}. | |
| − | + | 5. Go back to [[Prontera]] and pass {{item |id=7314 The Sign}} to Metz. He's pretty excited when you pass The Sign to him and he is glad you completed the quest. He'll start to study The Sign. | |
| − | + | * Metz takes some time to study {{item |id=7314 The Sign}}. Come back after 1 hour. | |
| + | *On Transcendence, take note of the time you turned in the quest and use this chart to determine what time you will be able to pick up the sign. This time will be the *only* time of day available for pick up every day. If you miss the window of opportunity one day, the same time period will be available the next day. Be careful of what time you turn it in so that it isn't available at a time you won't be able to go back to pick it up. | ||
| − | + | [[File:Signtimes.png]] | |
| − | + | 6. After taking The Sign, Metz asks you to bring it to Engel Howard {{Navi|mjo_dun02 |88|295}} to fix it. | |
| − | * Engel takes | + | * Engel takes some time to fix {{Item List|id=2644 |item=The Sign|simple=yes}} (into an equippable accessory). Come back after 1 hour. |
| + | *Transcendence use the same image for Metz to determine the pickup window. | ||
| − | + | 7. Bring {{item |id=2644 The Sign}} back to Metz. After he finds out the truth of The Sign, his wish is fulfilled. He will then give you 2,000,000 base EXP (114 GX received 4,500,000 Base EXP - VIP). | |
*It should be noted that the 5% [[ATK]] that {{item |id=2644 The Sign}} gives is a boost similar to a racial or elemental card, not a straight ATK boost. (aka, the ATK portion of The Sign will not affect skills like [[Soul Destroyer]], [[High Speed Cart Ram]] or [[Grand Cross]]) | *It should be noted that the 5% [[ATK]] that {{item |id=2644 The Sign}} gives is a boost similar to a racial or elemental card, not a straight ATK boost. (aka, the ATK portion of The Sign will not affect skills like [[Soul Destroyer]], [[High Speed Cart Ram]] or [[Grand Cross]]) | ||
| − | + | 8. Bring {{item |id=2644 The Sign}} and {{item |id=7178 Sobbing Starlight}} to Gen {{Navi|niflheim |146|241}}. Gen will warp you to his Master's room. Meet Lady Hell and pass the {{item |id=7178 Sobbing Starlight}} to her. Then sit back and watch the fireworks display! After the fancy display, Lady Hell will give you {{Item List|id=7025 |item=Lucifer's Lament|simple=yes}}. (Lucifer's Lament is storagable, which means you may use it on any character.) | |
| − | + | 9. Go to the [[Geffen]] Fountain and click on it to enter Geffenia. The portal will open temporarily North of the Fountain, and anyone regardless of class, level (even if have not complete the quest) may enter it. Be warned however that this map has strong monsters. | |
| + | == Failing the Quest == | ||
| + | If you fail the quest, you have the following options: | ||
| + | * Submit a support ticket to the server you play on. They may be able to reset the quest or rollback your progress. However, this may take a long time. | ||
| + | ** Some players get responses that there is nothing the GM can do. If that's the case, try contacting another mod or community mod. | ||
| + | * Do the quest on another character. Remember all your characters will have access to Lucifer's Lament. | ||
| + | * Delete your character and start all over. | ||
[[Category:Quests]] | [[Category:Quests]] | ||
[[Category:Einbroch Quests]] | [[Category:Einbroch Quests]] | ||
[[Category: Base Experience Reward]] | [[Category: Base Experience Reward]] | ||
Revision as of 21:02, 14 March 2023
- This guide may be missing some important information. If you feel something is missing in this guide, click here.
Contents
Part 1: Crumbs of Sobbing Starlight
1. Read the Announcement on a notice board in one of the cities. All the announcements are the same, so it is only necessary to read one.
2. Enter a Prontera building and talk to the Archeologist Metz about the announcement. Speak to him again and agree to help him. He mentions Arian, who first tests you for your competency. 3. Go inside a Morroc building and talk to the rogue Arian for the first test. He desires the following sets of items (bring only the set he asks for each time and NO other sets, i.e. not 100 Fluff and 50 Poison Spore at the same time. Otherwise, he will take all the quest items and you'll need to recollect):
4. After Arian has all the items he wanted, speak to the Young Man, Gaanan above him. Gaanan will asks 5 questions, to which the answers are:
After answering correctly, talk to Arian to be rewarded with a
5. Go inside a Payon building and talk to Daewoon, three rooms SOUTH WEST of the entrance . Select any option to "Do you have any idea what that jewel you're holding actually is?" and begin his test. You will receive different EXP based on your response here. Whether you suceed will depend on how much your answers appeal to him. The best choices see below.
You can take the test again if you failed. If you succeeded, Daewoon then gives you a
6. Enter the lower right Aldebaran building and find Sir Jore . He asks for the following items after he fails his experiment.
7. After collecting the items, Sir Jore requires information about the Stone of Sage from two famous alchemists. Talk to Piru Piru , just north west from Sir Jore) and she'll reveal the location of the two alchemists: the south forest.
8. First, find the daughter Pleur on the second floor of the Hidden Temple .
Once near her, one of two things will happen.
9. Once caught up with them & , talk to Gordon and select the second option about the Stone. After that expect to be teleported to one south of Aldebaran (mjolnir_12). 10. Tell Sir Jore what was discovered about the Stone of Sage from Gordon. When he asks what the Stone of Sage is, enter the response [Red Gemstone]. He'll hand over the third 11. Inside the top right Geffen building is a female drinker, Jesqurienne . Tell her you've heard of her, and then call her a stuck-up chick to accept her challenge. 12. Talk to her boyfriend Aaron at the same table to begin the challenge. In order to win, more or equal questions must be answered correctly than Jesqurienne. The ten multiple choice questions presented will also be chosen at random. Examples of some questions are:
After beating her, input your character's name and to receive a fourth 13. Go inside the Comodo casino , and proceed to the second floor. Talk to a Strange Guy, Dearles . First, he needs: 30,000 zeny.
14. Now he'll ask for artsy items. You must collect 11 or more points worth of different artsy items in order to continue. Here are all of the known examples: (w/ point values and npc location listed next to them)
After you hand them to him, you will receive 13,000 EXP.
15. Finally, Dearles proposes a dancing test.
16. After the dance examiner states the test was passed, talk to Dearles for the fifth
17. Leave to Alberta to find Bakerlan, the Wealthy looking Merchant. He is located inside a top left Alberta building in the first room upstairs . 18. He's busy and send you to his butler, Refined Steward, Mahatra . Find Mahatra on the first floor. He requires a Stone to be sent to a Crusader in Juno. 19. Go to Juno and find a crusader, Leibech . He gives you a Receipt in turn for the Stone. Then went back for Mahatra. 20. Mahatra needs you to speak to his boss, Bakerlan. Bakerlan will say you still need experience and asks you go back to Mahatra and ask for another test! Mahatra gives you a quest to help the Maid, Seylin in the second floor corridor. Seylin will ask your help to get Vigorgra as a gift for her brother. 21. Proceed to the Alchemist Guild in Aldebaran and find an Alchemist, Melkaba , downstairs and to the right. He'll create Vigorgra with the following ingredients:
22. After receiving the Vigorgra, go back to Seylin. She'll need the Vigorgra and a letter send to her brother at Prontera Castle. 23. Go to Prontera Castle and find her brother, Maruin , at the entrance of the banquet hall. 24. After he gets the items, return to Seylin. She rewards you with 3 Panacea. 25. Then go downstairs and talk to Mahatra. Mahatra will send you up to Bakerlan. Finally Bakerlan say you've passed the test and gives you the sixth
25. Return to Metz in Prontera. He will give you the 7th and last Part 2: The Complete Sobbing Starlight1. Continue talking to Metz. He tells you that if you can merge all the Crumb of Sobbing Starlights into the
2. Go to a Geffen building and find a Lonely Looking Woman, Brenda . You'll need to key in her husband's name Engel Howard. She'll tell you they moved to Geffen because it's near her husband's work place. 3. She asks you go talk to Cute Girl, Liana . The cute little girl will ask you to send a Picture Letter to her father.
4. Head to the Coal Mines to find her father. Go to second floor of the dungeon and find Engel by using the hidden path from . Give the Picture Letter to him and tell him your intentions. He'll ask you to find the required ingredients to forge the Sobbing Starlight.
After you pass over the items he needs, he'll ask you send the a letter to his Wife while waiting for him to complete the forging. 5. Go back to Geffen and pass the letter to his Wife, Brenda. Before you leave make sure to talk to the Cute Girl, Liana for a reward.
6. Go back to the Coal Mines and talk to Engel. If he failed to forge it, recollect the ingredients and a higher quality anvil instead (Golden or Emperium Anvil only). If it succeeded, you'll get the 7. When you tell Metz the good news, he's very happy you repaired the Sobbing Starlight. Unfortunately, he can't read the ancient words inside of it, so he sends you to the Magician, Dhota in Geffen. 8. Go to the Geffen Tower and find Annoyed Man, Dhota and the highest floor. Key in the [Sobbing Starlight] and he'll ask you to go to Umbala to get the solution instead.
9. Go to Umbala and talk to a Native named Laotan for clue. But he will only exchange the clue for a Mr. Smile.
10. According to the Native, you must go to the building in Umbala on the ground level, south of the spawn point. When you enter, you find a Fastidious-Looking Guy, Cyon . After you tell him your intentions he'll ask you to collect 10 Worn Out Pages. Note: On servers that still have Umbala Dungeon (iRO Classic) Cyon is located inside a house at . After bringing him the required items, he hands over an Part 3: The Ancient Document1. Metz states Frank needs to translate the Ancient Document. 2. Go to Alberta and to find a Fastidious Old Man, Frank . But he seems to talking to himself and mumbles about his eyesight.
3. Once he receives the Glasses, he'll help translate the Ancient Document. Once he finishes, keep talking to him until he gives you 4. Now go collect these items and bring them to the Giant Telescope in the West Geffen Field .
Move onto one of the chairs there to find an entrance to the Valkyrie Temple. 5. Keep going up to find Valkyrie, Sandra . After speaking to her, she kicks you out to Geffen.
6. Talk to the Metz again and he'll refer you to Niflheim.
7. When arriving at Nifflheim find a Pleasant-Featured Lady, Serin . She requires help: answer "Sure, go ahead" followed by "Sure, let's do it". The next answer determines how you wish to continue the quest. A. Sure, why not? (Longer quest but receive B. Why should I help them. (Shorter quest) Most NPCs here are DEAD NPCs. So in order to talk to them, walk near them to let them initiate a conversation. To talk back, click on the NPC's head. Part 4a: "Sure, why not?"
1. Once "I understand." is selected, track down a kid, Alakina Anne . She'll cry about wanting to go back home. After talking to her again "About the curse", she'll spew hints.
2. Go next to (don't click on it) the Cursed Spirit, Ashe Bruce . He senses your strength, select the pull and read the 3rd book. You would be prompt to enter a spell, select the following options: Klaatu, Verata and Nictu (hidden 4th option). It takes a few tries of inputting this spell until his curse is finally broken.
3. When the curse is successfully broken, the 4. Go near Anne and she'll ask for help to go back. Choose "What can I do?" and then go find the Witch at the Witch Tower. 5. The Witch is in the highest building in Nifflheim. Follow the carpet in the Piano room and to enter the Witch's Room. DO NOT CLICK ON, but go stand next to the Witch, Kirkena (if you click on her you will be teleported back to Umbala) so she begins talking. (If she is clicked on, you can wait until the dialogue time-outs, about 60 seconds. The Next button will change to Close and you may try again.) Give her the Witch's Spell Book and choose "There's a lost child here I want to help." She'll hand over a 6. Go near Anne and she'll thank you. Then go near the Anne again and she'll say you lied to her, and she still can't go back. 7. Go back to Kirkena for an explanation. She'll say the Wing Of Crow only can be used by living people, which means Anne is dead. 8. You did your best, so you head back and talk to Serin. Even though you can't help Alakina, she still thanks you. And as she promised, she'll give you her important item,
9. Go inside a Nifflheim building and you'll find Crayu . Go near Crayu. After answering a few questions he asks you to find Gen. 10. You find a Depressing Man, Gen just West of the building you enter. Talk to him and you find out he was the chosen one once, but failed, and he cautions you. He advises you to find the Witch for help. Part 4b: "Why Should I Help Them?"1. Once you choose "Why should I help them?," find a Depressing Man, Gen just West of the building you entered. Talk to him and you find out he was the chosen one once, but failed, and he cautions you. He advises you to find the Witch for help. 2. The Witch is at the highest building in Nifflheim. Follow the carpet in the Piano room and you'll enter the Witch's Room. Go near the Witch, Kirkena and she'll auto talk to you first. She'll ask you to find her Witch's Spell Book. 3. Go near the Cursed Spirit, Ash Bruce . He senses your strength, select the pull and read the 3rd book. You would be prompt to enter a spell, select the following options: Klaatu, Verata and Nictu (hidden 4th option).
4. Go back to the witches castle. Enter the witches room by clicking on the speech bubble next to the portait in the 2nd floor , return the Witch's Spell Book to Kirkena. Part 5: Proving Yourself1. Go near the Witch, Kirkena and she'll tell you about the dangers of the quest. She also tell you to prove yourself is by bringing her the 2. Go to Serin. You need to click on her 3 times. She'll tell you thing that the Witch didn't tell you. She also wants you to inform her first-hand once you get the Authority Of Nine World from the Ruler of the Dead and listen to the reasons why she needs these powers. 3. Now go back to the Giant Telescope in West Geffen Field to teleport to Valkyrie Temple (No need to bring any ingredients). Talk to Valkyrie, Sandra and she'll say she can't help you, but she'll give you support mentally. 4. You're on your own now. So you go back Nifflheim to find more clues. You find a Mad Man, Laichin and he seems to have information you need for the quest! But he needs you to pay him twice, 40,000 Zeny and 20,000 Zeny. 5. Listen carefully to the locations he mentions. The locations are random for each person and there are 4 locations you need to go out of a total of 8. Follow the sequence he mentions.
The locations he mentions are in The Lowest Cave of Glast Heim (gl_dun02). Bring a level 4 weapon from before the 10.1 update. Click here for a list of pre 10.1 level 4 weapons. Keep the weapon in your inventory (not equipped). 6. Once there, click on the Mysterious Environment and it'll pop up with 3 types of message.
7. You'll get a 8. Gen will identify himself as a servant to his master, Lady Hell. His master is looking for the Spiritual Whispers and he'll send you to an Unknown Area where his master resides. 9. Head up to the Unknown Area. You'll pass a fountain, but don't click it yet. Curiosity killed the cat. Keep moving upward and you'll find the Queen of the Dead, Lady Hell. 10. Talk to her and she'll give you Symbol of the Nine Realms in exchange for the Whisper of Soul.
11. Now you have two choices. Either give the Symbol of the Nine Realms to: A. Witch, Kirkena (requires defeating more monsters, but can bring friends to help) B. Pleasant-Featured Lady, Serin (requires defeating Incarnation of Dark Lord, aka 1 Dark Illusion, with NO help from friends) Part 6a: Kirkena the Witch1. If you chose the Witch, Kirkena, go find her in her room through the headstone near the stairs on the second floor. She'll ask for the Symbol of the Nine Realms and explain the reasons she needs it. If you got Serin's Gold Ring earlier, she'll take it but will return it later and you can store the ring in kafra now (before that you couldn't store it). After that she'll give you 1
Kirkena found the location of Serin. Once you're ready, Kirkena will send you to a copy of nif_fild02 with many monsters on it: Ghouls, Succubus, Wraiths, Injustices, Evil Druids, and Ancient Mummies, which do not give EXP or drop anything. You must fight your way past them to get to the portal on the other side. Enter it, and you'll be in Serin's room. If you have people helping you, they'll be sent to Serin and must talk to her to get to where you are.
2. You'll find Serin at the Unknown Area. Talk to her and chose "Stop her."
3. Serin will summon monsters to attack you. Try not to stand near her when you talk to her. You'll need to defeat these monsters:
4. Once you beat the monsters, Serin will reappear. She'll tell you she's happy that she met you and she'll give up her dream and live peacefully in Nifflheim. Later on she'll send you back to the Witch's room. There is a 10 minute time limit on this battle. Every time you are kicked from the room due to a loss or a time out, there is a chance that you will fail the quest. 5. If you fail, the Nifflheim NPCs will no longer talk to you. Part 6b: Serin the Pleasant-Featured Lady1. If you chose Pleasant-Featured Lady, Serin, go find Serin and she explains that the witch is going to summon Dark Lord which will devastate the world, instead, to pass her the Symbol of the Nine Realms to stop the witch. She'll send you directly to her room. 2. In the room listen to her reasons for using the Symbol of the Nine Realms. Serin has tricked you and she was the one who wanted to summon Dark Lord and so you must "Stop her". After talking to her, Dark Lord will appear. Talk to him and 1 Dark Illusion is summoned to attack you. There is a 10 minute time limit on this battle. Every time you are kicked from the room due to a loss or a time out, there is a chance that you will fail the quest.
3. Once you beat the Dark Illusion, Serin will reappear. She'll tell you she's happy that she met you and she'll give up her dream and live peacefully in Nifflheim. Later on she'll send you back to the Witch's room. Part 7: The Sign1. Talk to Kirkena and she's happy you stopped Serin. You'll get 500,000 (113 GX received 1,125,000 Base EXP; VIP) experience points as a reward. And she asks you to talk to Lady Hell once more. (if you took the witch path above, you need to have all 5 Witch's Medal in your inventory) 2. (If you did 4a and 6a, optional, but needs to be done immediately if you choose to do so.) Go back to Serin (in Niflheim) and she will give you 500,000 base exp (1,125,000 VIP; 113 GX) if you return her ring to her (if you took the path that gave it). This must be done before talking to Lady Hell, otherwise Serin will tell you "....." and /sob or /... "..."
3. Talk to Depressing Man, Gen to enter to Lady Hell room. When you meet Lady Hell, she won't have much to say to you. 4. Next, go the Valkyrie Temple and talk to Sandra. She's happy that you can complete the quest, and proved your courage to God. She'll give you The Sign as proof that you are God's Chosen One. You'll be able to enter Valhalla with 5. Go back to Prontera and pass The Sign to Metz. He's pretty excited when you pass The Sign to him and he is glad you completed the quest. He'll start to study The Sign.
6. After taking The Sign, Metz asks you to bring it to Engel Howard to fix it.
7. Bring The Sign back to Metz. After he finds out the truth of The Sign, his wish is fulfilled. He will then give you 2,000,000 base EXP (114 GX received 4,500,000 Base EXP - VIP).
8. Bring The Sign and Sobbing Starlight to Gen . Gen will warp you to his Master's room. Meet Lady Hell and pass the Sobbing Starlight to her. Then sit back and watch the fireworks display! After the fancy display, Lady Hell will give you 9. Go to the Geffen Fountain and click on it to enter Geffenia. The portal will open temporarily North of the Fountain, and anyone regardless of class, level (even if have not complete the quest) may enter it. Be warned however that this map has strong monsters. Failing the QuestIf you fail the quest, you have the following options:
| |||||||||||||||||||||||||||||||||||||||||||||||||||||||||||||
 100
100  50
50  30
30  20
20  15
15  10
10  2
2  10
10  10
10  20
20  30
30  1
1  1
1  1
1  5
5  2
2  1
1  1
1  1
1  10
10  1
1  4
4  12
12  375
375  1
1  1
1 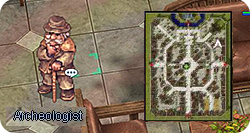
 1
1 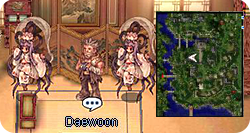
 1
1  1
1  1
1  1
1  1
1  1
1  1
1  1
1  1
1  1
1  1
1  1
1  1
1  1
1  1
1 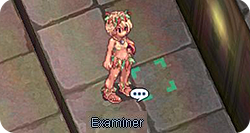

 1
1 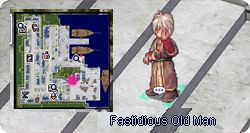
 1
1 