Difference between revisions of "Episode A 4 0 Rock Ridge"
| Line 260: | Line 260: | ||
* No longer requires a quest to learn and is now learned automatically upon becoming an Acolyte. | * No longer requires a quest to learn and is now learned automatically upon becoming an Acolyte. | ||
* Base cast time reduced from 2 seconds → 1 second. | * Base cast time reduced from 2 seconds → 1 second. | ||
| + | * No longer affected by Spirit Status (Priest Soul Link). | ||
| + | * Damage ratio adjusted: | ||
| + | * 300% MATK ratio as Acolyte/Monk/Champion. | ||
| + | * 625% MATK ratio as Priest/High Priest (same as linked Holy Light before). | ||
| + | * Enemies hit by Holy Light take 10% increased Holy property magic damage from the caster. | ||
| + | |- | ||
| + | | '''Demon Bane''' || | ||
| + | * No longer gives mastery attack. | ||
| + | * Now grants 0.5% physical damage to Demon and Undead race monsters per rank (up to 5% at rank 10). | ||
|} | |} | ||
| Line 293: | Line 302: | ||
* ATK ratio: 110% + 9% per skill level (200% at max rank). | * ATK ratio: 110% + 9% per skill level (200% at max rank). | ||
* MATK ratio: 300% + 25% per skill level (550% at max rank). | * MATK ratio: 300% + 25% per skill level (550% at max rank). | ||
| − | |||
| − | |||
| − | |||
| − | |||
|- | |- | ||
| '''Kyrie Eleison and Assumptio''' || | | '''Kyrie Eleison and Assumptio''' || | ||
| Line 317: | Line 322: | ||
| '''Suffragium''' || | | '''Suffragium''' || | ||
* Can now be cast on self at 50% effectiveness (reduces next cast by 7.5/15/22.5% when used on self). | * Can now be cast on self at 50% effectiveness (reduces next cast by 7.5/15/22.5% when used on self). | ||
| − | |||
| − | |||
| − | |||
| − | |||
| − | |||
| − | |||
| − | |||
|- | |- | ||
| '''Judex''' || | | '''Judex''' || | ||
Latest revision as of 12:25, 26 December 2024
Contents
- 1 Rock Ridge
- 2 New Main Office
- 3 Winter Event 2024
- 4 Party Finder System
- 5 Muspellskoll
- 6 Acolyte and Priest Rework
- 7 Paradise Bounty Quests
- 8 Map Adjustments
- 9 Payon Cave F1 (pay_dun00)
- 10 Amatsu Dungeon F1 (ama_dun01)
- 11 Coal Mines F3 (mjo_dun03)
- 12 Spawn and Monster Changes
- 13 Mjolnir Field 11 (mjolnir_11)
- 14 Spawn and Monster Changes
- 15 Louyang Field (lou_fild01)
- 16 Spawn and Monster Changes
- 17 Einbroch Field 4 (ein_fild04)
- 18 Spawn and Monster Changes
- 19 Rachel Field 8 (ra_fild08)
- 20 Spawn and Monster Changes
- 21 Prontera Field 10 (prt_fild10)
- 22 Spawn and Monster Changes
- 23 Orc Dungeon F1 (orcsdun01)
- 24 Spawn and Monster Changes
- 25 Byalan Dungeon F2 (iz_dun01)
- 26 Spawn and Monster Changes
- 27 Byalan Dungeon F3 (iz_dun02)
- 28 Spawn and Monster Changes
- 29 Byalan Dungeon F4 (iz_dun03)
- 30 Spawn and Monster Changes
- 31 Lasagna Field 1 (lasa_fild01)
- 32 Spawn and Monster Changes
- 33 Dragon's Nest F1 (lasa_dun01)
- 34 Spawn and Monster Changes
- 35 Other Map Adjustments
- 36 Night Watch Adjustments
- 37 Blacksmith Blessings
- 38 Limited Time Costume
- 39 General Adjustments
- 40 Bug Fixes
- 41 Whats Next
Rock Ridge
Getting to Rock Ridge
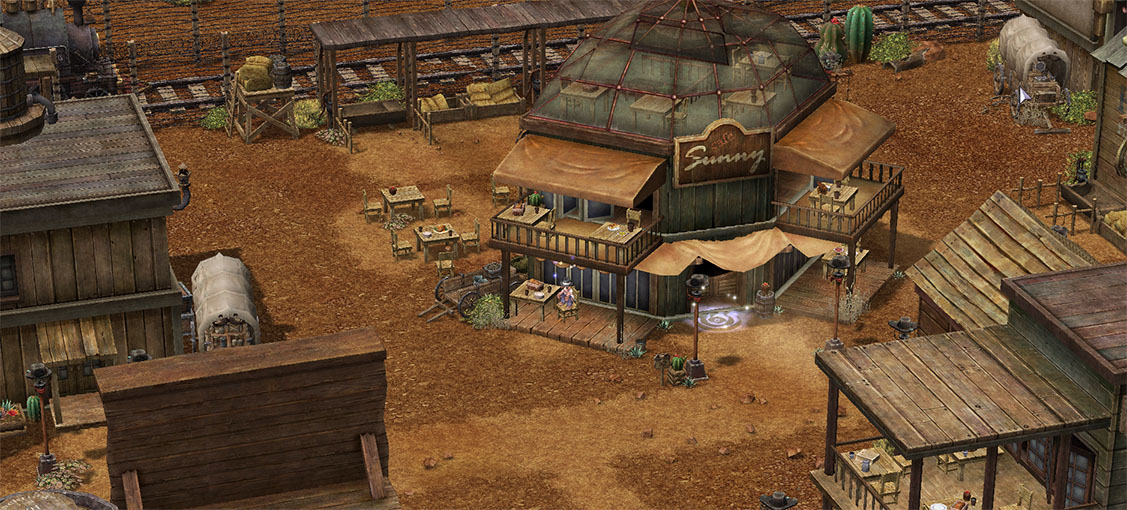
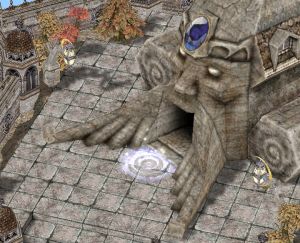
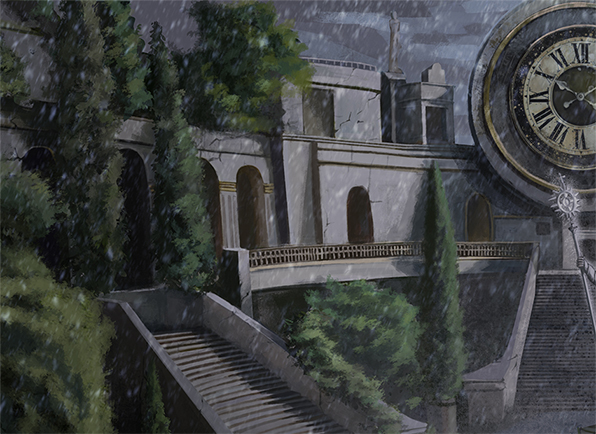
To begin these patch notes let's start with the title of the patch itself: Rock Ridge!
This is a new area you can traverse to from Alberta for a small fee. Unlike other locations, however you don't talk to a unique npc, you simply talk to the npc directly next to the one that would take you to Sunken Ship.
Rock Ridge is part of a massive update that includes a lot of new features for the server that will give you plenty of reasons to come here and most importantly, revisit frequently. We won't have any spoilers here of what you can find in this new town and region, but there's a lot to explore and discover!
For newbies, the paradise quest line has been extended to direct you to Rock Ridge as part of our ongoing efforts to streamline and make getting into RO and learning the game easier and help make the early process of joining the server easier. You'll also find an interconnected tunnel that makes getting from Rock Ridge to your paradise bounty quests without having to know where to go since a lot of new players are not familiar with the world.
Again, no spoilers here, you'll have to discover the hidden mechanics, quests, and new things to interact with. We WILL be allowing players who have wiki edit access to put in guides as they are discovered, but only players will be adding these to the wiki once they are discovered. We will not be doing it ourselves.
New Main Office
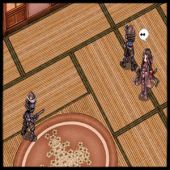
With this update comes a shiny new, bigger on the inside, main office! You'll find all the same things you found before, just spread out a little more so you can access things in peace without a branch room gospel in main office abuser ruining your view of your super totally adorable high priest's outfit.
Due to the sheer size of the main office, we've put in a warper that will allow you to easily warp locations around the main office based on what you need. There is one next to each of these locations so you can warp there and warp back, free of charge. For those of you who like to walk there's a new item available in this patch that can be used in the main office, since it is now flagged as a town!
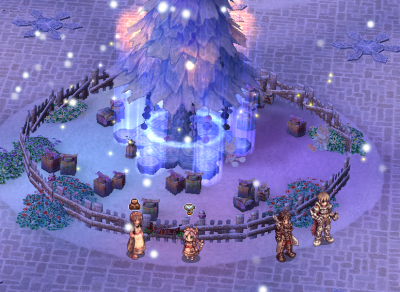
Winter Event 2024
So after a break without our halloween event, we're not going to miss out on our Winter Event! Further, there are two new ways to get currency and a slew of new costumes as well. There are also some updates to bring back some costumes that were missing from our last events.
That said, we don't want you to miss out on the halloween costumes so we're including the halloween costumes with our winter event. You can exchange these as normal with Airi in our shiny new main office!
We've also added a new hidden costume quest for you all to find! So with that out of the way, Let's get into the ways you can get currency this event!
Nightmare MVP Event
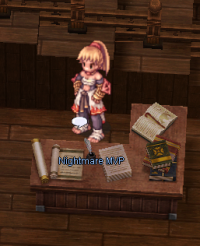
The Nightmare MVP event is a new automated even that will run every hour on the hour. the NPC can be found in the main office on the 2nd floor off to the eastern side near our new BSB merchant. (we'll talk about her down below).
Once the hour starts an announcement will tell players the event is about to begin in 10 minutes, just like with our Devil's Square event you can register and enter. Once inside you just have to wait it out for the monster to be spawned and as a team kill the mvp together!
These MVPs have massively increased HP and 50% more ATK than they normally have, and defense ignore does not work on them. (this means both defense pierce from items and skills like Spiral Pierce wont pierce defense, etc.)
You'll have 30 minutes in total to kill the MVP and if the server fails to kill the mvp, everyone who participated is given a compensation reward and warped out.
Upon success, you'll gain noticeably more of the compensation reward. In both cases, however, normal mvp items and rewards will not drop, and the only reward is the event currency which will be mailed to you through rodex after the event ends.
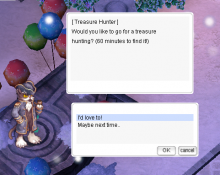
Treasure Hunter
We're bringing back an old classic event here from our initial sweets festival event in 2022. You can find the treasure hunter just below the tool dealer and above the main office in Prontera.
When you sign up for the event a treasure chest is spawned in one of towns in RO and you are told which town it is spawned in. You are not told any other hint besides this with the exception of Yuno due to its massive size (which tells you to only look outside).
This treasure chest can ONLY be opened by you, however, you can see other players chests! So if you want to help out fellow players when hunting on your own feel free to do so!
You'll have a limited time to find the chest, but if you get frustrated hopping on another character to spawn a new chest is perfectly acceptable.
There is no cooldown to this event so you're able to run it as often as you want to go hunting for treasures!
Silvervine and Bounty Quests
This is standard for all of our events, running bounty quests and dropping silvervine will give you event currency per normal to help you get all your costumes.
Costumes and Black Knitted Hat
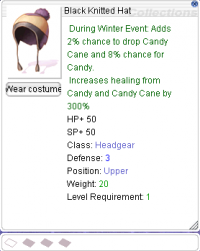
The winter event brings back the exclusive Black Knitted Hat headgear. This headgear is pretty basic being slotted and only giving 50 hp and SP. But as long as the winter event persists, you'll get a chance to drop candy canes and candy and get massively increased healing from those! It also costs very little in event currency so you can pick it up right away early in the event so you can enjoy it!
Beyond that, there a slew of costumes to choose and too many to list here so instead here's the link to the pages for the Winter and Halloween event costumes which are both available during this event.
Party Finder System
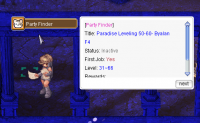
With this update, we'll also be introduce our experimental party finder system! This is an attempt to create party matchmaking similar to modern MMOs like FF14. For now there are now class or role choices as its bare bones to see if the system garners any traction at all, but if it does we'll certainly expand upon it.
What this system does is place an NPC on a map that we've assigned as a party finder map. Right now, for this patch there is ONLY Byalan Dungeon F4 (iz_dun03). There is also an appropriate bounty quest associated with each map. In this case we've tied the new Rock Ridge paradise quest into this location.
Now one big problem we've seen is that there often isn't enough newbies in modern RO even when we were heavily populated. So we've designed that system that anyone can join these parties. If you join these parties above level, you'll be flagged as a "Mentor" role and you'll get different rewards than those who are in the intended level range for these lower level parties. If you do join a first class party, as an example here at Byalan F4, you'll be locked to your first class skills, have capped ATK and MATK, and your HP values will be capped to be similar to those of the intended level range. As an example, if you join as a 10k HP high priest, you'll only be able to use acolyte skills, have 2500 HP, and your MATK Will be capped to 200. You'll still have distinct advantages such as cast time and defenses, but it at least levels the playing field a little to make the party feel more organic. These debuffs only last while you are on the map and if you leave the party or leave the map they are removed immediately.
Mentors who join will receive 20 Honor Tokens and be placed on a mentor cooldown that lasts 6 hours. This is designed in such a way that we hope everyone gets a chance to be a mentor at some point and with it having a cooldown, we hope you don't feel pressured to join every mentor party as well.
How Does It WORK though?
Only someone who is in the intended level range can start a party. Once they start an announcement is broadcast periodically until the party is filled or starts after 5 minutes. This broadcast will notify players of the @command needed to join and what to type. For example: you can type @partyfinder iz_dun03 and you will join the party from anywhere (assuming you arent in another party). Once the party is filled or 5 minutes have passed the party will commence and all players will be recalled next to the NPC and given the bounty quest associated with the party. The party will then simply be tasked with finishing the bounty. Once the bounty is done the party will be disbanded and people can talk to the original NPC that starts the party and get their rewards.
Note that you can join partway through a party that is ongoing but not filled as well, and you'll get a bounty given to you, but others will not have their bounties refreshed. The party will still end once the party completes, but you can turn in your bounty for partial rewards and still get something scaling with how much of your bounty is done. This will still put your bounty on cooldown, so it might not happen frequently but it is an option for those who have to leave early.
What Are Honor Tokens?
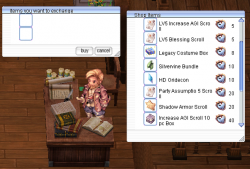
Honor tokens are a new currency that can be used to purchase some of the consumables usually exclusive to our new Old Red Box's in this update. These are more rare so for some of these, this is the only reliable way to get these. We've also included some good old classics like Old Blue Box, Old Purple Box, Silvervine Bundles, and HD Ores.
Each party will give you 20 Honor Tokens if you fully complete it. This means a lot of items cannot be purchased after only 1 party, but for those who consistently take the time to mentor, you will have reliable access to consumables or nice bonus of other items of your choosing. The list is small for now, but we may expand upon it in the future. For now we felt this was enough to entice players. We'll continue to balance/adjust the shop if necessary.
You can find Aldric in the main office to exchange your Honor Tokens with. Note that Honor Tokens are master account bound and cannot be traded.
Muspellskoll
After being in development hell for what feels like a life time, the ability to take on Muspellskoll is finally here! There's a few unique things about this fight that are different from previous encounters.
For starters, Muspellskoll offers 3 modes: Solo, Normal, and Hard.
With each mode, comes different settings and adjustments. For solo you'll need to be alone in your party, and for normal and hard you'll need at least 2 people, but each mode has a maximum party member count. For normal that's 6, and for hard mode thats 12.
The party versions (normal and hard) both share the same cooldowns. The Solo version has its own cooldown so you can run it without ruining your potential to party up with your friends later. Let's get into the balance and adjustments unique to the fight itself since we know thats what you guys care about the most!
New Mechanics
Muspellskoll is the first fight we've done where we will actively allow you to analyze the monster and get information on how to fight it. Like in other games where you can use a scan or assess skill, you can use the "Sense" ability to generate an item for everyone in the party that will detail how Muspellskoll works (mostly, we don't detail everything down to the nitty gritty, just the major things you need to understand to be successful). This item is only generated the first time you sense Muspellskoll and only once per instance. If you lose it, sell it, or want another, you can destroy the instance, start it up again and sense him again. We hope this helps make the fight feel more fair and leaves you feeling less confused by the custom design since a lot of what we try to do is stuff you can't see elsewhere in RO.
Second, in the party versions of the fight, you'll notice performers have had their songs swapped to the renewal variants of their songs. However, they retain their scalings so they'll function the same, just have a large screen wide aoe. Unlike in renewal, they do not have cooldowns though, so you can spam them to your hearts content. they just have a very short cast time to get off thats fixed. For this fight in particular you won't need to have everyone clump up and stand in the stack, you'll be able to apply the buff from anywhere.
Additionally, you'll find that the assumptio skill has been given a small area of effect on its cast (7x7) that will make it easier to apply to multiple people who roughly stick together. This is so you can assumptio multiple people at once for this fight amidst the chaos without having to find and track down every single person.
For all modes in the fight you'll also find that everyone has permanent endure. Due to the importance of skill expression placed on the fight, we simply felt it was not fair to the players to have pos lag play a large factor in the fight. Some skills will still pos bug you a little (fire bolt in particular we cant do much about) but overall getting hit wont mean shenanigans like it normally does.
Lastly, in the solo version of the fight, to make it more palatable and manageable without support, we've added 50% Cast Time and After Cast Delay reduction to simulate a weaker form of bragi. This stacks ADDITIVELY with your gears/bonuses which means you can reach 100% instant cast or cast delay with gears if you so wish. So wearing 30% ACD reduction gear will bring your ACD to 80%, etc. The solo version is noticeably meant to be more accessible than the harder party modes, so this is in line with that thought process.
Where To Start
You can start the quest to learn about Muspellskoll's origins in top right Yuno. From there it is up to you to figure everything else out. We won't be providing a guide or details on the quest as we feel the starting point is more than enough to get going. If players wish to make their own guide on the wiki for the quest, however, they are more than welcome to. (those that are trusted with wiki access that is)
Acolyte and Priest Rework

So we're doing a class update here thats a bit smaller in scope than the upcoming Soul Ascetic rework. (for those of you wondering how we squeezed this in so easily). First, I'll give you the reasoning for why Acolyte is being targeted. There are 4 primary reasons:
1.) First Job party leveling is non-existent, and as we adjust maps with early game leveling together in mind, we wanted to make sure that Acolyte felt like a true support class. We'll also be updating all the other classes too like we did with merchant who can now be a proper dps in a party and provide aspd buffs to those who can wear appropriate weapons. As all the classes get done we hope to have a fully realized group of first classes that mesh well together and still feel good to play solo.
2.) Take an opportunity to both take pressure off hard needing a priest in a party, but also taking pressure off priests in parties themselves. By having more classes that can provide some level of real support, then the need for priest to do "everything" is less. Champions being able to do some stuff that was formerly exclusive to priest will help them join parties more, especially those MVP builds that can't really tank but want to join parties. They'll now be able to play a pseudo priest role in a pinch, although without the new abilities priest is getting, priest is not going to be replaced entirely. This is more about opening up the game. And yes, we're aware now that Super Novice can actually provide a true support role in parties, something we are also happy with the idea of. With 3 classes now that can provide support, it will be a bit easier to be inclusive and also get some pressure off priests when these other classes are visible.
3.) There are other ways to take pressure off priest as well though, and thats by directly making them smoother to play. Obviously with a lot of priest skills shifting into the Acolyte tree, priest will need proper replacements. The direction we decided to go was to shift priest into the better of the support styles. If you liked acolyte's support style as a first job, you'll become a priest and become even better at it. Priests will be more of the same but with area of effect capabilities for their party allowing them to better apply buffs to their entire party easily and quickly. Much as we've seen with the Canto and Clementia additions. So things like Kyrie and Status Recovery will have AOE options, and some useless fat like Slow Poison is now cut entirely in favor of a new AOE cleansing skill. And before you ask, no there is still not an AOE assumptio by default. (although there is a way to get it, just not in your skill tree.)
4.) Lastly make priest's skill tree feel satisfying is a big goal of the update. It may seem counter-intuitive to do this by removing a lot of the more powerful skills and shift them to acolyte, but by replacing them with even more powerful and easy to use skills we think they will feel good about their tree. We're also reducing a lot of the skill fat by reducing skill points across the board in both trees, and adding in some new skills that fill some much needed voids we've identified for priest. Also taking the opportunity to make clunky skills not clunky, like BS Sacramenti.
Resets
Acolyte classes and Super Novice will get unlimited resets both stat and skills until February 1st. So try out the rework until then and lock in before that date!
For other classes affected like Paladin (heal) and Mage classes (sp recovery) only 1 free skill reset in given in addition to the one forced one upon login.
Note that all classes that have had their skill trees affected have forced skill resets.
Acolyte Adjustments
| Skill | Changes |
|---|---|
| Increase AGI |
|
| Blessing |
|
| Warp Portal |
|
| Heal |
|
| Kyrie Eleison |
|
| Angelus |
|
| Increase SP Recovery |
|
| Status Recovery |
|
| Resurrection |
|
| Decrease AGI |
|
| Holy Light |
 * 300% MATK ratio as Acolyte/Monk/Champion.
 * 625% MATK ratio as Priest/High Priest (same as linked Holy Light before).
|
| Demon Bane |
|
Super Novice Adjustments
All Acolyte adjustments also affect Super Novice, this means they also get all the new skills added to their tree in addition to the reworked Acolyte skills.
Priest Adjustments
| Skill | Changes |
|---|---|
| Praefatio |
|
| Canto Candidus and Clementia |
|
| Slow Poison |
|
| Duple Light |
|
| Kyrie Eleison and Assumptio |
|
| Clearance |
|
| BS Sacramenti |
|
| Religio |
|
| Suffragium |
|
| Judex |
|
| Turn Undead |
|
| Meditation |
|
| Mana Recharge (Spiritual Thrift) |
|
| Magnus Exorcismus |
|
| Mace Mastery |
Paradise Bounty Quests
Akin to renewal style, we will be implementing new bounty quests that hold your hand and tell you where to level if you aren't sure where to go after getting your paradise gear. The paradise quest continues after getting your weapon, and now after meeting all the NPCs in Rock Ridge that are part of the paradise group you can take your suggested bounty quests and have an easy path to leveling.
Note that these bounty quests will overall be "inefficient" compared to optimally leveling as an established player. But as a new player who needs to learn the game from the ground up, these are designed to not only help you get your feet wet, but ensure that you are getting the kind of drops/raw zeny that you need early to help get into the game immediately.
These bounties will not reward bonus EXP like in renewal, however. They will instead reward you with the currency for the Paradise Group which are Rock Ridge Coins. These can be exchanged for various weapons, as well as a rock ridge gear set as well. This gear set and the weapons can be enchanted up to 2 times but do not roll random options. (consider this our experiment with something more akin to the Temporal Boots system but toned down in scope)
There are basically now leveling ranges that are set and each bounty is tailored to make sure you end up roughly around the level range of the next bounty. You won't have to complete them more once for first job leveling.
And note that we only have first job leveling up to 65 right now for these, and only one option for each type of job/class. You can choose to crossover if you wish or ignore this entirely of course. Again, this is no way mandatory and we expect established players will largely ignore this system overall.
Below you'll see the bounties for each range and the intended type of class to level there.
Rock Ridge Bounty Quests
| Level Range | Map | Intended Class |
|---|---|---|
| 20-40 | Mjolnir Field 11 | Archer, Gunslinger |
| 20-40 | Rachel Field 8 | Mage |
| 20-40 | Byalan Dungeon F2 | Swordsman, Merchant |
| 20-40 | Payon Cave F1 | FS Acolyte, Archer |
| 40-50 | Lasagna Field 1 | All |
| 40-50 | Prontera Field 10 | Mage |
| 40-50 | Byalan Dungeon F3 | Swordsman, Merchant |
| 40-50 | Louyang Field | Archer, Gunslinger |
| 50-65 | Lasagna Dungeon F1 | Melee Classes |
| 50-65 | Orc Dungeon F1 | Mage |
| 50-65 | Einbroch Field 4 | Archer, Gunslinger |
| 50-65 | Coal Mines F3 | FS Acolyte, Duos |
| 50-65 | Byalan Dungeon F4 | All, Small Parties |
Map Adjustments
A lot of adjustments coming here, but these will need a bit of a preface to explain. The early leveling experience on Alfheim was bolstered with the addition of Lasagna, but over time its become very clear that Lasagna has in many ways been a detriment long term even though its mostly a net positive. Relative to its difficulty, its incredibly efficient to the point people can often stay at Dragon's Nest until Base Level 80. Which is not something we really want to see. That said, we do still want Lasagna to feel good early on if you aren't sure where to go and need a safe reliable place to get EXP.
We also want to make sure you have a reason to explore the world and try other locations or other mobs, or maybe take on more of a challenge for a better reward. Given that Lasagna is kinda near the cap of what we want leveling speed to be, it only means we should probably shave off some of Lasagna's top end and start to buff other areas so the more challenging areas are the directions to go instead of Lasagna.
Note that we expect a lot of the new buffed locations to be as good as pre patch Lasagna or in some cases even better. We're also considering that with some of the locations that might be better, we might as see more people party together at lower levels even if its only duo since taking them on solo might be a bit rough without consumables, but with an acolyte there to heal you or more homies to beat up the mob faster, it will be more efficient.
Obviously we can't do this all in one patch so in the short term this means a bit of a reduction in first job leveling speed for anyone who doesn't go to the newly buffed locations, but its a necessary thing for the long term in our eyes.
We're also aware that a big reason why people stay at Dragon's Nest until level 80 is that there is no middleground safer location post level 60-65 for people as the jump in difficulty and challenge spikes a little bit too high still. Louyang was a step in the right direction but for a newbie with only paradise gears, you are kinda out of options right now so we'll be looking at that as well.
NOTE: The numbers in parentheses [i.e (1.0)] is the EXP to HP ratio.
Payon Cave F1 (pay_dun00)
So slight overhaul here. Aiming for this map to be mostly for heal bomber acolytes but its still doable by other classes, mostly aimed at archers though due to the greatly increased flee of the mobs in the floor. Familiars have been a bit juicier to kill, but are also no longer aggressive so as to not mess with the Thief job change. They hit a lot harder, still have the same move speed, but give a lot more exp and drop more goodies.
The Ribbon drop from Familiars has also been added to the list of items you can enchant at Rock Ridge as well so if you happen to get one while farming down there you can enchant it instead of your Bull Hat if you so wish to go that route. The hope is that this provides value as bridge gears you may drop coincidentally along the way in your journey.
Ultimately, this should be mostly for heal bombing, but it was also designed with archers/gunslingers in mind as an early duo with the an acolyte if two people wish to go that route. Archers should be able to help provide a boost to a FS acolyte by killing the familiars that would usually go ignored.
Spawn and Monster Changes
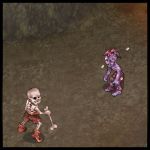
Skeleton
Stats
| Stat | Before | After |
|---|---|---|
| Level | 10 | 21 |
| Movement Speed | Normal | Slowed down by ~50% |
| Attack Range | 39-47 | 87-97 |
| DEX | 12 | 42 |
| INT | 0 | 10 |
| AGI | 5 | 50 |
| HP | 234 | 1,034 |
| Base EXP | 54 (0.23) | 1,239 (1.2) |
| Job EXP | 42 (0.18) | 987 (0.95) |
| DEF | 10 | 20 |
| MDEF | 10 | 20 |
Drops
| Item | Drop Rate Before | Drop Rate After |
|---|---|---|
| Skel Bone | 34.09% | 100% |
| Skull Ring (New Effect: Increases Heal Damage on Undead by 5%) | 1.49% | 4.90% |
| Orange | Not Dropped | 40.96% |
| Blue Herb | Not Dropped | 35.86% |
| Free Ticket for Kafra Transportation | Not Dropped | 11.89% |
| Newbie Blue Gemstone | Not Dropped | 9.61% |
| Rough Elunium | Not Dropped | 4.90% |
| Red Herb | 14.45% | Removed |
| Jellopy | 70.11% | Removed |
| Phracon | 0.97% | Removed |
Zombie
Stats
| Stat | Before | After |
|---|---|---|
| Level | 15 | 25 |
| Attack Range | 67-79 | 89-99 |
| DEX | 15 | 40 |
| INT | 0 | 10 |
| AGI | 8 | 48 |
| HP | 534 | 1,034 |
| Base EXP | 150 (0.28) | 1,242 (1.2) |
| Job EXP | 99 (0.18) | 984 (0.95) |
| DEF | 0 | 18 |
| MDEF | 10 | 20 |
Drops
| Item | Drop Rate Before | Drop Rate After |
|---|---|---|
| Horrendous Mouth | 2.48% | 100% |
| Orange | Not Dropped | 40.96% |
| Opal | 3.45% | 4.90% |
| Newbie Blue Gemstone | Not Dropped | 9.61% |
| Rough Oridecon | Not Dropped | 4.90% |
| White Herb | Not Dropped | 40.96% |
| Newbie Inn Voucher | Not Dropped | 1.24% |
| Cursed Ruby | 0.25% | 4.90% |
| Sticky Mucus | 10.87% | Removed |
Familiar
Stats
| Stat | Before | After |
|---|---|---|
| Level | 8 | 18 |
| HP | 155 | 1,355 |
| Attack Range | 20-28 | 108-128 |
| Base EXP | 84 (0.54) | 1,761 |
| Job EXP | 45 (0.29) | 1,491 |
| AGI | 12 | 42 |
| DEX | 28 | 38 |
| AI Type | Aggressive | Passive |
Drops
| Item | Drop Rate Before | Drop Rate After |
|---|---|---|
| Tooth of Bat | 98.15% | 100% |
| Can of Anchovies | Not Dropped | 30.43% |
| Ribbon[1] | Dropped | Can now be enchanted at Rock Ridge |
| Novice Fly Wing | Not Dropped | 40.96% |
| Grape | 4.90% | 40.96% |
| Blue Herb | Not Dropped | 30.43% |
| Opal | Not Dropped | 4.90% |
| Concentration Potion | 2.48% | 4.90% |
| Red Herb | 48.96% | Removed |
| Fly Wing | 9.89% | Removed |
| Falchion | 0.25% | Removed |
Amatsu Dungeon F1 (ama_dun01)
Very basic changes here, mostly to the Miyabi Dolls, Firelock Soldiers are pretty much by default spot on for an ideal mob so they are nearly identical to classic with only an increase in EXP mostly and some very minor adjustments to their stats otherwise. Instead we've focused on buffing the drops on this map to make them in line with the other first job paradise leveling maps. This map is intended for FS Acolyte heal bombing (Level 40-50) for Firelock soldiers, but new players will also be encouraged to try their luck with the Miyabi Dolls with their reduced MDEF/increased shadow element by using Holy Light. We also wanted to make Miyabi Dolls actually worthy killing on the map so we are hoping to see Amatsu F1 as a duo map for Acolyte + anyone else really since the Miyabi Dolls obviously cannot be heal bombed, but they'll taken down more efficiently with two then just one acolyte slowly holy lighting them down solo. We've also upped the firelock soldiers so its a bit easier to find them as you walk around.
Spawn and Monster Changes
| Monster | Spawn Before | Spawn After |
|---|---|---|
| Firelock Soldier | 45 | 65 |
Firelock Soldier
Stats
| Stat | Before | After |
|---|---|---|
| Level | 47 | 40 |
| Base EXP | 3,879 (1.00) | 5,007 (1.3) |
| Job EXP | 3,009 (0.78) | 3,852 (1.0) |
| AGI | 35 | 25 |
| DEF | 10 | 15 |
| MDEF | 10 | 15 |
Drops
| Item | Drop Rate Before | Drop Rate After |
|---|---|---|
| Skel-Bone | Not Dropped | 100% |
| Can of Anchovies | Not Dropped | 40.95% |
| White Herb | Not Dropped | 40.95% |
| Orange | Not Dropped | 40.95% |
| Free Ticket for Kafra Transport | Not Dropped | 11.89% |
| Pearl | Not Dropped | 4.90% |
| Old Blue Box | Not Dropped | 1.49% |
| Apple of Archer | 0.05% | 0.15% |
| Iron | 51.20% | Removed |
| Yellow Herb | 2.48% | Removed |
| Yam | 9.89% | Removed |
| Panacea | 0.25% | Removed |
| Cyclone[2] | 0.25% | Removed |
Miyabi Doll
Stats
| Stat | Before | After |
|---|---|---|
| Level | 33 | 43 |
| Element | Shadow 1 | Shadow 3 |
| HP | 6,300 | 4,300 |
| Attack Range | 250-305 | 130-150 |
| Base EXP | 2,385 (0.38) | 5,160 (1.2) |
| Job EXP | 1,359 (0.21) | 4,086 (0.95) |
| AGI | 52 | 25 |
| DEX | 62 | 22 |
| DEF | 1 | 13 |
| MDEF | 20 | 10 |
Drops
| Item | Drop Rate Before | Drop Rate After |
|---|---|---|
| Glossy Hair | 97.79% | 100% |
| Orange | Not Dropped | 40.95% |
| Can of Anchovies | Not Dropped | 40.95% |
| Rough Elunium | 4.95% | 4.95% |
| Professional Cooking Kit | 1.25% | Removed |
| Hakujin | 0.25% | Removed |
| Mandolin | 0.10% | Removed |
Coal Mines F3 (mjo_dun03)
The final location for the Acolyte first job leveling path for FS builds is Coal Mines F3. Like with Miyabi Dolls, the Mysts have been adjusted to be more killable with Holy Light and slowed down so they are properly kiteable as well as made non-aggressive so theres some similarities to Amatsu Dungeon F1.
Skeleton Workers are by and large the same mobs, but with some stat adjustments, bulkier, and some new skills on chase to provide some level of threat that keeps you on your toes. Overall this should be where you finish your first job leveling. We've also adjusted The Gas Mask and the Safety Helm drops to be more appealing as a random drop for newbies who may have little to nothing as a new player. (adjustments below in general adjustments section).
Spawn and Monster Changes
| Monster | Spawn Before | Spawn After |
|---|---|---|
| Myst | 35 | 50 |
| Cramp | 3 | 0 |
Skeleton Worker (1169)
Stats
| Stat | Before | After |
|---|---|---|
| Level | 30 | 50 |
| Movement Speed | Normal | About 25% Faster |
| Element | Undead 1 | Undead 3 |
| HP | 2,872 | 9,872 |
| Attack Range | 242-288 | 342-388 |
| Base EXP | 1,197 (0.41) | 11,847 (1.2) |
| Job EXP | 720 (0.25) | 7,971 (0.8) |
| DEF | 0 | 25 |
| MDEF | 0 | 25 |
| DEX | 42 | 27 |
| Additional Behavior | None | Casts Quagmire Level 1 at a moderately low chance and long cast time on chase state after being attacked |
Drops
| Item | Drop Rate Before | Drop Rate After |
|---|---|---|
| Lantern | 98.15% | 100% |
| Coal | 9.61% | 83.19% |
| Orange | Not Dropped | 40.95% |
| Can of Anchovies | Not Dropped | 40.95% |
| Newbie Blue Gemstone | Not Dropped | 14.13% |
| Rough Elunium | 4.42% | 4.96% |
| Safety Helmet | 0.05% | 0.15% (item adjusted, see below) |
| Iron | 28.77% | Removed |
| Iron Ore | 16.12% | Removed |
Myst (1151)
Stats
| Stat | Before | After |
|---|---|---|
| Level | 38 | 52 |
| HP | 3,745 | 9,745 |
| Base EXP | 4,173 (1.1) | 11,694 (1.2) |
| Job EXP | 2,064 (0.55) | 8,283 (0.85) |
| Attack Range | 365-445 | 355-395 |
| Movement Speed | Normal | About 50% Slower (same speed as Skeleton Worker) |
| DEF | 0 | 20 |
| MDEF | 40 | 20 |
| AGI | 38 | 20 |
| DEX | 53 | 23 |
| Element | Poison 1 | Shadow 3 |
| AI Type | Aggressive | Passive |
Drops
| Item | Drop Rate Before | Drop Rate After |
|---|---|---|
| Poisonous Gas | Not Dropped | 100% |
| Can of Anchovies | Not Dropped | 40.95% |
| Grape | 1.74% | 40.95% |
| Newbie Blue Gemstone | Not Dropped | 14.13% |
| Rough Oridecon | 3.21% | 4.90% |
| Anodyne | 1% | 1.98% |
| Gas Mask | 0.10% | 0.15% (item adjusted, see below) |
| Rough Elunium | 4.42% | Removed |
| Trunk | 26.34% | Removed |
Mjolnir Field 11 (mjolnir_11)
Mostly adjustments to drops and Mandragoras, Evening out the Mandragora/Flora spawns on this map and making this the level 20-40 Archer Leveling range for the new Rock Ridge Bounty Quests.
Spawn and Monster Changes
| Monster | Spawn Before | Spawn After |
|---|---|---|
| Mandragora | 50 | 60 |
| Male Thief Bug | 30 | 0 |
| Argiope | 10 | 0 |
Flora
Stats
| Stat | Before | After |
|---|---|---|
| HP | 2,092 | 1,092 |
| Base EXP | 1,071 (0.52) | 1,254 (1.15) |
| Job EXP | 726 (0.66) | 1,092 (1.0) |
| VIT | 35 | 15 |
| AGI | 26 | 16 |
| INT | 5 | 35 |
| LUK | 80 | 1 |
Drops
| Item | Drop Rate Before | Drop Rate After |
|---|---|---|
| Aloe Leaflet | 2.5% | 83.19% |
| Sunflower | 1.24% | Removed |
| Singing Flower | 0.10% | Removed |
| Witherless Rose | 0.05% | 0.50% |
| Fire Ammunition Supply Box (New Item) | Not Dropped | 1.24% (When used, prompts selection between Flare Bullet Case or Fire Arrow Quiver) |
| Rough Oridecon | Not Dropped | 4.90% |
Mandragora
Stats
| Stat | Before | After |
|---|---|---|
| Level | 12 | 22 |
| HP | 405 | 1,005 |
| Base EXP | 135 (0.33) | 1,107 (1.1) |
| Job EXP | 96 (0.23) | 1,005 (1.0) |
| Attack Range | 26-35 | 86-95 |
| DEF | 0 | 10 |
| AGI | 12 | 20 |
| VIT | 24 | 14 |
| INT | 0 | 25 |
| LUK | 15 | 1 |
| Element | Earth 3 | Earth 1 |
Drops
| Item | Drop Rate Before | Drop Rate After |
|---|---|---|
| Soft Blade of Grass | Not Dropped | 100% |
| Rough Elunium | Not Dropped | 4.90% |
| Fire Ammunition Supply Box | Not Dropped | 1.24% |
| Green Live | 2.49% | 4.90% |
| Gaia Whip | 0.10% | Removed |
| Shoot | 4.42% | Removed |
| Spear[4] | 0.25% | Removed |
| Green Herb | 9.89% | Removed |
Louyang Field (lou_fild01)
Mi Gaos getting an adjustment to make them better suited for the level 40-50 range. currently you can already do this, but they're a bit bulky and are honestly more of a 50-65 mob in the new system by default so we're toning them down since we have another map planned for the initial 50-65 range for Archer/Gunslinger classes. They will overall give less total experience, but be less bulky so they are faster to take down, and with more of them spawned it should overall be a net buff since the ratios for them have also been increased.
They've been sped up slightly so you'll maybe have to kite a little sometimes, however engaging them at max range should result in rarely having to do this. But we're using the increased speed to make them somewhat more of an engagement over the start mandragora/flora and get ranged classes moving around as they ease into higher levels.
Spawn and Monster Changes
| Monster | Spawn Before | Spawn After | Notes |
|---|---|---|---|
| Mantis | 30 | 3 | Now completely random rather than set zones. |
| Mi Gao | 30 | 50 | Now completely random rather than set zones; also instant respawn. |
Mi Gao
Stats
| Stat | Before | After |
|---|---|---|
| Level | 51 | 41 |
| DEX | 69 | 79 |
| INT | 12 | 22 |
| HP | 8,230 | 5,230 |
| Base EXP | 8,859 (1.07) | 6,540 (1.25) |
| Job EXP | 6,773 (0.82) | 4,707 (0.9) |
| DEF | 30 | 20 |
| MDEF | 12 | 22 |
| Movement Speed | Normal | Roughly 30% Faster |
Drops
| Item | Drop Rate Before | Drop Rate After |
|---|---|---|
| Dry Sand | 94.32% | 100% |
| Mud Lump | 72.93% | 83.19% |
| Fire Ammunition Supply Box | Not Dropped | 1.98% |
| Rough Oridecon | Not Dropped | 9.61% |
| Free Ticket for Kafra Transportation | Not Dropped | 11.89% |
| Fruit Mix | Not Dropped | 1% |
| Newbie Inn Voucher | Not Dropped | 1.49% |
| Orange | Not Dropped | 40.95% |
| Great Nature | 9.89% | Removed |
Einbroch Field 4 (ein_fild04)
Geographers have forever been the slog of archers and mages. For mages in particular they're pretty boring and the heal can be a nuisance. So we're leaning into these more for ranged physical classes as the intended spot. One of our other goals is to make Geographers less "boring" by keeping you on your toes with the Geographer able to cast heaven's drive on you even if you are out of its basic attack range. Additionally they are no longer aggressive so unless you choose to engage them they won't mess with you.
Overall they should feel mostly the same with just a mild amount of engagement to make them not a bore. And of course, bulkier to make them efficient for your time at this level range as an archer/gunslinger archtype.
Spawn and Monster Changes
Geographer
Stats
| Stat | Before | After |
|---|---|---|
| HP | 8,071 | 10,071 |
| Base EXP | 8,145 (1.00) | 12,084 (1.2) |
| Job EXP | 6,000 (0.6) | 9,063 (0.9) |
| AI Type | Aggressive | Passive |
| Minimum Skill Range | None | 14 |
| Additional Behavior | None | Casts Heaven's Drive on its target when attacked. |
| Heal Cooldown | 5 seconds | 10 seconds |
Drops
| Item | Drop Rate Before | Drop Rate After |
|---|---|---|
| Orange | Not Dropped | 40.95% |
| Fire Ammunition Supply Box | Not Dropped | 1.98% |
| Newbie Inn Voucher | Not Dropped | 1.98% |
| Sunflower | 1.49% | 0.10% |
| Level 5 Heal Scroll | 5% | 9.61% |
| Fancy Flower | 2.5% | 0.10% |
Rachel Field 8 (ra_fild08)
Pretty basic changes here, more cute rocks, no more drosera trolls, and better drops over all. This is mostly as an addition to the new Rock Ridge bounty quests for paradise newbies. Mages will be encouraged to come here first instead of necessarily going Byalan to provide different options.
Spawn and Monster Changes
| Monster | Spawn Before | Spawn After |
|---|---|---|
| Drosera | 20 | 0 |
| Stapo | 100 | 200 |
Stapo
Stats
| Stat | Before | After |
|---|---|---|
| Move Speed | Normal | Slowed down by 67% |
| Element | Earth 2 | Earth 3 |
| HP | 666 | 1,066 |
| Base EXP | 996 (1.5) | 1,599 (1.5) |
| Job EXP | 663 (1.0) | 1,065 (1.0) |
| INT | 11 | 1 |
Drops
| Item | Drop Rate Before | Drop Rate After |
|---|---|---|
| Large Jellopy | 4.90% | 67.23% |
| Orange | Not Dropped | 40.95% |
| Emerald | Not Dropped | 4.90% |
| Rough Elunium | Not Dropped | 4.90% |
| Box of Drowsiness | Not Dropped | 1.49% |
| Honey Herbal Tea | Not Dropped | 1% |
| Newbie Blue Gemstone | Not Dropped | 9.61% |
| Wizard Hat | Not Dropped | 0.15% |
| Jellopy | 51.34% | Removed |
| Jubilee | 16.42% | Removed |
| Apple | 9.89% | Removed |
| Green Live | 4.42% | Removed |
| Seismic Fist | 0.25% | Removed |
Prontera Field 10 (prt_fild10)
Another simple change, next step along the path as an option for mage leveling. With your classic firewall + bolt combo here you'll be able to take care of these pesky boars easily. Adding in some more Savages but making sure not to add too many as the need for fire wall necessitates room to position. But we don't want players to struggle too hard to finding the boars.
Spawn and Monster Changes
| Monster | Spawn Before | Spawn After |
|---|---|---|
| Savage | 70 | 100 |
Savage
Stats
| Stat | Before | After |
|---|---|---|
| HP | 2,092 | 6,092 |
| Defense | 10 | 25 |
| Move Speed | Normal | Slowed down by about 40% |
| Base EXP | 1,563 (0.75) | 6,702 (1.1) |
| Job EXP | 744 (0.35) | 6,093 (1.0) |
Drops
| Item | Drop Rate Before | Drop Rate After |
|---|---|---|
| Grape | 14.13% | 40.95% |
| Royal Jelly | 0.10% | 3.94% |
| Rough Elunium | 3.45% | 4.90% |
| Blue Herb | Not Dropped | 10.53% |
| Mage Hat | Not Dropped | 0.15% |
| New Blue Gemstone | Not Dropped | 14.13% |
Orc Dungeon F1 (orcsdun01)
Smaller adjustments here. This is meant to be the mage option for 50-60 range since mages can't really do Dragon's Nest and let's be real...Geographers are not fun in the slightest. Letting mages get in the mobbing fun by embracing a classic leveling location adjusted to be on par when mobbed with other maps in its range. Drops and EXP appear lower on paper, but when you factor in how easy it is to mob in orcs dungeon this will more than make up for it. they are still quite slow and you will still easily be able to kite just without those pesky bats in your face now. I wanted to make the map entirely about positioning and kiting with fireball leveling here, but in order to justify buffing the mobs they had to be strengthed up a little bit so they hit about 50% harder and theyre higher level to compensate. It might not be enough but overall should be a chill mobbing map so that when mages finish their first job leveling experience, they will have got their feet wet with fire wall + bolting and mobbing so they will have an idea of whether they want to become a wizard or professor. As for a class like Ninja, we suspect it will be much the same only with their aoe skills instead.
Spawn and Monster Changes
| Monster | Spawn Before | Spawn After | Notes |
|---|---|---|---|
| Steel Chonchon | 10 | 0 | |
| Familiar | 15 | 0 | |
| Drainliar | 5 | 0 | |
| Orc Skeleton | 10 | 0 | |
| Orc Zombie | 80 | 80 | Respawns all reduced to 10 seconds instead of various respawns |
Orc Zombie
Stats
| Stat | Before | After |
|---|---|---|
| HP | 1,568 | 1,803 |
| Defense | 5 | 20 |
| Base EXP | 588 (0.37) | 1,623 (0.90) |
| Job EXP | 360 (0.23) | 1,299 (0.72) |
| Attack Range | 151-184 | 251-284 |
| Base Level | 24 | 54 (increases hit and flee requirements by 30) |
Drops
| Item | Drop Rate Before | Drop Rate After |
|---|---|---|
| Sticky Mucus | 10.87% | Removed |
| Orc Claw | 98.15% | 100% |
| Orange | Not Dropped | 7.28% |
| Can of Anchovies | Not Dropped | 7.28% |
| Rough Oridecon | Not Dropped | 1% |
| Rough Elunium | Not Dropped | 1% |
| 1carat Diamond | Not Dropped | 0.6% |
| Morroc Fruit Wine | Not Dropped | 0.35% |
Byalan Dungeon F2 (iz_dun01)
Goal of map is to give a good location to level right out of the gate upon becoming first job similar to Lasagna Fields but with a bit less wasted EXP since the HP pools are a bit smaller here. EXP ratios are actually better since the mobs hit slightly harder, and have a bit more resistances in some ways. We've upped their resistances on some mobs in some ways to make sure its not literally 0, but thats just to justify the higher ratios than Lasagna Fields.
Spawn and Monster Changes
| Monster | Spawn Before | Spawn After |
|---|---|---|
| Planktons | 10 | 0 |
| Kukre | 50 | 30 |
| Marina | 15 | 50 |
| Hydra | 30 | 0 |
| Vadon | 60 | 90 |
| Cornutus | 15 | 20 (now all instant respawn) |
Vadon
Stats
| Stat | Before | After |
|---|---|---|
| Magic Defense | 0 | 9 |
| EXP | 405 (0.4) | 1,017 (1.0) |
| Job EXP | 255 (0.25) | 864 (0.85) |
Drops
| Item | Drop Rate Before | Drop Rate After |
|---|---|---|
| Rough Elunium | 1.98% | 4.90% |
| Garlet | 3.21% | Removed |
| Crystal Mirror | Not Dropped | 3.94% |
| Elemental Converter (Water) | Not Dropped | 1% |
| Solid Shell | 4.90% | 83.19% |
| Blue Gemstone | 9.89% | Removed |
| Newbie Blue Gemstone | Not Dropped | 9.61% |
| Crystal Blue | 2.48% | Removed |
Cornutus
Stats
| Stat | Before | After |
|---|---|---|
| Magic Defense | 0 | 7 |
| EXP | 720 (0.44) | 2,187 (1.35) |
| Job EXP | 447 (0.27) | 1,539 (0.95) |
Drops
| Item | Drop Rate Before | Drop Rate After |
|---|---|---|
| Blue Gemstone | 9.89% | Removed |
| Newbie Blue Gemstone | Not Dropped | 9.61% |
| Crystal Blue | 2.48% | Removed |
| Elemental Converter (Water) | Not Dropped | 1% |
| Solid Shell | 40.95% | 83.19% |
| Scell | 4.42% | Removed |
| Conch | 98.15% | 100% |
| Rough Elunium | 2.62% | 4.90% |
Kukre
Stats
| Stat | Before | After |
|---|---|---|
| HP | 507 | 707 |
| EXP | 134 (0.26) | 531 (0.75) |
| Job EXP | 84 (0.16) | 495 (0.7) |
Drops
| Item | Drop Rate Before | Drop Rate After |
|---|---|---|
| Worm Peeling | 98.15% | 100% |
| Garlet | 18.46% | 83.19% |
| Crystal Blue | 2.48% | Removed |
| Elemental Converter (Water) | Not Dropped | 0.50% |
| Red Herb | 9.89% | Removed |
| Insect Feeler | 5.12% | Removed |
| Monster's Feed | 4.42% | Removed |
| Can of Anchovies | Not Dropped | 22.62% |
| Newbie Blue Gemstone | Not Dropped | 3.45% |
Marina
Stats
| Stat | Before | After |
|---|---|---|
| Defense | 0 | 9 |
| Magic Defense | 5 | 15 |
| EXP | 654 (0.3) | 2,298 (1.1) |
| Job EXP | 420 (0.2) | 1,776 (0.86) |
Drops
| Item | Drop Rate Before | Drop Rate After |
|---|---|---|
| Blue Gemstone | 9.89% | Removed |
| Newbie Blue Gemstone | Not Dropped | 10.53% |
| Crystal Blue | 2.48% | Removed |
| Elemental Converter (Water) | Not Dropped | 1.24% |
| Mystic Frozen | 0.25% | Removed |
| Single Cell | 4.42% | Removed |
| Sticky Mucus | 10.87% | Removed |
| Crystal Mirror | Not Dropped | 4.42% |
| Tentacle | Not Dropped | 100% |
| Orange | Not Dropped | 50.16% |
| Rough Elunium | Not Dropped | 5.86% |
Byalan Dungeon F3 (iz_dun02)
This should be your next natural stepping stone after choosing to level at Byalan Dungeon F2. We want it to be a viable option to simply progress through the dungeon along the way.
These mobs are noticeably a bit stronger than your Eggrings and Leaf Lunatics of the world so we gave them appropriate EXP given the new overhaul.
We also added in a ton of goodies for newbies since this is around the level range we want the drops to start feeling good. We also took the opportunity to make Marse a good place to farm grapes for those who so wish as established players and take advantage of our Galapago pet.
This floor could be used up until job 50, but we're anticipating players to go to the next step of their journey before then and transition to their next leveling spot.
Spawn and Monster Changes
| Monster | Spawn Before | Spawn After |
|---|---|---|
| Merman | 1 | 0 |
| Marse | 40 | 70 |
| Obeaune | 40 | 60 |
| Hydra | 40 | 0 |
Obeaune
Stats
| Stat | Before | After |
|---|---|---|
| Defense | 0 | 15 |
| Magic Defense | 40 | 25 |
| DEX | 74 | 23 |
| VIT | 31 | 1 |
| Attack Range | 141-165 | 111-135 |
| EXP | 1,932 (0.49) | 5,139 (1.3) |
| Job EXP | 1,221 (0.31) | 3,954 (1.0) |
Drops
| Item | Drop Rate Before | Drop Rate After |
|---|---|---|
| Aquamarine | 4.42% | Removed |
| Rough Oridecon | Not Dropped | 9.61% |
| Free Ticket For Kafra Transportation | Not Dropped | 11.89% |
| Fin | 12.5% | 100% |
| Witherless Rose | 1.5% | 1.98% |
| Mystic Frozen | 0.25% | Removed |
| Can of Anchovies | Not Dropped | 40.95% |
Marse
Stats
| Stat | Before | After |
|---|---|---|
| Defense | 0 | 15 |
| Magic Defense | 5 | 12 |
| Attack Range | 211-252 | 120-145 |
| DEX | 52 | 25 |
| VIT | 25 | 1 |
| EXP | 1,758 (0.35) | 6,042 (1.2) |
| Job EXP | 1,110 (0.22) | 5,034 (1.0) |
Drops
| Item | Drop Rate Before | Drop Rate After |
|---|---|---|
| Grape | 14.13% | 40.95% |
| Blue Gemstone | 9.89% | Removed |
| Newbie Blue Gemstone | Not Dropped | 14.13% |
| Aquamarine | 4.42% | Removed |
| Mystic Frozen | 0.25% | Removed |
| Can of Anchovies | Not Dropped | 40.95% |
| Elemental Converter (Water) | Not Dropped | 1.98% |
| Sapphire | Not Dropped | 4.90% |
Byalan Dungeon F4 (iz_dun03)
Mostly an exp and stat overhaul to make this map more doable for melee classes at the intended level range of 50-65. This map should be slightly more rewarding than the other maps since its intended to be done as a small group potentially due to us leaving in the density of the map. With all the new acolyte tools like Kyrie, Ressurrection, and Angelus, we suspect that Swordsman should be able to mob/tank small groups of mobs here potentially or at least a couple while the acolyte keeps them alive. We also suspect with status recovery being available as an acolyte that things like the stun attack will be less oppressive since you'll have an answer to those things now. Drops as with all the other maps are adjusted accordingly and this should fall in line. It is still soloable, so fret not if you do not want to opt in to the small party system we are implementing this patch. It's just we feel this is the map best pushed for small parties.
Spawn and Monster Changes
Marc
Stats
| Stat | Before | After |
|---|---|---|
| Level | 36 | 56 |
| HP | 6,900 | 9,900 |
| Base EXP | 2,964 (0.42) | 12,375 (1.25) |
| Job EXP | 1,875 (0.27) | 8,910 (0.9) |
| DEF | 5 | 20 |
| MDEF | 10 | 15 |
| AGI | 36 | 10 |
| DEX | 56 | 26 |
Drops
| Item | Drop Rate Before | Drop Rate After |
|---|---|---|
| Gill | 99.9% | 100% |
| Fin | 40.95% | 83.19% |
| White Herb | 30.43% | 40.95% |
| Can of Anchovies | Not Dropped | 40.95% |
| Blue Gemstone | 9.61% | 11.89% |
| Rough Oridecon | 4.66% | 7.28% |
| Aquamarine | 0.50% | 1.74% |
| Mystic Frozen | 0.9% | 1% |
Phen
Stats
| Stat | Before | After |
|---|---|---|
| Level | 26 | 56 |
| HP | 3,347 | 9,347 |
| Base EXP | 1,071 () | 12,150 (1.3) |
| Job EXP | 678 () | 9,348 (1.0) |
| Attack Range | 138-150 | 168-180 |
| Defense | 0 | 18 |
| AGI | 26 | 16 |
| DEX | 88 | 28 |
| LUK | 75 | 25 |
Drops
| Item | Drop Rate Before | Drop Rate After |
|---|---|---|
| Fish Tail | 98.15% | 100% |
| Fin | 22.62% | 83.19% |
| Can of Anchovies | Not Dropped | 40.95% |
| Orange | Not Dropped | 40.95% |
| Rough Oridecon | 4.66% | 7.28% |
| Aquamarine | 0.25% | 1.74% |
| Newbie Inn Voucher | Not Dropped | 1.49% |
| Meat | 30.43% | Removed |
| Sharp Scale | 9.89% | Removed |
Swordfish
Stats
| Stat | Before | After |
|---|---|---|
| Level | 30 | 50 |
| HP | 4,299 | 9,299 |
| Base EXP | 3,753 (0.87) | 12,090 (1.3) |
| Job EXP | 1,914 (0.44) | 9,300 (1.0) |
| Defense | 5 | 15 |
| AGI | 30 | 18 |
| INT | 41 | 31 |
| DEX | 62 | 32 |
Drops
| Item | Drop Rate Before | Drop Rate After |
|---|---|---|
| Gill | 26.61% | 83.19% |
| Can Of Anchovies | Not Dropped | 40.96% |
| Grape | Not Dropped | 40.96% |
| Rough Oridecon | 3.21% | Removed |
| Rough Elunium | 2.48% | 7.28% |
| Mystic Frozen | 0.5% | 1% |
| Unicorn Horn | 0.10% | 0.15% (adjusted, see below) |
Hydra
| AI Type Before | AI Type After |
|---|---|
| Aggressive | Passive |
Lasagna Field 1 (lasa_fild01)
Not much to say here, also improving the drops to match other leveling locations. EXP is being lowered to make sure the easiest place is not also the best place, but still trying to ensure its viable for newbies.
Spawn and Monster Changes
Eggring
Stats
| Stat | Before | After |
|---|---|---|
| EXP | 6,063 (1.1) | 4,850 (0.875) |
| Job EXP | 3,858 (0.7) | 3,086 (0.556) |
Drops
| Item | Drop Rate Before | Drop Rate After |
|---|---|---|
| Jellopy | 51.34% | Removed |
| Stem | 12.25% | Removed |
| Sticky Mucus | 10.87% | Removed |
| Phracon | 0.97% | Removed |
| Fly Wing | 9.89% | Removed |
| Old Frying Pan | Not Dropped | 100% |
| Blue Herb | 4.42% | 9.61% |
| Orange | Not Dropped | 34.09% |
| Lemon Dyestuffs | Not Dropped | 3.45% |
| Rough Elunium | Not Dropped | 4.42% |
| Elemental Converter (Wind) | Not Dropped | 1% |
| Newbie Inn Voucher | Not Dropped | 1.49% |
Leaf Lunatic
Stats
| Stat | Before | After |
|---|---|---|
| EXP | 2,916 (1.1) | 2,332 (0.9) |
| Job EXP | 2,313 (0.9) | 1,850 (0.72) |
Drops
| Item | Drop Rate Before | Drop Rate After |
|---|---|---|
| Jellopy | 51.34% | Removed |
| Clover | 12.25% | Removed |
| Poison Spore | 9.89% | Removed |
| Empty Bottle | 4.42% | Removed |
| Fly Wing | 9.89% | Removed |
| Phracon | 0.97% | Removed |
| Aloe Leaflet | Not Dropped | 100% |
| Orange | Not Dropped | 26.61% |
| Blue Herb | Not Dropped | 8.68% |
| Rough Oridecon | Not Dropped | 3.45% |
| Darkgreen Dyestuffs | Not Dropped | 2.48% |
| Newbie Inn Voucher | Not Dropped | 1.49% |
| Four Leaf Clover | Not Dropped | 0.25% |
Sweet Drops
Stats
| Stat | Before | After |
|---|---|---|
| EXP | 2,190 (0.54) | 1,752 (0.44) |
| Job EXP | 5,304 (1.33) | 4,243 (1.06) |
Drops
| Item | Drop Rate Before | Drop Rate After |
|---|---|---|
| White Chocolate | 4.90% | 100% |
| Gift Box | 0.25% | 2.96% |
| Chocolate Strawberry | 4.90% | 18.46% |
| Fierce Cacao | 4.90% | 34.09% |
| Rough Oridecon | Not Dropped | 3.94% |
| Elemental Converter (Fire) | Not Dropped | 1% |
Hunter Wolf
Stats
| Stat | Before | After |
|---|---|---|
| EXP | 2,442 (0.55) | 1,953 (0.44) |
| Job EXP | 5,901 (1.32) | 4,720 (1.06) |
Drops
| Item | Drop Rate Before | Drop Rate After |
|---|---|---|
| Emveretarcon | 4.42% | Removed |
| Animal Skin | 12.25% | Removed |
| Fly Wing | 9.89% | Removed |
| Orange | 22.62% | 26.61% |
| Rough Elunium | 1.49% | 3.94% |
| White Herb | Not Dropped | 14.13% |
| Well-Dried Bone | Not Dropped | 2.48% |
| Zargon | Not Dropped | 100% |
Dragon's Nest F1 (lasa_dun01)
Besides nerfing the EXP were buffing the drops of these locations to be more newbie friendly/oriented so you aren't forced to go to one location but will still benefit loot wise. We want the main determiner of choice to be EXP not loot. Giving a little bit of raw zeny, some desireable drops albeit in a lower amount than other locations, and making sure anchovies are a plenty since sustain is one of the biggest problems for early game players.
Spawn and Monster Changes
Scout Basilisk
Stats
| Stat | Before | After |
|---|---|---|
| EXP | 10,497 (1.1) | 8,397 (0.87) |
| Job EXP | 8,586 (0.9) | 6,868 (0.72) |
Drops
| Item | Drop Rate Before | Drop Rate After |
|---|---|---|
| Rough Oridecon | 1% | 4.90% |
| Rough Elunium | 1.74% | 4.90% |
| Dragon Canine | 65.13% | 100% |
| Can of Anchovies | Not Dropped | 40.95% |
| Elemental Converter (Water) | Not Dropped | 1.98% |
| 1carat Diamond | Not Dropped | 4.42% |
Trans Spore
Stats
| Stat | Before | After |
|---|---|---|
| EXP | 10,245 (1.1) | 8,708 (0.93) |
| Job EXP | 8,379 (0.9) | 7,122 (0.76) |
Drops
| Item | Drop Rate Before | Drop Rate After |
|---|---|---|
| Spore Doll | 0.5% | 7.28% |
| Cluster of Poison Spores | Not Dropped | 20% |
| Blue Herb | Not Dropped | 22.62% |
| Rough Elunium | Not Dropped | 5.14% |
| Rough Oridecon | Not Dropped | 5.14% |
| Can of Anchovies | Not Dropped | 40.95% |
| Elemental Converter (Water) | Not Dropped | 2.23% |
| Soft Blade of Grass | Not Dropped | 100% |
| Poison Spore x 3 | 9.89% | Removed |
| Emveretarcon | 4.42% | Removed |
| Red Herb | 10.87% | Removed |
| Fly Wing | 9.89% | Removed |
Other Map Adjustments
1.) Sropho (iz_dun05) no longer casts defender.
2.) Pot Dofle (iz_dun05) magic defense reduced from 90 > 55.
Night Watch Adjustments
Doing some work to bring Desperado's extreme edge cases (those with Bragi active) down and bring its other cases up so you have more reason to use other guns and to make weapon swapping feel more viable.
| Skill | Before | After | Notes |
|---|---|---|---|
| Hasty Fire in the Hole | 175-875% ATK | 200-1000% ATK | Ratio increased. |
| Basic Grenade | 160-300% ATK | 180-400% ATK | Ratio increased. |
| Desperado | Normal damage under Poem of Bragi | 65% less damage under Poem of Bragi, removed with full stack Intensive Aim (active) | No longer hits over non-snipeable walls. |
| Spread Shot | 100% + 25% per rank (350% at max rank) | 100% + 10% per rank (200% at max rank) | Ratio reduced. Gains 0.5% damage per point in Critical Chance (capped at 100 Critical Strike). Now has 2-second after cast delay, reduced by Poem of Bragi and ACD gears. |
Intensive Aim
Intensive Aim isn't being used much outside of stacking it up for the damage buff and then sitting on it. Which really goes against the intended design. While a few people did try out the weapon swapping mechanic and found it fun, the general feedback was despite it feeling mechanically fun, it simply wasn't worth it to swap weapons, let alone all 5.
With that knowledge in hand and time to think about it, we're going to be going really heavy handed with some buffs to Intensive Aim, both generally swapping, some individual buff mechanics for mastery consumption, and of course the full stack effects themselves. We really want the full stack effects to feel like you're going super saiyan and unleashing your full potential.
We also want swapping to not have to necessarily happen quite as quickly as it is now. By extending the duration of the weapon swap buff global buffs, we'll properly allow people to breathe between swaps instead of feeling like they are purely swapping for the sake of it. We hope this change will lean more into the combo planning that was in the original design.
| Skill | Type | Before | After | Additional Notes |
|---|---|---|---|---|
| Intensive Aim | Mastery Consumption Buff | 25% Damage | 50% Damage | Damage when consuming a new mastery. |
| Intensive Aim | Mastery Consumption Buff | Next Cast | 2 Casts | Does not apply to individual mastery effects, only the global effects. |
| Hasty Fire In The Hole | Full Stack Buff Duration | 5 seconds | 8 seconds | Duration of full stack buff increased. |
| Tracking | Shotgun Mastery AOE | 3x3 | 5x5 | Splash radius increased by 2 cells. |
| Tracking | Full Stack Damage to Normal Monsters | Double damage | Triple damage | Matches existing damage for boss/MVP types. |
| Tracking | Full Stack Damage Reduction and Cast Interruptibility | 75% reduction, interruptible | 90% reduction, uninterruptible | Increased durability during casting. |
| Tracking | Revolver Mastery Fixed Cast Time Reduction | 25% | 50% | Fixed cast time reduced further. |
| Spread Shot | Intensive Aim | Does not consume mastery | Counts for Intensive Aim stack | No additional effects added. |
| Rapid Fire | Grenade Launcher Mastery | 3x3 splash | 5x5 splash | Splash radius increased. |
| Rapid Fire | Full Stack Buff Duration | 5 seconds | 8 seconds | Duration of full stack buff increased. |
| Rapid Shower | Grenade Launcher Mastery Slow Effect | 75% slow for 2 seconds | 90% slow for 5 seconds | Improved slow effect duration and potency. |
| Rapid Shower | Rifle Mastery Defense Pierce | 25% pierce | 50% pierce | Defense penetration increased. |
| Rapid Shower | Shotgun Mastery Knockback | 3 cells | 6 cells | Knockback increased. |
| Rapid Shower | Full Stack | 75% ACD and SP Cost Reduction for 5 seconds | Grants 90% ACD reduction and 80% SP cost reduction for 8 seconds | Significant buff added to full stack effects. |
| Desperado | Full Stack SP Cost Reduction | 50% | 80% | Full stack buff reduces SP cost further. |
| Desperado | Full Stack | None | Applies Assumptio for duration | Does not override or stack with existing Assumptio. |
| Full Buster | Full Stack | Single target | 3x3 AOE | Gains AOE. |
| Full Buster | Full Stack Buff Duration and SP Reduction | 5 seconds, 50% SP reduction | 8 seconds, 80% SP reduction | Both duration and SP reduction improved. |
| Full Buster | Grenade Launcher Stun Effect | 50% chance | 100% chance | Stun chance increased. |
| Full Buster | Rifle Mastery Defense Pierce | 25% pierce | 50% pierce | Defense penetration increased. |
| Gatling Berserk | Full Stack | 10% ASPD | 20% ASPD | Additional 10% ASPD granted. |
| Mass Spiral | Full Stack Defense Reduction Duration and AOE | 3 seconds, single target | 6 seconds, 7x7 AOE | AOE applies only to defense reduction. |
| Mission Bombard | Full Stack Cooldown Reduction | 50% | 80% | Cooldown reduction for full stack cast increased. |
Blacksmith Blessings
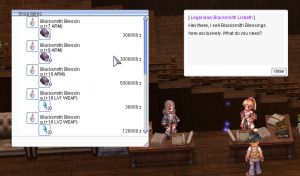
For a long time now, refining has been a pain point for a lot of players. We have RNG with random options so we put in HD ores as a means to make it feasible to reach higher refines on these gears and ensure the system would be interacted with. None the less, over time we've seen frustration grow as dedicated players who love the server get frustrated with bad luck. While this has been "fair" it doesn't mean its "right". So thus, we're finally implementing our planned Blacksmith Blessing consumable items.
What these will do is when used give you an option to refine a gear you are wearing based on the BSB that you used. Once chosen you'll be asked to confirm and then once confirmed your gear will be refined. We spent a long time simulating refines and even doing some of these simulations ourselves by hand...in game! The data showed that while averages expected are quite stable...the variance is all over the place.
Now you may ask, what is the cost of an item that guarantees you will get to the refine you want? Well, the cost is noticeably higher than the average cost of using HD Ores, in those very same HD ores. And also in raw zeny 5x or 2x more depending on the BSB in question. Below you'll find a table.
Limited Time Costume
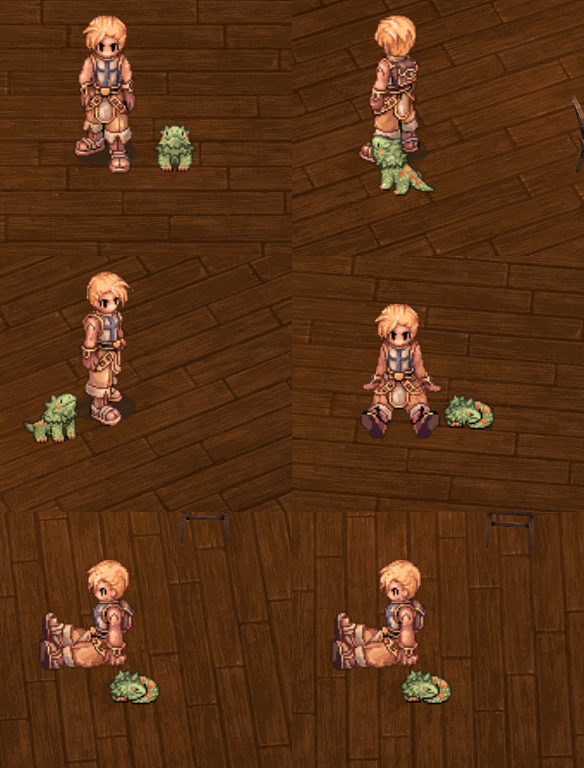
As part of an effort to help out our Developer Ken who has been through some things recently, we're doing a special limited time promotional costume. The costume in quesion a cute baby pitaya that will tag along on your adventures with you! All proceeds from this costume will go directly to Ken, and you can buy as many of these as you want! Ken has been a big part of our servers success and the dream doesn't happen without him, so I wanted to show him some extra support. Below you'll find a preview of the costume.
The Costume costs 500 CP.
General Adjustments
1.) Kyrie Eleison effects no longer interrupt movement. (similar to what we did with effects like Gloria)
2.) Repentance weapon now proc for Adrenaline Rush increased from 1.5% > 4.5% (still requires combo with Odin's Blessing)
3.) Most Niflheim Dungeon F1 Mobs no longer cast their AOE on chase. Nif F2 mobs that got AOEs added on chase during the A3 update have had their aoes on chase removed.
4.) Priest Spirit and Blacksmith Spirit skills now state that they do literally nothing.
5.) Continental Messenger's no longer automatically talk to you when you walk within 3 cells of them. Their quest remains otherwise unchanged.
6.) Each paradise gear piece now grant 4 soft defense each.
7.) The Test Dummies in Prontera can now properly check if a monster is MVP flagged for purposes of MVP specific bonuses. (like the new Judex skill)
8.) OGH Abbey's Little Demons now have an attack range of 4 allowing them to be further back from their master mob. This should make them easier to click on.
9.) Paradise Quest Line updated to include a few extra steps and give some new items that will make starting out easier.
10.) Wand[0] updated to give the Mage player Level 3 Firebolt, Coldbolt, and Lightning Bolt. This item is also given to you automatically upon becoming a Mage now. Sell price reduced to 1.
11.) Ancient Mummies in Isis/Osiris map in Pyramids removed.
12.) Turtle Dungeon, Amatsu, Ayothaya, Gonyrun, Louyang, Lasagna, Brasilis, Moscovia, and Sunken Ship all normalized to have a 100 zeny fee in Alberta.
13.) Mistress MVP Instance no longer requires Fancy Flower.
13.) Corrupt Cruiser Card's auto cast of gloria proc chance changed from 1% chance for level 1 > 3.5% chance for level 3.
14.) Skull Ring[0] now grants 1% undead race damage reduction just like the slotted version, and it also grants 10% increased heal damage to undead monsters.
15.) Skull Ring[1] now also grants 10% increased heal damage to undead monsters.
16.) Waste Stove's Iron and Iron Ore drops increased to 100%
17.) Safety Helmet[0] now grants 1 VIT, 200 HP, and 5% increased healing received. Can be enchanted at Rock Ridge.
18.) Gas Mask now grants 100% Poison Resist instead of 30%.
19.) Unicorn Horn now grants 50 SP, 3% SP cost reduction, 5 hit, 5% damage reduction to fish monsters, and can be enchanted at Rock Ridge.
20.) Individual Loot added to all the newly adjusted maps at a cap of 6 per party. All other maps that were previously capped at 4, have now been increased to 6 for their caps as well.
21.) OGH Cas 1 party requirement for double coag drops reduced from 7 > 6.
22.) Warden Kades no longer dispells on chase.
23.) Nif F1 Mob's Rough Shadowdecon/Rough Zelunium drops increased to 100% drop rate.
24.) Lovely Feeling (Mid) can now be exchanged for Lovely Feeling (Lower) for free in the main office with Airi in the slot position exchange section.
25.) Amatsu Dungeon Entrance NPC no longer checks if you've done the quest or requires the Feudal Permit. The Quest can still be done if one wishes but it is no longer necessary.
26.) The Client now offers a 2nd page of character slots for each account so you can have more characters on one account! (note you still can't transfer characters)
27.) Mastery Account Storages increased from 1 > 5. This means you'll have to select personal account storages or your master storage when using a kafra or kafra ticket.
28.) Shield Chain range increased from 4 > 5
Bug Fixes
1.) Safety Whip properly reduces 100% of Severe Rainstorm's Cast Time when the weapon is +7.
2.) AP is no longer removed upon changing maps.
3.) Fixed an issue related to MVP respawn timers.
4.) Slotted Monocle's item combo with memory book and pocket watch now properly functions.
5.) King Schmidt's NPC pressure will no longer target random people outside of its primary target.
6.) FAR, Windwalk, and Platinum Altar now persist through logging out.
7.) Storages now work properly within WOE SE Castles.
8.) Night Watch's Job EXP bar now properly shows up.
9.) OCA/MCA pools updated to include Magma 3 and Einbech 3 cards.
10.) Card Captor Sakura updated to include Einbech Mines 3 cards.
11.) King Schmidt's spells no longer hit his summons.
12.) King Schmidt no longer erroneously double casts his spells sometimes.
13.) King Schmidt's Floral Flare Road cast now has a proper ground indicator when its being cast.
14.) Fixed some bugs with Infinite Concentration, Infinite Awakening, and Infinite Berserk potions to where they properly mimic their non infinite equivalents.
15.) Dynite properly weights 0.
16.) Random Options or Enchants that set an element on a weapon (like crimson weapons) no longer override ammo anymore unless the ammo is considered neutral.
17.) Time Keeper set from Nightmare Clock Tower now properly requires Level 50 as its description states.
18.) Reverberation can now properly only be used with Whips/Musical Instruments.
19.) Fixed an issue where Himmelmez would occasionally spam her dialogue multiple times after being defeated. Also fixed an issue where she would sometimes give multiple amounts of her exp.
20.) Weapons that have an item bonus that increases a skill's range should now properly update when weapon swapped.
Whats Next
With a long development cycle for this patch we'll be slowing down in the short term for a week or two to polish up A4 and make sure all the bugs associated with it after fixed. And boy will there be bugs most likely. A5 is going to be the next major patch and with it will come a lot of things we've meant to work on. The next of the expanded reworks will be prioritized, as well was RWC for the 3 starving PVP players who somehow are still playing.
The next content will take us to our first fully custom built from the ground up content as well as linking this new world with some existing RO locations from renewal. We know you all have been left waiting in the rain for awhile for some of these features and content, but we'll hopefully be able to get it to you in a timely manner. This content will be the most ambitious we've done yet, covering a wide array of themes and locales, from temples to a fortress in the forest, we'll have a lot covered for everyone. We love you and appreciate the patience you all exude for us.
