Difference between revisions of "Public Test Server"
| (4 intermediate revisions by 2 users not shown) | |||
| Line 26: | Line 26: | ||
charlietestsu | charlietestsu | ||
charliewikiexample | charliewikiexample | ||
| + | |||
| + | ==Cloning an account== | ||
| + | |||
| + | Main accounts are cloned to the test server at unknown intervals. Simply log in using the account's details on the test server. The cloned accounts will have all characters, equipment, and items as the original and allows for quick testing. As an example, if my account details for the main server is as follows: | ||
| + | *Account: Test1 | ||
| + | *Password: Test2 | ||
| + | Typing the account details in the test server will login to the Test1 account for the test server. If it shows as unregistered, not enough time has passed for the account to be cloned. | ||
==Special Commands== | ==Special Commands== | ||
| Line 343: | Line 350: | ||
|- | |- | ||
|Formless Race Resist | |Formless Race Resist | ||
| − | | | + | |87 |
|- | |- | ||
|Perfect Dodge | |Perfect Dodge | ||
| Line 447: | Line 454: | ||
|- | |- | ||
|Phys. Damage to Small | |Phys. Damage to Small | ||
| − | | | + | |157 |
|- | |- | ||
|Phys. Damage to Medium | |Phys. Damage to Medium | ||
| − | | | + | |158 |
|- | |- | ||
|Phys. Damage to Large | |Phys. Damage to Large | ||
| − | | | + | |159 |
|- | |- | ||
|Phys. Damage to Boss | |Phys. Damage to Boss | ||
Latest revision as of 18:52, 16 January 2024
Project Alfheim has a public test server separate from the one we develop on so players can test changes that might be too impactful to push to live immediately. Its also there for you to feel free to test builds and strategies you aren't sure are worth investing into!
Its basically a relatively recently updated version of the live server at all times. (although not always up to date)
What makes the public test different is the commands players have access to that are normally restricted to players and only available to GMs.
Contents
Registering For the Test Server
There is NO website to register for the test server, instead when you first attempt to login, type your username like follows
usernamedesired_M
thisisyourpasswordforever
Note that you only need to type the " _M " portion this first time, after that it is just the username. So let's get into an example, we're going to pretend that we are registering charlietestsu on the test server.
Example:
       charlietestsu_M
       charliewikiexample
This creates an account with the login "charlietestsu" and the password for this account is "charliewikiexample".
Now to login from here on out I would type:
       charlietestsu
       charliewikiexample
Cloning an account
Main accounts are cloned to the test server at unknown intervals. Simply log in using the account's details on the test server. The cloned accounts will have all characters, equipment, and items as the original and allows for quick testing. As an example, if my account details for the main server is as follows:
- Account: Test1
- Password: Test2
Typing the account details in the test server will login to the Test1 account for the test server. If it shows as unregistered, not enough time has passed for the account to be cloned.
Special Commands
@go
You can use this to quickly jump to a specific town by either typing @go and then the town name or @go and a number.
Examples:
@go prontera
@go 0
@warp
This is a more specific warper that lets you instantly teleport to any specific location in the game! It has a specific format:
Format:
@warp (mapname) (x coordinate) (y coordinate)
Example:
@warp moc_fild01 100 100
@jump
This acts like a fly wing for the specific map you are on. You can also use specific coordinates like with @warp for this too! just typing @jump will go somewhere random on the same map. You can use this even on maps you cannot normally teleport on.
@job
This lets you instantly change your job to a desired job. It is recommended you job level up in order and then use @jlvl (mentioned below) to get your appropriate job points and spending them rather than instantly jumping to your final job.
Example:
@job High Novice
@jlvl 10
Spend Skill Points
@job High Merchant
@jlvl 50
Spend Skill Points
@job Creator
@jlvl 70
Spend Skill Points
@blvl and @jlvl
These instantly raise your base level or job level. You can also lower them too!
Example:
@blvl 99
@blvl -50
@jlvl 70
@jlvl -50
@reset
This will instantly reset your stats and skill points. Not much else to explain here.
@item
This allows you to create an item and an amount of it. This is the basic version. You must know the item id but you can look that up with @ii (item info).
Example:
@item 610 30 (makes 30 yggdrasil leaves)
@item2
Item 2 is a bit more complex and honestly confusing for players who are not familiar with GM commands. This will allow you to bypass all normal item restrictions to create items with anything in their card slots that you so wish. With the introduction of @itemopt (explained at the end of this page, this is rather obsolete, but for those of you who still wish to use it I will explain.
Format:
@item2 (itemid) 1 1 (refine) 0 (card id) (card id) (card id) (card id)
Example:
@item2 13027 1 1 7 0 4086 4086 4086 0
The above example will make a Scalpel[3] (item id = 13027) that is refined to +7 and has 3 Soldier Skeleton Cards (item id = 4086) in them. the 0 for the last card slot means it is empty.
@skillid and @questskill
These two are intended to go together. Quest skills require the latter command, but if you dont know the skillid you wont be able to use it. So first look up the skill id number with @skill id then use that id with @questskill to learn the skill on the appropriate class.
Example:
Archer
@skillid Arrow Crafting
It returns: skill147: Arrow Crafting (AC_MAKINGARROW)
@questskill 147
You've now learned Arrow crafting
@zeny
This will give you the amount of zeny you enter. Pretty basic.
@refine
This command will let you refine a specific gear slot you HAVE EQUIPPED to a certain value.
The Slots are as follows:
256 = Top Headgear
2 = Right Hand (Weapon)
         32 = Left Hand (Shield)

         16 = Armor
4 = Garment
64 = Shoes
Let's say we want to refine our shield to +9, here's an example:
Example:
@refine 32 9
Then that will refine our shield from its CURRENT refine to +9.
Note that if your shield was say, already +4 and then you wanted +9, you would type:
@refine 32 5
@makeegg and @petfriendly
Pet Eggs cannot be made with @item, they must be made with @makeegg instead. Simply look up the item id of a pet egg with @ii and then use @makeegg with id instead. @petfriendly simply makes a pet loyalty change to whatever you set it to. 1000 is the maximum.
Examples:
@makeegg 9042 (this will make a Loli Ruri Egg
        Hatch the egg with a Pet Incubator (@item 643 to make a pet incubator)

        @petfriendly 1000  (this will give the loli ruri max loyalty and thus give it, its strongest loyalty bonus)
@homlevel and @homfriendly
You can easily make a homunculus by creating an embryo (@item 7142) and making one normally at the alchemist guild in Aldebaran (@warp alde_alche 31 184). Then talk to the Homunculus Master and choose your homunculus.
@homlevel is exactly like it sounds like and will instantly level your homunculus just like @blvl levels yourself. @homfriendly will raise your intimacy of your homunculus if you want to evolve it for any reason.
Special Command: @itemopt
This is the command players will find themselves using the most as it allows you to create random options with specific values on gears. You unfortunately cannot card at the same time you use this nor can you refine. But it will create the item with random options you set.
Below at the end of this guide you will a table with the list of options ID that you will need to use. For now lets get into explaining how the command works!
For this example we are going to try to make a Valkyrian Armor[1] with +3 DEX on the first option and 10% Neutral Reduction on the second option!
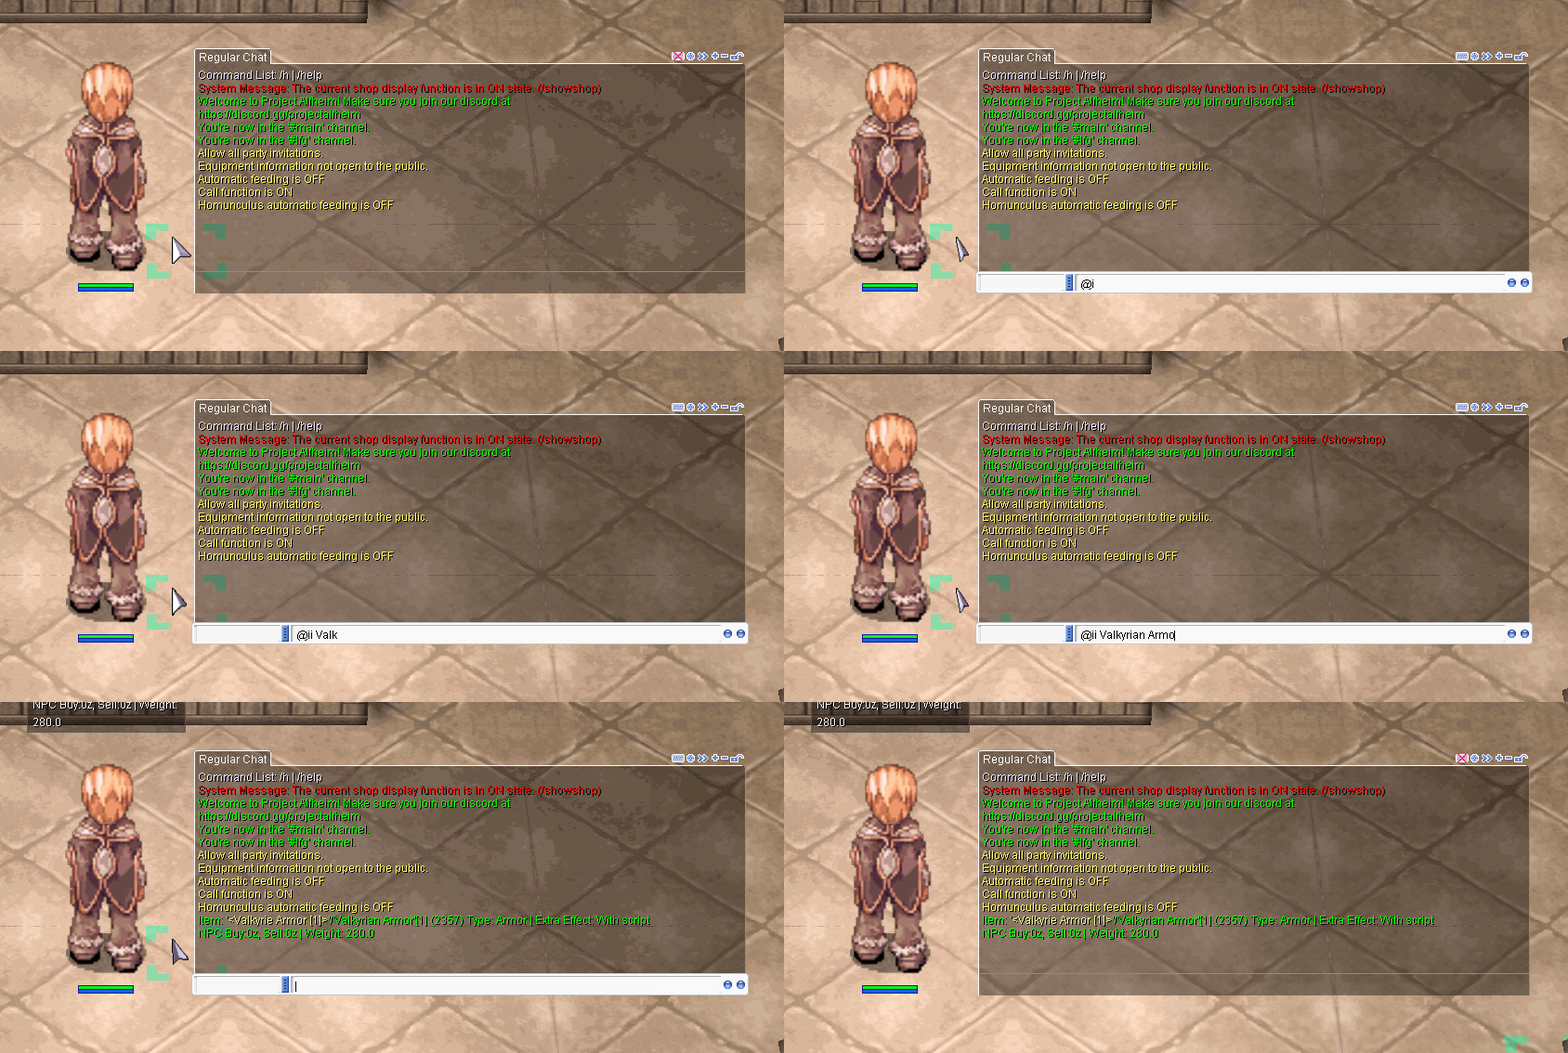
First, lets use @ii to look up the item id for a Valkyrian Armor
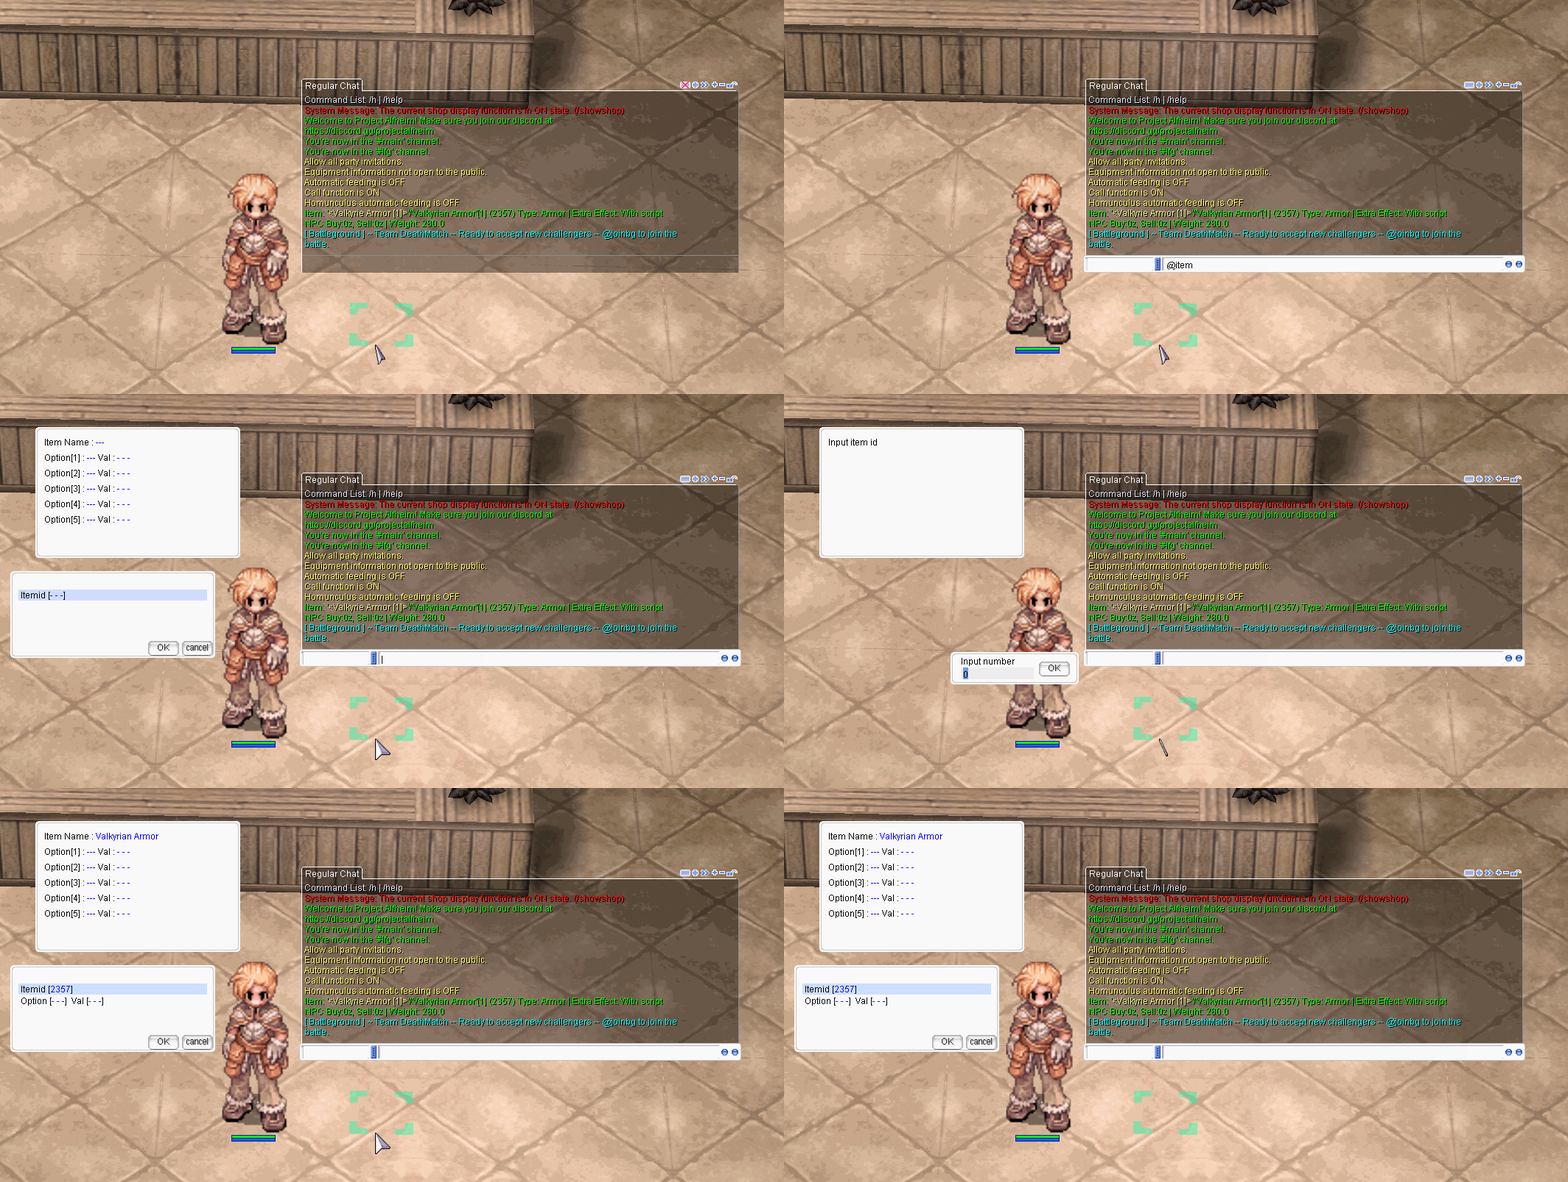
Now that we have our ID (2357), we can use @itemopt to bring up the command and choose to make a Valkyrian Armor.
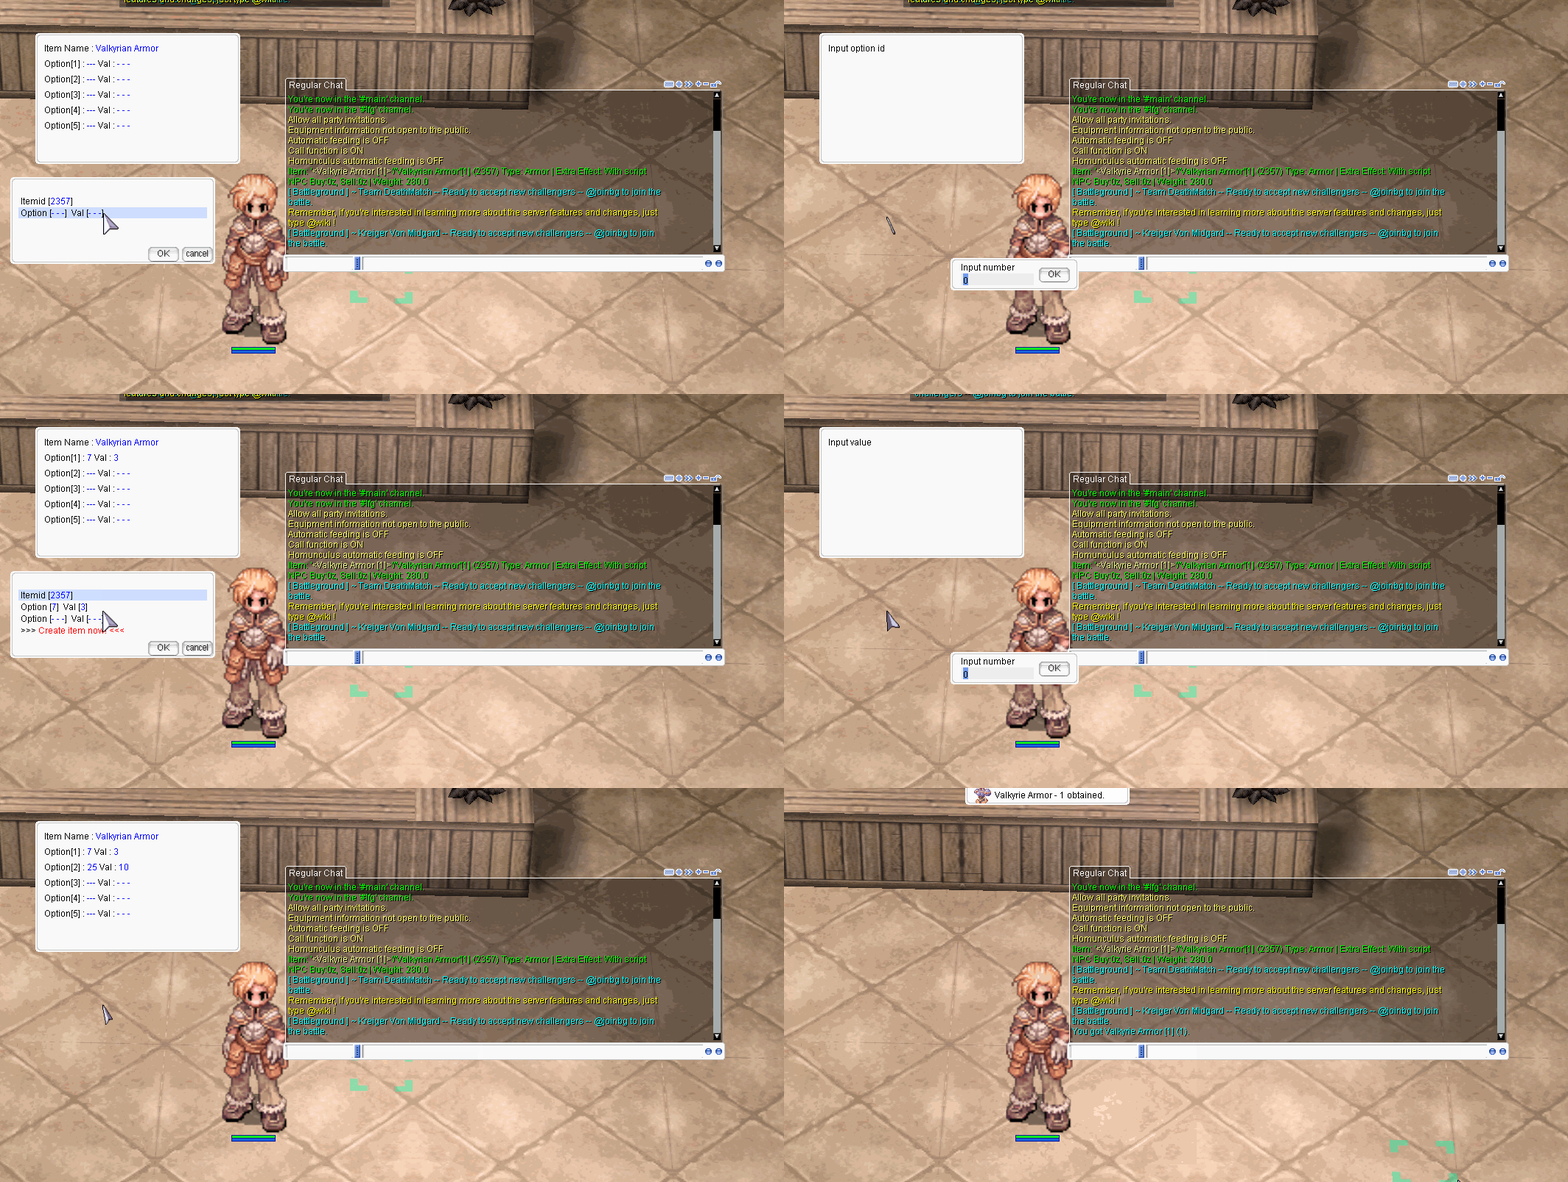
Next you will notice it is asking for "Options" and "Values", below in the table you will find those. So lets find out what the ID for DEX and Neutral Resist are!
DEX's random option ID is 7
and
Neutral Resistance ID is 25
Will enter these on two separate lines, So ID is 7, and value is 3 for +3 DEX
and ID is 25 and value is 10 for 10% Neutral Resist! Here you can see it in action below!
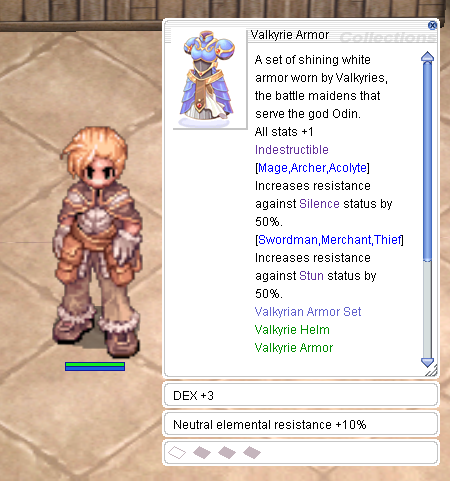
Now let's check if our item turned out right!
Yep, looks right! As you can tell, its as simple as using the table below to look up the ID and entering a value. If you don't remember what the values you can roll for each option are check out our Random Options page!
Armor/Garment/Shoes Options
| Option Name | ID |
|---|---|
| ATK | 17 |
| MATK | 19 |
| HP (Flat) | 1 |
| SP (Flat) | 2 |
| HP recovered per 10 | 11 |
| SP recovered per 10 | 12 |
| VIT | 5 |
| DEX | 7 |
| AGI | 4 |
| LUK | 8 |
| STR | 3 |
| INT | 6 |
| Freeze Resist | 255 |
| Stone Curse Resist | 256 |
| Neutral Elemental Resist | 25 |
| Wind Elemental Resist | 29 |
| Fire Elemental Resist | 28 |
| Water Elemental Resist | 26 |
| Earth Elemental Resist | 27 |
| Shadow Elemental Resist | 32 |
| Holy Elemental Resist | 31 |
| Ghost Elemental Resist | 33 |
| Poison Elemental Resist | 30 |
| Undead Elemental Resist | 34 |
| Flee | 22 |
| Hit | 18 |
| Undead Race Resist | 88 |
| Brute Race Resist | 89 |
| Plant Race Resist | 90 |
| Insect Race Resist | 91 |
| Fish Race Resist | 92 |
| Demon Race Resist | 93 |
| Demihuman Race Resist | 94 |
| Angel Race Resist | 95 |
| Dragon Race Resist | 96 |
| Formless Race Resist | 87 |
| Perfect Dodge | 23 |
| Critical Chance | 24 |
| Critical Damage | 164 |
| Long Range Damage Resist | 167 |
| Small Size Resist | 160 |
| Medium Size Resist | 161 |
| Large Size Resist | 162 |
| Boss Monster Resist | 150 |
| Heal Power(Casting) | 168 |
| Defense | 20 |
| Magic Defense | 21 |
Weapons Options
| Option Name | ID |
|---|---|
| ATK | 17 |
| MATK | 19 |
| VIT | 5 |
| DEX | 7 |
| AGI | 4 |
| LUK | 8 |
| STR | 3 |
| INT | 6 |
| Attack Speed % | 16 |
| SP Cost Reduction | 172 |
| Critical Chance | 24 |
| Critical Damage | 164 |
| Cast Time Reduction | 170 |
| After Cast Delay Reduction | 171 |
| Flee | 22 |
| Hit | 18 |
| HP (Flat) | 1 |
| SP (Flat) | 2 |
| Max HP % | 9 |
| Max SP % | 19 |
| Phys. Damage to Small | 157 |
| Phys. Damage to Medium | 158 |
| Phys. Damage to Large | 159 |
| Phys. Damage to Boss | 148 |
| Phys. Damage to Shadow | 51 |
| Phys. Damage to Fire | 43 |
| Phys. Damage to Earth | 41 |
| Phys. Damage to Neutral | 37 |
| Phys. Damage to Poison | 47 |
| Phys. Damage to Holy | 49 |
| Phys. Damage to Ghost | 53 |
| Phys. Damage to Undead | 55 |
| Phys. Damage to Water | 39 |
| Phys. Damage to Wind | 45 |
| Long Range Phys. Damage | 166 |
| Phys. Damage to Angel | 105 |
| Phys. Damage to Brute | 99 |
| Phys. Damage to Demon | 103 |
| Phys. Damage to Dragon | 106 |
| Phys. Damage to Fish | 102 |
| Phys. Damage to Demihuman | 104 |
| Phys. Damage to Insect | 101 |
| Phys. Damage to Formless | 97 |
| Phys. Damage to Plant | 100 |
| Phys. Damage to Undead | 98 |
| Magic Damage to Boss | 152 |
| % MDEF Pierce to Shadow | 270 |
| % MDEF Pierce to Fire | 266 |
| % MDEF Pierce to Earth | 265 |
| % MDEF Pierce to Neutral | 263 |
| % MDEF Pierce to Poison | 268 |
| % MDEF Pierce to Holy | 269 |
| % MDEF Pierce to Ghost | 271 |
| % MDEF Pierce to Undead Ele | 272 |
| % MDEF Pierce to Water | 264 |
| % MDEF Pierce to Wind | 267 |
| % MDEF Pierce to Angel | 145 |
| % MDEF Pierce to Brute | 139 |
| % MDEF Pierce to Demon | 143 |
| % MDEF Pierce to Dragon | 146 |
| % MDEF Pierce to Fish | 142 |
| % MDEF Pierce to Demihuman | 144 |
| % MDEF Pierce to Insect | 141 |
| % MDEF Pierce to Formless | 137 |
| % MDEF Pierce to Plant | 140 |
| % MDEF Pierce to Undead Race | 138 |


